Friday, February 27, 2015

Pillow Collective - Think Big Edition

I was so excited when I was asked by Amy Ellis of Amy's Creative Side to participate in her Pillow Collective Blog hop!!  I haven't made a pillow in quite some time and I forgot just how rewarding it is to be able to make a project, start to finish in 1 day!!!!   And here's my pillow ;)


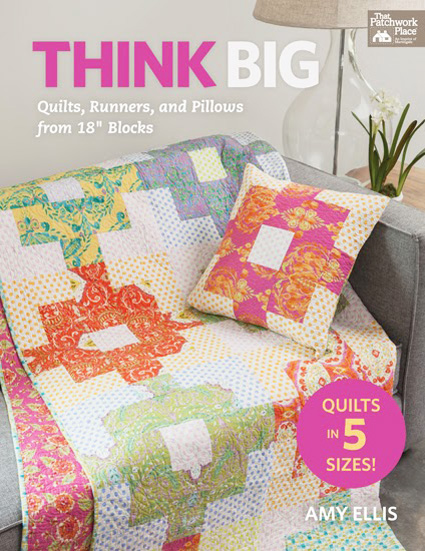
Amy has just finished writting her 4th book and the pillows for this blog hop have all been inspired by patterns from her book, Think Big!!!  This book is filled with awesome designs all starting with 18" blocks and then giving you the tools to make those blocks into any size project you want to make!


My pillow is from the Amy's Moving Mosaic pattern :)  I have been wanting a new pillow for this chair in my living room for some time and this pattern was the perfect fit for it ;)


I used some of the prints sent to me by Little Miss Shabby in this wonderful bundle she curated ;)  I have been waiting for just the right project to use these, and this was perfect as the purples, golds, and olives match the pillows on my couch ;) 


 This pillow was a lot of piecing, and oh so much fun!!!  Amy has such wonderful directions in her book that makes something as intricate as this seem like a piece of cake ;)

When it came time to quilt, I knew right away that I wanted to use some "special" thread.  I am almost using neutrals to quilt, but I knew I could pull off a little fun with this one.  So I used this beautiful variegated Golden Glory Rainbows thread by Superior Threads ;)


And I opted for a little straight-ish line quilting.  I was using my walking foot on my home machine, but I didn't worry to much about if I was quilting in a totally straight line.  I love the overall effect it gives, And I love the multi-color shine of the thread!!


And for the back, I did a simple envelope enclosure with a binding on the raw edges.  I just love this beautiful floral on the back.  And the polka dot binding!!!!  I can never get enough polka-dots ;)


And just like that, I had a brand new pillow!!!  So fun!!!    I just love the way it came out ;)  It adds such a happy pop to this chair ;)


Seriously, if you haven't made a pillow lately, maybe it's time to give one a go.  They are so fun to make and give you a finished project that adds so much to a room in a small amount of time ;)  Pillows are an all around Win-Win!!!


And to get you thinking in the Pillow Making Mood . . . Amy has some amazing Pillow Collective Prizes and all you have to do to win them is Pin.  Pin.  Pin. ;)   To win some of this yummy fabric goodness or even the quilt in the background made by Amy . . . Simply Pin Pillows to Pinterest and add #ThinkBigBook and #PillowCollective in your description ;)  Before you know it, you will have tons of Pillow Making Inspiration ;)


Thanks for stopping by :)  I have loved being a part of Amy's awesome Pillow Collective - Think Big Edition hop ;)  It was so fun!!!


And for more Pillow Collecting, Think Big Inspiration, (and lots more places to pin :)  be sure to stop by all of the Pillow Collective Stops and see what everyone made up ;)  Loving all of this Pillow Goodness!!


Have a Happy Quilting Weekend!!


Linking up this Pillow finish to Sarah's :) 


Pin It!

Thursday, February 26, 2015

Irish Chain Twist Quilt-A-Long - Twists On Tradition Units

**  NOTE  - This post is part of a series of posts for the Irish Chain Twist Quilt-A-Long.  If you would like to join (and have a chance to win $100.00 or $75.00 Gift Certificate grand prizes sponsored by The Intrepid Thread and Fat Quarter Shop ) you can find a list of the post links here :)  Here is the schedule:

Improvisational Piecing Units
Improvisational Piecing Block
Twists on Tradition Units - Feb 26th
Modern Patchwork Block - Mar 5th
Appliqued Chains Block - Assembling - Mar 12th
Appliqued Chains Block - Stitching - Mar 19
Piecing Top and Grand Prize Linky - Mar 26th
Parade and Grand Prizes - April 23rd


Before we get any farther,  we need to pick a winner for last weeks Improvisational Piecing Block assignment.   And great job to everyone that finished up their Blocks!!! I loved seeing all of your first sets of blocks for the QAL, so fun!!!!

The Improvisation Piecing Block winner who gets a Autumn Lily Bundle and Mini Charm pack  from Shabby Fabrics is . . .
#26  -   Colleen!! - Congrats :)


So here we are, moving onto a new set of blocks:)  If you are just finding this QAL, it's never to late to join in the fun :)  Just see the schedule above for the posts you missed and start quilting along ;)  


THIS WEEKS ASSIGNMENT - TWISTS ON TRADITION UNITS

Today we are going to have so fun Strip Piecing.  If you have never Strip Pieced before you are in for a treat.  It is a great time saver ;)  So let's get to it :)


STRIP PIECING


 So first off, we need to match up our strips.   Your 3" Print Strips are going to be sewn with the 2 1/2" Background Strips  and your 2 1/2" Strips are going to be sewn with your 3" strips.  Group them together like I have shown below and keep them separate, because it is super easy to mix them up ;)


And now are strips matched up, we are going to do some strip piecing.   In strip piecing, you don't have to worry about ends lining up perfectly.  I already trimmed my prints selvages but didn't on my background selvages.  So when I sew, I will just overhang my selvage ;)  And a quick double check for you each time, you should always be sewing a Print and a Background strip and the widths shouldn't match up ;)


When I Strip Piece, I always turn my stitch length down a bit.  It doesn't have to be a lot, but it is best to use a slightly smaller stitch than normal.  This is because when you sub-cut them you are going to be cutting right through your stitching, so you don't want it to unravel ;)


So, with your stitch length smaller, you are ready to start stitching.  I started with the 2 1/2" wide Print fabrics and 3" Background Fabrics.  I find it easier to put the wider strip on the bottom and the skinnier strip on the top with right sides together.  Now just  Stitch a 1/4" seam along the long edge of your first matched strip set. And again, it doesn't matter if the edges match perfectly.  Just align the two fabrics as you go, stitching all the way down the length of the strip.


And when you get to the end of one strip, oh ya, more chain stitching ;)  Just feed the next strip set through, sewing a 1/4" seam and aligning as you go ;)  Repeat this for all of the 2 1/2" wide Print fabrics and 3" Background Fabrics sets.  Clip your threads when you are done.


And then, it's time to move on to the 2 1/2" wide Background fabrics and 3" Print Fabric Sets.  These are sewn the exact same way as the previous strip sets.  Just align as you go, this time with the Print fabric strip on the bottom and the Background fabric strip on top ;)  Chain Stitch all of your strip sets and then clip your threads.


And now it is time to move to the ironing board.   Now, let me start with a disclaimer here, you will be ironing a lot of long strip sets, and it is very easy to get going to fast.   Slow down  and really take the time to press each set perfectly :)   You will be pressing the seam allowance towards the Print Strip.  To do this, I like to press strip sets from the front. This helps me from pulling and stretching the long strip.    I run my finger along the seam, just in front of my iron to ensure that I don't have any little bubbles creeping into my seam allowance.  Use lots of steam and keep them nice and crisp ;)  And just press, press away ;)


SUB-CUTTING UNITS

And with all of your seams pressed, you are ready to move on to sub-cutting your strip sets.   We will start with your 2 1/2" Print and 3" Background Strip Sets.   Double check that these are what you are working with as the different strip sets are subcut at different widths.  It would be so sad to cut the wrong sets.

Fold a strip set in half, aligning the smallest raw edges and lay it out on your cutting mat aligning the top of the strip set with a horizontal line on your cutting mat.  Now, you might think to stack these up on top of one another to speed up your cutting, but it often ends up with crooked cuts.  You are already cutting over 4 layers where the seams meet up ;)  So rather than stacking up, spread out as shown below.  You can easily fit 3 strip sets on a large cutting mat ;)  Just be sure that your raw edges are close to matching up on the left hand side of all your strip sets.


To start your cutting, you will need to make a straight edge.  Place your ruler along the Vertical line of your mat that is just over the raw edges of all 3 of your strip sets.  Cut along the edge of your ruler to create a nice straight edge.  Discard the scrap.


Now, measure in 2 1/2".  You can check your measurement in 2 places.  The raw edges of your strip sets should align with the 2 1/2" mark on your ruler (white arrows) and the edge of your ruler should align with 2 1/2" in on your mat.  I like to double check both to ensure I am getting a super straight cut ;)  With your measurements double checked, cut along the edge of the ruler.


And now, it is just rinse and repeat ;)   Once again, move your ruler in 2 1/2", double-check your 2 places of 2 1/2" measurements, and cut along the edge of your ruler.


You will repeat this process a total of 8 times and have a little bit of scrap left at the end that can be discarded.  This will create 16 2-patch units per Strip Set :)


Repeat this process for all of your 2 1/2" Print and 3" Background Strip Sets.  You will end up with a pretty pile that looks something like this ;)


And then, you are ready to move onto sub-cutting  the  3" Print and 2 1/2" Background Strip Sets.  This is done using the same process, there is just a little extra at the end ;)  So once again, align 3 folded strip sets along the horizontal lines of your mat with your smallest raw edges aligned.


Align your ruler along the Vertical Line closest to your smallest raw edge and cut a straight edge.


Now measure in 3", yes a different measurement!!  We will be cutting 3" wide this time :)  Once again, you can double check your measurements.  The raw edge of your strip sets should align with the 3" mark on your ruler and your rulers edge should align 3" in on the vertical line of your cutting mat.   And with your ruler aligned, cut along the edge of it.


And then again, move in another 3", double check that you are aligned, and cut along the edge of the ruler.


Continue in this fashion sub-cutting 6 times.  This will create 12 units per Strip Set and have a larger piece of scrap at the end of your strip set.  We will be using that piece of scrap ;)


Unfold the scrap and lay it on your mat open with the raw edges all aligned on the same Vertical Line on your mat ;)

One last time, measure in 3", double check your measurement, and cut along the edge of your ruler.  Now you can scrap that little bit of leftover ;)


So in the end, you will have 13 2-Patch Units Strip Set.  Repeat this process for all of your 3" Print and 2 1/2" Background Strip Sets.


And now you have a pile of 3" Two Patch Units and a pile of 2 1/2" Two Patch Units and you are done for the week!!!!


So here is the summary.  This is how many 2 1/2" subcut units you made up and how many 3" subcut units you should have made.  As you can see, you are going to have a few extras depending on the size you make. (just hold on to them for now, more on them next week ;)   If you were using Fat Quarters, these charts might just come in handy.  Depending on your sub-cutting, you might find you need a few extra units that you will just need to stitch up by cutting 2 1/2" and 3" squares ;) 


And with your Assignment all complete, you are ready to link up for a chance to win the Weekly Prize!!!!


This weeks Weekly Prize is being sponsored by Bear Creek Quilting Company and a huge thanks goes to them for their support of the Irish Chain Twist Quilt-A-Long.

This weeks prize is 2 Dear Stella Charm Packs!!!  Love the polka-dot goodness!!!


So what do you have to do for a chance to win these goodies?  Simple . . . Just link up your Twists on Tradition Units at the end of this post :)  You can link to a blog post, flickr picture, Instagram, Facebook . . .  or whatever.  Just make sure to link up by next Thursday morning as I will be announcing a winner at the beginning of next weeks post :)


If you don't get your Twists on Tradition Units done by next week you can still link it up :) (just not in time for the prize :)    The linky will remain open until the end of the Quilt-A-Long.  So if your out of town, or just had a busy week, no worries!!!  Just link up when you can :)


And Don't forget to add your sewn units to the Happy Quilting Quilt-A-Long Flickr group and to post it on social media with using #irishchaintwistqal.    I am so excited to see your blocks!!!!

So let's get strip piecing !!!  And if you have questions, don't hesitate to email me at happyquiltingmelissa@gmail.com.  Have a Happy Quilting Day!!


Pin It!

Wednesday, February 25, 2015

Bonnie Rose - A Quilt Tutorial

Good Morning everyone!!  I am so excited to have a new finish and a new Riley Blake Design Team tutorial to share with you this morning :)  With my upcoming book release, Irish Chain Quilts: Contemporary Twists on a Classic Design, it's no surprise that I have Irish Chains on the brain ;)  So I thought it would be fun to share this super fun and super fast variation on a Single Irish Chain using Beautiful Snowball Blocks in the center of the chains :)   I call it Bonnie Rose and I just love it!!!


The reason I loved adding in the snowball blocks in this design was because it allowed me to really highlight focal fabrics.  And I knew right away that I wanted to use Lisa Tueller's new Halle Rose line  !!  Those beautiful large flowering prints are just stunning in the snowballs!!  I love them!!!


So, let's get to making your own  63" x 75" lap size Bonnie Rose Quilt ;)

WHAT YOU WILL NEED:

Quilt Top:
1 1/3 Yards of a Focal Fabric
      If you want several focal fabrics like I have done, just be sure to get your fabrics in 1/3 yard cuts.           You can get up to 4 squares per block and you will need a total of 15.
1 1/3 Yard Chain Fabric
       If you want to have more variety in your chain you will need 3 1/2" strips or 1/8 Yard cuts.
             You will need at least 12 strips but can always use more for extra variety.
3 Yards of Background Fabric

Backing and Binding:
4 Yards Backing Fabric
2/3 Yard of Binding Fabric
         If you use extra strips for more variety you can always use the excess from the strips to make
         a scrappy binding like I have done


STEP 1 - CUTTING

From your Focal Fabric(s) cut:
      (15) 9 1/2" x 9 1/2" squares.   Fussy cutting here will really help to make your snowballs shine.

From your Print Fabric(s) cut:
       (15) 3 1/2" x 20" strips
       (42) 3 1/2" x 3 1/2" corner squares

From your Background Fabric cut:
         (12) 3 1/2" x 20" strips
         (71) 3 1/2" x 9 1/2" sashing rectangles
         (60) 3" x 3" squares


STEP 2 - SNOWBALL BLOCKS

Draw a diagonal line on the wrong side of your (60) 3" x 3" background squares.


You will be using these squares to snowball the 4 corners of your Focal Fabric blocks.   If you are new to quilting you might find it helpful to pin your 4 corners as shown below, placing a marked background square in each corner of the focal fabric square.  If you are feeling confident, you won't need to bother with pins.


Sew directly on top of the drawn line from corner to corner.  If you didn't want to pin, just be sure to keep your background square aligned directly in the corner of your block while stitching.


And now, chain stitch the remaining 14 blocks first corner.  Chain stitching is a great way to save time and thread.  Rather than clipping threads after each block, simply continue feeding in corner after corner through your machine until you have stitched the first corner of all 15 blocks.


Then, clip the threads between your blocks and stack them up once more ;)


Now repeat the process in the second corner of all 4 blocks, chain stitching one after another.


Continue in this fashion, until you have sewn a 3" x 3" Background square to each corner of your 9 1/2" x 9 1/2" Focal Fabric squares.


And now it is time to snowball them ;)   Using your ruler, align the 1/4" mark along your seam line.  Trim along the edge of your ruler.  Repeat for all 4 corners of all 15 blocks.


Press your seam allowances outwards towards your background fabric.


And your Snowball Blocks are done.  Simple as that and aren't they just so pretty!!!  Set these aside for the moment ;)

STEP 3 - CHAIN BLOCKS

To save time, we are going to strip piece our rows for the Chain blocks and then sub-cut them to the size we need.   When strip piecing, I always find it helpful to reduce my stitch length so that when the pieces are sub-cut they don't come undone.

So we will start by making the A Strip Sets and you will be making 6 of these.   Take (2) 3 1/2"  x 20" Print strips and (1) 3 1/2" x 20" Background strip laid out as shown below.


To sew these together simply take the first 2 strips and with right sides together, sew a 1/4" seam along the long edge.  Then, add the bottom strip to the now sewn 2 top strips using a 1/4" seam again.   And you are going to be sub-cutting these, so don't worry about pinning or anything.  If the ends don't match up it doesn't matter ;)


The B Strip Sets are made in the exact same way, only they start with (2) Background 3 1/2" x 20" Rectangles and (1) Print 3 1/2" x 20" rectangle laid out as shown below.  You will be making 3 of these strip sets.


Once again, in both the A and B strip sets, it will save a lot of time to chain stitch your sets.  So sew the first and second strips together on all 9 strip sets, then clip your threads.  Then add the third strip to all 9 strip sets and clip your threads.  Press the 6 A Strip Sets Outwards towards the Print Fabrics and Press the 3 B Strip Sets Inwards towards the Print Fabric.


And now, you are ready to subcut your rows for your Chain Blocks.  Now it will be tempting to speed things up and stack these one on top of another, but you will get much greater accuracy if you spread them out across your mat, rather than stacking them up ;)  Lay your strip sets out aligning them on the Horizontal lines of your mat.  Now, start by creating a straight edge along your strip sets as shown below.  There is wiggle room so move in as much as you need to get a nice crisp straight edge.


Now move your ruler over 3 1/2" from the straight edge.  Cut along the edge of the ruler creating a 3 1/2" x 9 1/2" 3 patch row.  Continue cutting in 3 1/2" wide increments creating 5 rows per Strip set.  You will have some scrap at the end of the row ;)  Sub-cut each of your 9 Strip sets this way.


Now, take (2) A Rows and 1 B Row and lay the out as shown below.  This is the Chain block.


To sew it together, simply place the first row onto the second with right sides together.  Align and pin the 2 seams.  Stitch a 1/4" seam along the pinned edge.     Then, place the third row onto the now stitched together first and second row with right sides together.  Again, align and pin the 2 seams.   Stitch a 1/4" seam along the pinned edge.


Once again, I like to save time here by chain stitching.  You will be making 15 blocks so pin all of your 2 row sets and then chain stitch them.  Then pin the third row to all 15 sets and then chain stitch them.


Now just clip your threads and press your seams to one side or open, whichever your prefer.   And your 15 Chain Blocks are done and oh so much fun!!!


STEP 4 - MAKING THE QUILT TOP

And now with your blocks all done, you are ready to sew your quilt top together.  Layout your 15 Snowball Blocks and 15 Chain Blocks alternating blocks as shown below.  Place a 3 1/2" x 9 1/2" Background Sashing Rectangle between the blocks and place a Print 3 1/2" x 3 1/2" Cornerstone square between the sashing strips as shown below.  Play around with the placement of the blocks and cornerstones until you have a look that is pleasing to the eye.


I like to sew my Sashing rows first.   To do this, I simply start at one of the strip and work my way across.  Place the print square onto the sashing rectangle with right sides together and sew a 1/4" seam along the edge.  Then, place the second print square onto the sewn unit with right sides together and sew a 1/4" seam along the edge.   Continue adding pieces one after another until the row is sewn together.  Repeat for all 7 rows.


Next, sew the Block rows together.  This is done the same way you sewed the sashing rectangles together, just on a larger scale and as always, using a 1/4" seam ;)  So start by adding a sashing rectangle to your first block.  Then add a sashing rectangle to the other side of the block.  Then it's time to add another block to the row.  Just keep moving across adding pieces until the row is finished.  Repeat for all 6 rows ;)


Now, it's time to press.   Press all of the seams in the rows towards the Sashing Rectangles.  This will allow them to nest in the next step ;)


And now, it's time to sew the rows together ;)  I like to start by sewing all of my Sashing rows to the Block Rows.  Place the Sashing Rows onto the Block Rows with right sides together.  Align and pin each of the seams.  Sew a 1/4" seam along all of the pinned edges.


Press the seams open or to one side, whichever you prefer.


And now, it is just like making the rows but on a much bigger scale.  Place the first row onto the second with right sides together.  Align and pin each of the seams.   Sew a 1/4" seam along the pinned edge.


Then place the third row onto the now sewn together first and second row.  Once again, align and pin all of the seams and then sew a 1/4" seam along the edge.  Continue in this process adding one row after another until all the rows are sewn together.  Press the seam allowances open or to one side, whichever your prefer.


And just like that, your quilt top is done!!!!   I just love the way the chain highlights those beautiful snowball blocks ;)  So fun, and so easy right ;)


Now all you have left to do is Baste It, Quilt It, and Bind It ;)  I know, a lot of work in one sentence.  If you are are new to quilting and unsure on these steps,  you can see my Finishing Your Quilt Video Tutorial Series here :)  They will walk your through step by step and give you lots of helpful tidbits along the way ;)

I decided to quilt mine using an all over Feathered Swirl design.  And I used my favorite color Pearl 402 So Fine Superior Thread.  It never ceases to blow me away just how well this blends with white, I love it!!!!

And now you can sit back and snuggle up in your new Bonnie Rose quilt ;)  I hope you have enjoyed this tutorial and love the quilt as much as I do ;)   If you do make your own, I would love to see it ;)  You can add it to my Flickr Group here or email me a picture at happyquiltingmelissa@gmail.com or add it to social media with #happyquiltingmc :)


And that wraps it all up ;)

Have a Happy Quilting Day!!!
Pin It!