Friday, August 31, 2012

Welcome Precut Paradise and a Giveaway


Today, I am so excited to introduce to you the newest member of the Happy Quilting sponsor family.  So a huge welcome to Precut Paradise!!!!  Dayna Greenleaf has been putting in some long hours these last few months to get Precut Paradise up and running and this week marks the celebration of Precut Paradise's Grand Opening!!!! 


Precut Paradise has so much to offer.  You would never believe it is a brand new shop by their wonderful inventory.  By the chosen name of her shop, you can guess that Dayna focus is on providing Precuts!!  I love precuts, oh the time they save!!   And you can find all the latest and greatest precuts from Moda, Free Spirit, and Riley Blake.  Charm Packs, Jelly Rolls, Layer Cakes, and  Bundles!!!!  Ah, precut love!!!


Dayna has precuts galore, but she also has some other fun little tidbits in her shop.  Like a Rainbow of Kona Solid yardage. Don't you just love to look over a rainbow of solids and come up with wonderful color combinations!!


Dayna's Precut Paradise also offers some fabulous yardage, Quilt Patterns, Books (of course focused on precuts) and Quilt Kits.  And she even offers long arm quiltling services at a fabulous price!!!  So ya, basically something for everyone!!!


And one of my absolute favorite parts of Precut Paradise . . . The Daily Deal section!!!  It is just so exciting to check each day and see what will be the Daily Deal that you can take advantage of.  I mean come on, who doesn't love a sale!!!  (Little Black Dress Jelly Roll's happen to be the current daily deal and let me tell you, I have been playing with this fabric the last few days and it is fabulous!!!!)


So pop on over to Precut Paradise and see what Dayna has to offer.  She is so excited to start this new shop and I just know she will appreciate your visit ;)  Thank you to Dayna and Precut Paradise!!!  I am so excited to have you as a part of Happy Quilting!!! 


 And . . . .  as part of their Grand Opening, Precut Paradise is sponsoring a fantastic giveaway!!!   One lucky Happy Quilting reader will be getting a wonderful package from Precut Paradise with not 1 but 2 precuts!!!  A Riley Blake Bohemian Festival 10 Square and Rolie Polie!!!  


So what do you do for a chance to win this fantastic giveaway???  Well, you get to know Precut Paradise a bit :)  So you can have three chances to win while you get to know Dayna's new shop :)    (please, leave a separate comment for each for a total of 3 comments max :)  

1 - Visit Precut Paradise and then come back here and leave a comment of your favorite item in Dayna's new store.  

2 - Be a follower of Precut Paradise's Blog and leave a comment. 

3 - Like Precut Paradise on Facebook and leave a comment.  

So that's it :) The giveaway will close on Thursday the 6th of Sept. and I will announce a winner Friday Morning.   Good Luck to all and Happy Quilting!!!
Pin It!

Thursday, August 30, 2012

TNT - The Bee Block Version

I love being a part of Bee's!!!  Each month they challenge me and I almost always get to try something new!!!  I highly recommend trying one out if you haven't done so already.    This month had me trying new things with each block.  (And yes, I am just finishing my bee blocks with a whole 2 days to spare :)

First, Cherie requested a Carpenters Star block.  This is a stunning block and Cherie has so many beautiful color combo's for it!!  She wrote up a fabulous little tutorial for it here in case you want to do your own :)  I love these blocks that are all about perfectly precise points.


The new thing I tried with this block was making larger HST's for trimming.  When I was ready to trim these I had to check the directions 3 times to make sure I wasn't trimming them to small.  I kept thinking there was way more fabric than normal.  And that is because there was.  Cherie's directions had us make our squares 3/4" larger then the HST size instead of 1/2" larger.  And I have to say, I really liked it!!!  I found trimming when much faster because I didn't have to be so precise and most of all, it made me feel like I was actually trimming for a reason.  I think I might be doing my HST's with the 3/4" give in the future :)


The second bee block I put together was for Lindsay and she requested a Polaroid block.  This was such a fun block to put together!!!  You chain sash everything so it goes together super quick.  I used this fabulous tutorial  to put it together.

My favorite part of this block was picking the "pictures" to fussy cut.  And while I was fussy cutting I decided to try something new.  I was getting frustrated trying to make sure my images were centered and having to constantly keep checking the measurements.  And then I saw the masking tape I use when basting and WhaLa.  2 tape marks along the edge of my designated measurement, no more centering headaches.  Perfect!!!

So . . . That is what I have been trying new this week :)  2 little tricks to speed up your cutting :)  So what have you been trying new this week??  Link on up!!


Pin It!

Wednesday, August 29, 2012

What's On the Agenda

Well the kids are in school.  And I must say, I am loving the regular routine :)  I love spending oodles and oodles of time together in the summer but I sure love the day to day  dependable routine that is school :)  And my third started Kindergarten yesterday afternoon which means he isn't so lonely during nap time anymore.  (He was really missing his brother and sister.)  It also means that nap time is now completly interruption free.  Oh, I am so excited, sewing machine here I come :)

So, what's at the top of the list for this week??

First off, I need to finish up this little beauty for my niece.  (Don't you just love Little Black Dress!!)  I have the blocks all made I just need to sew them together, border it, baste it, quilt it, and bind it :)  We are visiting for labor day so the goal is to have that all done by Friday :)  I think I can, I think I can, I think I can ;)


Then, next on the list is working on my Fab Little Quilt Swap project.  My partner loves a rainbow of colors so I think I will be digging through my new scrap bin drawers :)


And I will be using this little template to aid in my creation.  If it comes out the way I envision it in my head, I will be totally excited :)


And lastly, If I really manage to be productive, I might just bust open my layer cake of Mama Said Sew  and get to some cutting :)  I am so excited to play with these prints!!  Love them!!!


And so nothing slips through the cracks . . . here is the rundown :)


Designing Stage
  • Circle Meets Square Quilt
  • Turnovers Quilt
  • Modern Squares Quilt
Piecing Stage
  • Jessi and Me Quilt 
  • WIC with MSS Quilt
  • Sew Bee Create Quilt (waiting on 1 block)
  • Braided Irish Chain - Queen and King (a tiny bit of progress)
  • Ashlyn's Quilt
  • Fab Little Quilt Swap Mini
Quilting Stage
  • Solids Quilt for Free Motion
  • Tetris Quilt-A-Long 
Completed Stage
  • Refracted Quilt
  • King Size Serenity Quilt
  • August Bee Blocks

Pin It!

Tuesday, August 28, 2012

Tetris Quilt-A-Long Finishing Up and Grand Prize Link Up


**  NOTE  - This post is part of a series of posts for the Tetris Quilt-A-Long.  If you would like to join you can find a list of the post links here :)

Need detailed instructions on "how to play"??  See this post :)

It's the end of the Tetris Quilt-A-Long!!!!  Time to finish those quilts up!!

But before we get to that, Let's first announce a winner of the Week 6 giveaway who gets the Cherry Christmas Jelly Roll. And Mr Random Generator says the winner is . . .#16 - Lyndsey- Congrats!


So now moving on and . . .

FINISHING UP


Start by sewing your 6 quilt blocks together.  This is just like putting together your blocks but on a large scale.  Just be sure to match your seams.  (And from the looks of the flickr group a good portion of you have already done this step, check!!)


So now, you are ready to start adding borders.  Now as far as borders go . . . please do whatever you like.  I will give you a few suggestions, but please, don't feel like you have to do it this way.  Just finish up your quilt the way you like.  (And if that means no borders, that's fine to :)

IDEA 1:

Start by adding a thin border to the top and bottom of the quilt. (Maybe 1 1/2" to 2 1/2") I liked the idea of going with the white since those were my missing spots color.  When I do borders I just use Width of Fabric strips and then trim the excess.


Then add the same size to the left and right.

 Make sure to press these little borders nice and crisp or they will look a little wonky.

 Then you can add a thicker black border (3" to 4").  Once again, add the top and the bottom first and then after pressing add the left and right.  And that's Idea 1.
 IDEA 2

Idea 2 starts the same with a thin border on the top and bottom in white again.

But, then you can change it up a bit. You can add a larger border to the left and right (8" - 9").  This will make your quilt a little more of a standard size quilt.


Then you can add the black border (3" - 4") to the top and the bottom and then to the left and the right just like you did in the first idea.  And then your top is done!!


IDEA 3

And then if you want you can get super creative like some of the amazing quilters in our group.  Like the way Danielle added a large sashing to the right side and then added a "next piece" block to give it that Tetris look!


IDEA 4

Julie also added the side sashing but then she took it a step farther and added some extra white blocks to the top with a few extra pieces to make it look like you are ready to add the very next piece.  So cute!!!!


So to sum it up - however you want to finish your top is wonderful - the most important part is that you finish your top!!!   (the Quilt-A-Long Flickr Group has lots of great inspriation :)   I am so excited to see everyone's creative take on their finish!!

GRAND PRIZE LINK UP

Okay, so now your Tetris Quilt Top is done.  Yippee Skippee!!!     And now you can enter to win one of the Grand Prize's :)

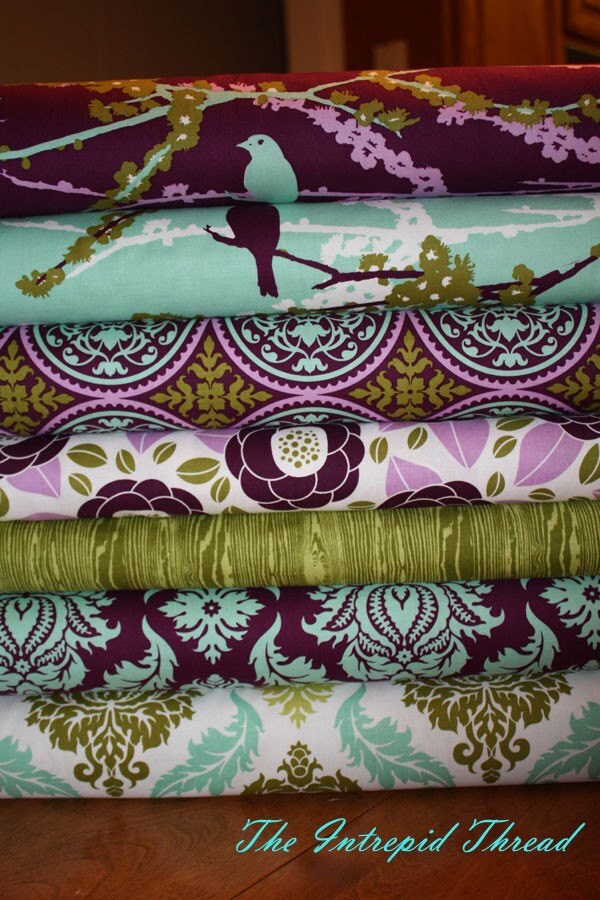
The Tetris Quilt-A-Long Grand Prizes are sponsored by the Intrepid Thread and a huge thanks goes to Julie for her support!!!.

So, as a refresher, the Grand Prizes that you can win are. . .

A $75.00 Gift Certificate that you can spend as you like!!


A Build your Own Bundle Certificate that you can use to create the perfect Fat Quarter Bundle for you!!


Or a Complete Fat Quarter Bundle of La Dee Da by Erin McMorris!!!


There will be 3 lucky Grand Prize winners.  Their first will be allowed to choose their prize, and so on. 


So what do you have to do for a chance to win one of these amazing Grand Prizes?  Simple . . . Just link up your completed quilt top at the end of this post :)  You can link to a blog post or a flickr picture, or whatever.  You will have until the evening of Monday the 10th of Sept. to link up.  (that gives you 2 weeks for those that need a little catch up time :)

And Don't forget to add your quilt top to the Happy Quilting Quilt-A-Long Flickr group!!!   I am so excited to see everyone's Quilt Tops!!!  

TETRIS QUILT-A-LONG PARADE

Now, you only have to have your quilt top done to enter into the grand prize link up . . . but I wanted to encourage you to finish these quilts and not set the quilt top in a pile of "to be quilted" so . . . I am planning a little Parade for the 11th of September :)  The parade will be for quilted and bound Tetris Quilts!!  So, if you would like your quilt to be in the Parade, please send me an email (happyquiltingmelissa @ gmail . com)  with your favorite Tetris Quilt picture attached as well as the name you would like your photo listed with, where you are from, and a blog or flickr link if applicable.  You can email me anytime from now until the 10th and I will get you added to the Parade!!!

I am so looking forward to September 11th!!!  Grand Prize winners will be announced followed by an amazing parade filled with all of your beautiful quilts!!!  So excited!!

So now what do you do???  Finish up those quilt tops, Link them up, and then email me your finished quilt!!!!   


Pin It!

Monday, August 27, 2012

Rosy Lullaby - Published (Squeal)

I am so excited to get to share Rosy Lullaby with you!!!  I designed Rosy Lullaby to be a simplistic and adorable pattern.  The fabric is from the Song Bird line by Carina Gardner for Riley Blake Designs.  Isn't it just beautiful!!!! The quilt goes together quick and is perfect for when you want to whip something up for an adorable little girl (or boy if you wanted to use blue and green :)

Image courtesy of McCall's Quilting
Now,  the publishing process takes a little while and it is really hard for me to keep these things under wraps. So you can imagine my excitement when I was sent the cover image and found my little Rosy Lullaby inserted on the front cover as the PLUS addition ;)  Squeal #2!!!

Image courtesy of McCall's Quilting
And then it gets better!!!!  McCall's decided to use the basis of my quilt as their Web Bonus feature!!!  The Web Bonus is a free download of the Rosy Lullaby Twin Size version!!!  So now you can whip this up in a twin size for free!!!   Squeal #3

Image courtesy of McCall's Quilting
The final thing I am super excited about this quilt is that I quilted it myself.  Now I have quilted a ton of quilts before but this is the first one that I quilted on my own that was being published.  And I have to say, I was pretty happy with how it turned out :)  (Squeal #4!!)


Here is a detail shot of the quilting :)


So ya, basically a lot of squeals going on over here today.  Maybe even a happy dance or two :)  And with that, I wish you all a Happy Quilting Day!!!
Pin It!

Saturday, August 25, 2012

Monster Quilt equals Long Arm!!!

Yesterday I got to visit Let's Quilt to do a little long arm action for the second time!!  And once again, I had so much fun!!! It was nice to have a little experience under my belt from the  first time so that I felt a little more confident, and subsequently was a little quicker.  This time I was working on a king size quilt and it was a monster. Sadly, I can't show you the quilt (It will be published next year) but I can show you the back :)

After playing around with several designs in my head and on paper, I finally decided to go with this concept. I really like the way it creates a patchwork look and it really lends itself to the quilt design.  And it was oh so much fun to quilt.  It's not perfectly even by any means, but I am super happy with how it turned out.  Each of those little squares are about 7"'s.  So fun!!!


Now I just need to make some more monster size quilts so I have an excuse to go back down and play again.  Oh, I know, maybe I could finish the King and Queen size versions of my Braided Irish Chains ;)  So many projects, so little time :)
Pin It!

Thursday, August 23, 2012

TNT Thursday - My Pickled attempt at Pickling

So this weeks TNT is a little different for me in that it has nothing to do with quilting.  It did however, keep me from spending as much time quilting :)  So here's what I tried new :)

I do not have a green thumb.  In fact, I would say it is much more of a brown thumb. And normally our little garden produces so little that we can eat it right as we pick it.   But . . . for some reason, this year, I have cucumbers coming out of my ears!!  So, since we can't eat 20 cucumbers in a week, I decided to try my hand at making pickles.


I found this recipe at Crazy Mom Quilts and thought it sounded easy enough.  But, when I got to the store I found that they were out of mustard seed, and didn't have red pepper flakes or canning salt.  So I decided to improvise.  Instead of canning salt I used regular salt and instead of the spices listed I just used Pickling Spice.  (It said on the label that it worked for pickles).


So after 24 hours of refrigeration we have pickles!!!  They are crispy, green and look delicious.  However . . . when you bite into them they are spicy!!  Seriously, these pickles bite back.  I think I should have stuck to the exact recipe and left out the pickling spice, or not used so much of it.


But I am not to worried.  I have already found at least 15 little cucumbers that should be ready in a few days.     I will be trying again soon, and this time I will find a store that carries the remaining ingredients I need and follow the recipe :)  And since this is all gardenish I am linking up to Debbies Herbal Table :)


So what have you been trying new this week???  Link on up :)


Pin It!

Wednesday, August 22, 2012

Studio Tour

Today my little sewing space is being toured at the Moda Bake Shop!!!  So if you want to see a few shots of my happy purple space go ahead and pop on over :)


I just love that when I sit here I have my current WIP to the right of me, my future projects stacked in the cupboard above me and fabric inspiration all around me :)
Pin It!

Tuesday, August 21, 2012

Tetris Quilt-A-Long - Week 6


**  NOTE  - This post is part of a series of posts for the Tetris Quilt-A-Long.  If you would like to join (and have a chance to win one of the grand prizes sponsored by The Intrepid Thread ) you can find a list of the post links here :)

Need detailed instructions on "how to play"??  See this post :)

It's Week 6 of the Tetris Quilt-A-Long!!!!  The last week of blocks!!  (But were not done yet, we have borders, and putting it all together next week and then a parade on the 11th of September :)

But before we get to the pieces for week 6, Let's first announce a winner of the Week 5 giveaway who gets the Modern Quilts HYB. And Mr Random Generator says the winner is . . .#6 - Lisa Marie- Congrats!


So now  . . .  on to Week 6!!!  (It's our last week of blocks!!!!)


First, Print off your grid!!
Now, color in your Tetris Pieces


Nothing fancy needed, just fill it in as if you were playing.  Here's my grid for this week.


Now lay your fabric out to match your grid.  Now for those that did the Tetris Color Charm Swap, you might be running a little low on squares. You might need to swap out colors or get a few prints from your stash.  Just FYI :)


And now just sew your squares into rows and then your rows into your Week 6 Block!!! (For detailed instructions on sewing a grid/patch block together see this post :)  


Yippee Skippee!!!  Block 6 is done!!!  You are done with all of your weekly blocks!!!  And now you can enter to win the last weekly prize :)

The Weekly Prizes are sponsored by the Fat Quarter Shop and a huge thanks goes to them for their support of the Tetris Quilt-A-Long.

This weeks  prize is a Cherry Christmas Jelly Roll by Aneela Hoey for Moda.


So what do you have to do for a chance to win this beautiful Jelly Roll??  Simple . . . Just link up your Week 6 block at the end of this post :)  You can link to a blog post or a flickr picture, or whatever.  Just make sure to link up by next Tuesday morning as I will be announcing a winner at the beginning of next weeks post :)

And Don't forget to add your Week 6 Block to the Happy Quilting Quilt-A-Long Flickr group!!!   I am so excited to see everyone's Week 6 block!!!  Yippee Skippee for the last weeks block!!!!

So what are you waiting for . . . Get your Tetris sewing on!!!


Pin It!