

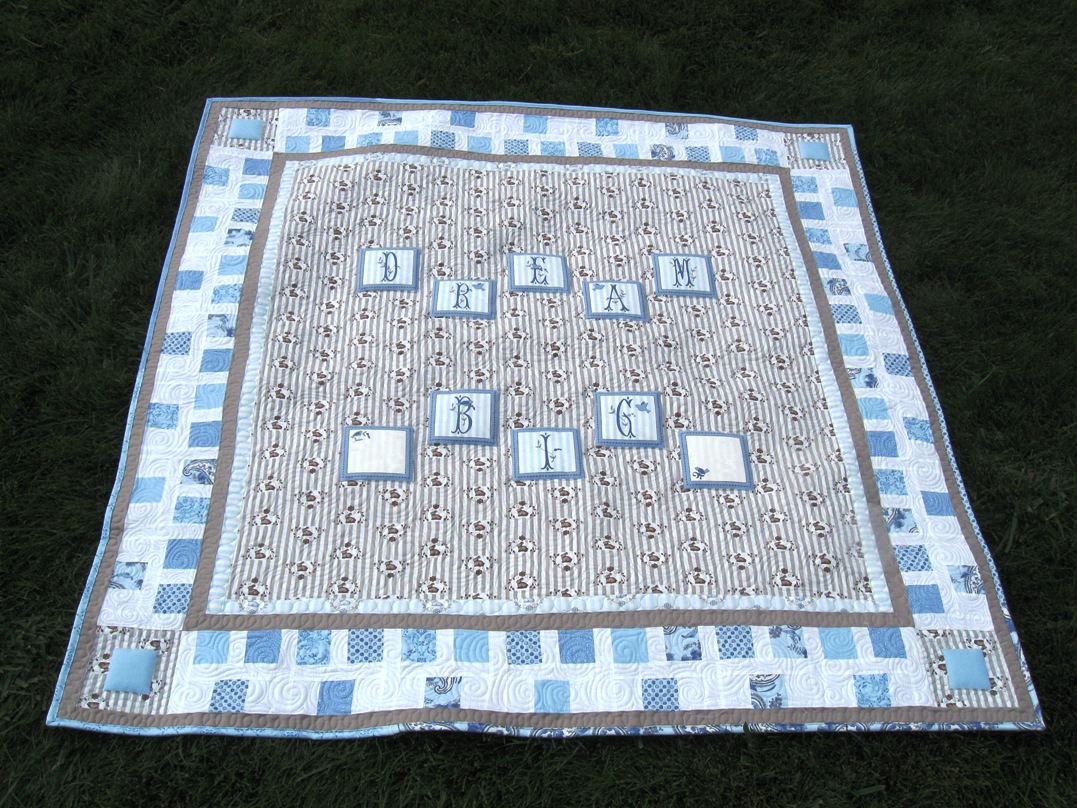
The quilting is really what makes the trapunto pop!! The more dense the quilting around the applique the more the applique pops :) Pebbling, it doesn't get much more dense than that!

And now that this
Moda Bake Shop Tutorial has been published for a while, I can now post it here
on my blog for your convenience ;) So just follow along
below for the full step-by-step tutorial. And if you love it, you can get
the printerfriendly version here :)


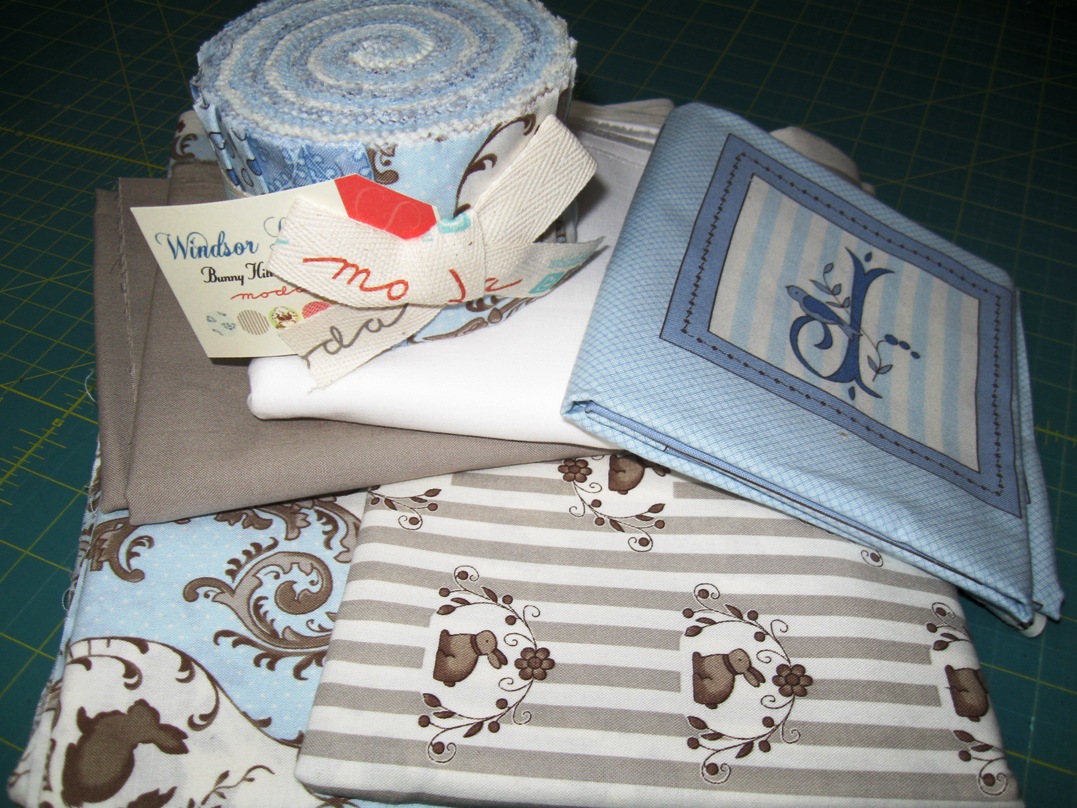
You will need:
1 Windsor Lane Junior Jelly Roll (Junior rolls have 20 strips vs 40)
1 Windsor Lane Alphabet Panel
1 1/3 yard of the Taupe Bunnies – print 2844 15
2/3 yard of Bella Slids Off White – 200
1/2 yard of Bella Solids Stone – 128
3 Yards of Backing
1 Windsor Lane Alphabet Panel
1 1/3 yard of the Taupe Bunnies – print 2844 15
2/3 yard of Bella Slids Off White – 200
1/2 yard of Bella Solids Stone – 128
3 Yards of Backing

STEP 1 – CUTTING
Sort your Junior Jelly roll into the following piles of strips. Put the scrap strips away (you can use them in a pieced backing if you desire) and your binding strips aside.
Sort your Junior Jelly roll into the following piles of strips. Put the scrap strips away (you can use them in a pieced backing if you desire) and your binding strips aside.
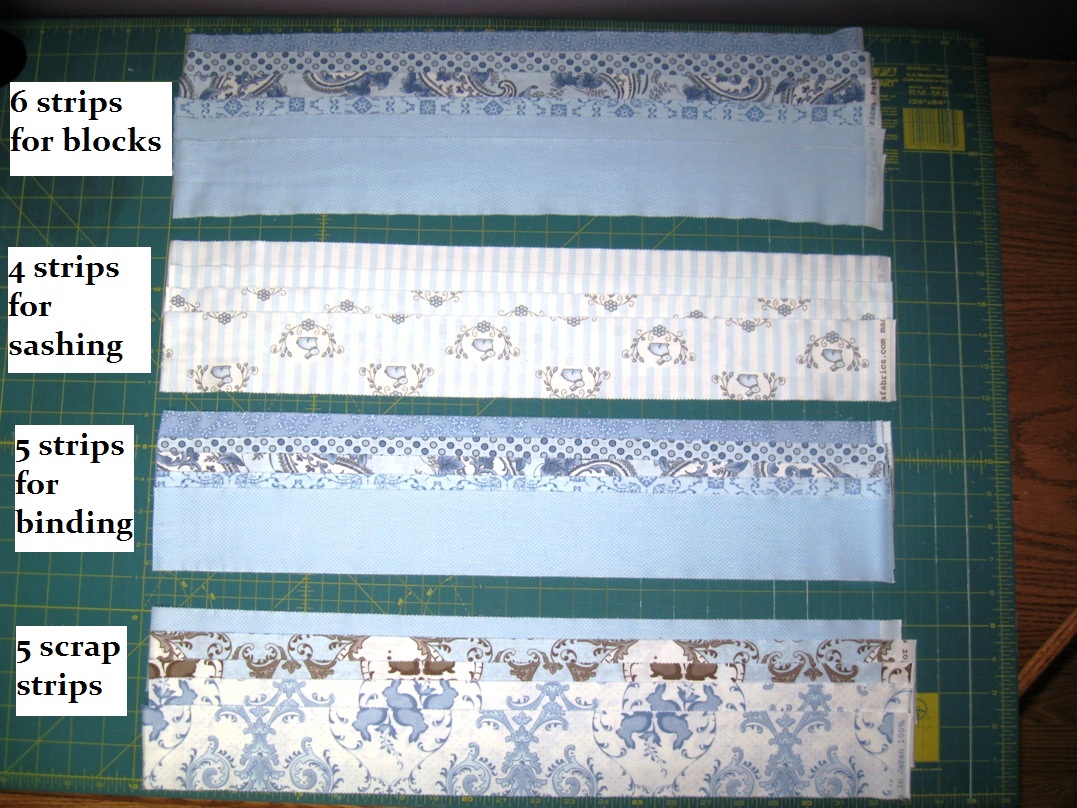
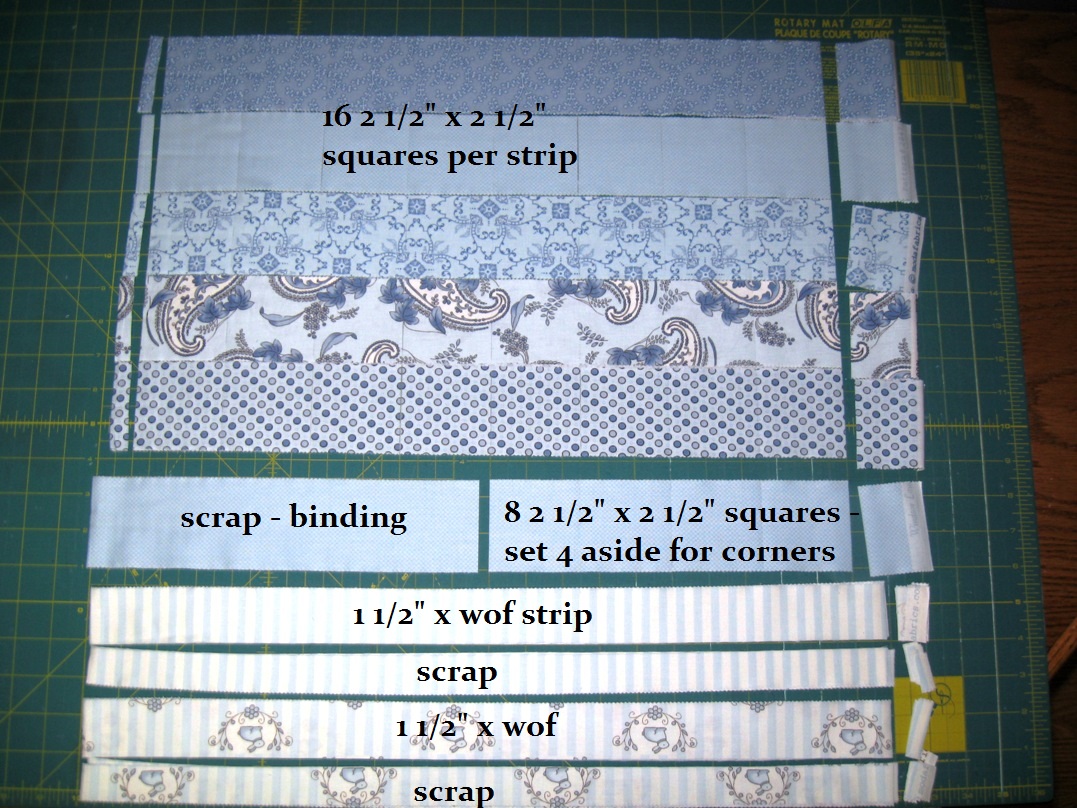
Separate your block strips into the 5 different prints and the one repeat print. From the 5 different prints cut (16) 2 1/2″ x 2 1/2″ squares from each of the 5 strips. From the repeat print strip cut (8) 2 1/2″ x 2 1/2″ squares. Set 4 of these repeat print squares aside to be used for the corner blocks. Place the remaining piece of repeat print with your binding pile. Lastly, trim the selvages from your 4 sashing strips and then subcut them into 1 1/2″ x wof strips, scrapping the remaining 1″.
And now onto the yardage.
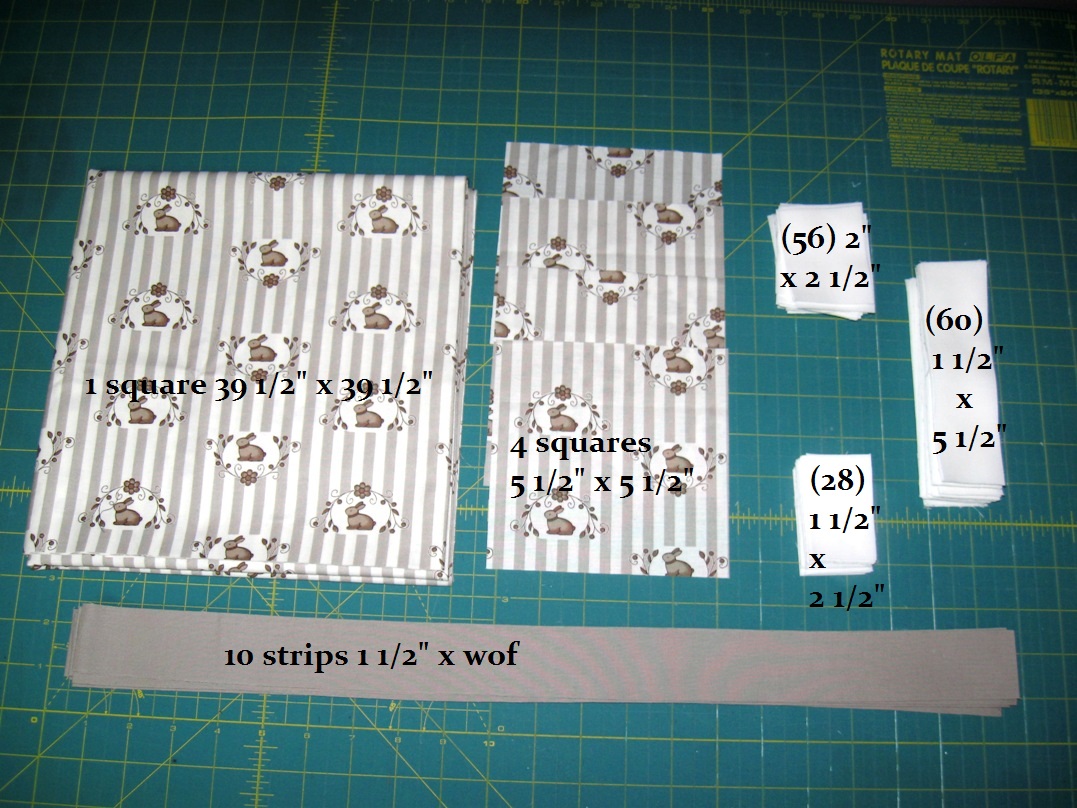
From your taupe bunny yardage cut a 5 1/2″ strip. This should leave you with a 39 1/2″ piece, so be careful. There’s no wiggle room. Subcut your 5 1/2″ strip into 4 squares 5 1/2″ x 5 1/2″. Scrap the remains. Then square up the remaining yardage into a 39 1/2″ x 39 1/2″ square.
From your off white yardage cut (56) 2″ x 2 1/2″ rectangles, (60) 1 1/2″ x 5 1/2″ rectangles, and (28) 1 1/2″ x 2 1/2″ rectangles.
From your stone yardage cut 10 strips 1 1/2″ x wof
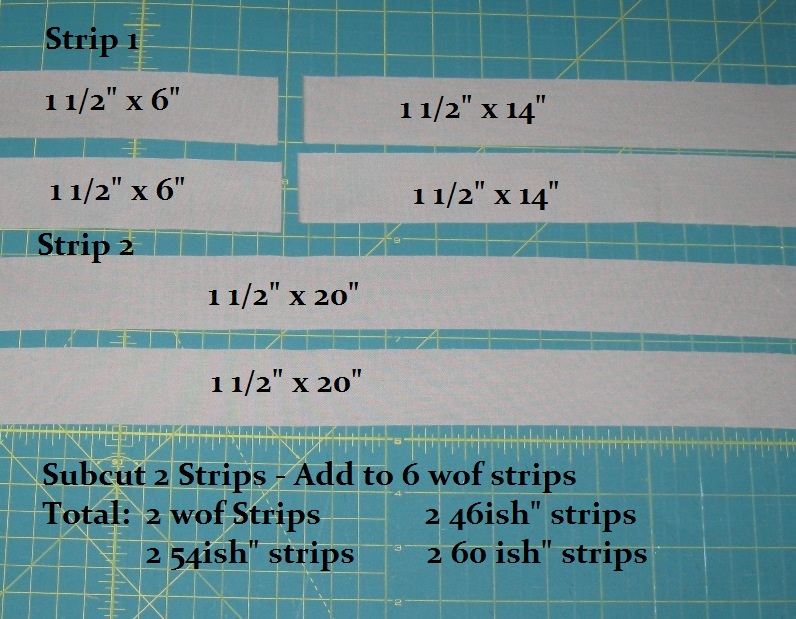
I find it easiest to piece my borders now so they are ready when I get to that stage of the quilt. Sub-cut one stone strip into (2) 1 1/2″ x 6″ strips and (2) 1 1/2″ x 14″ strips. Subcut a second strip into (2) 1 1/2″ x 20″ strips. Now add each subcut piece to the end of a stone wof strip. You will have 8 strips total now at the sizes listed below.
STEP 2 – BUILDING BLOCKS
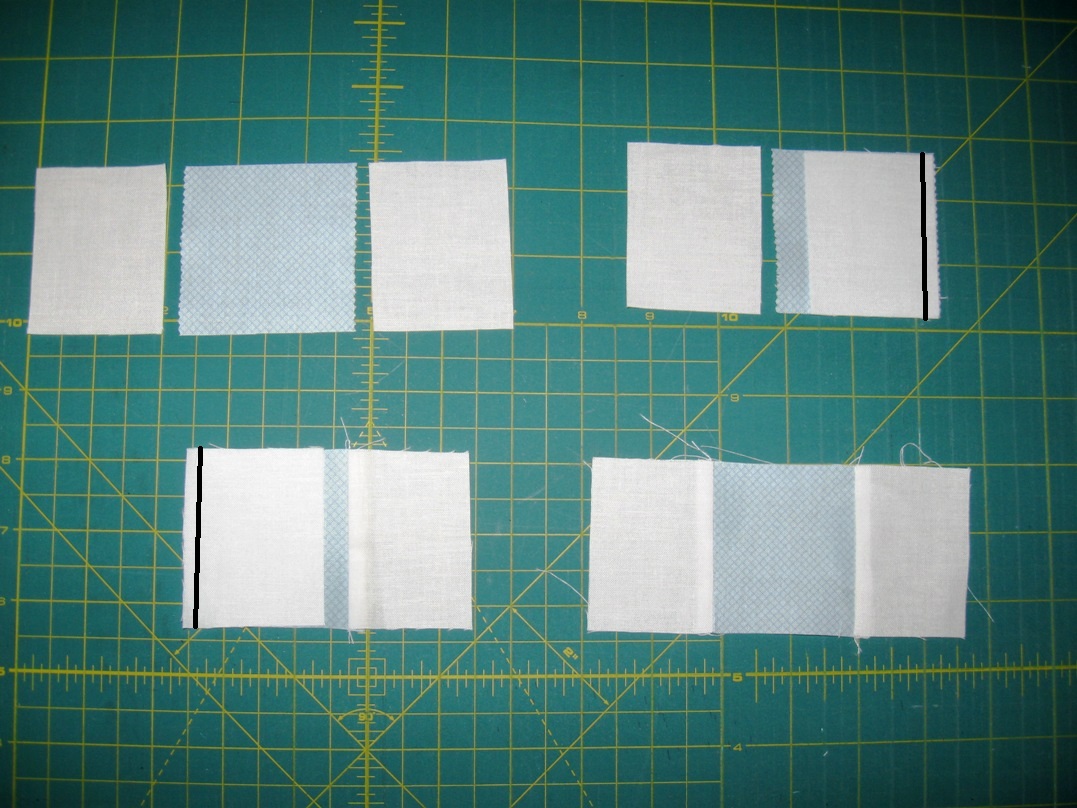
First, we will build the top half of the block. Start by taking a print square and placing an off white 2 1/2″ x 2 1/2″ rectangle on either side. Lay the right hand rectangle onto the square with right sides together and stitch a 1/4″ seam along the edge. No need for pins :) Press. Now place the left hand rectangle onto the square with right sides together and stitch a 1/4″ seam along the edge. Press. Make 28 sets. (See below for chain stitching instructions)
First, we will build the top half of the block. Start by taking a print square and placing an off white 2 1/2″ x 2 1/2″ rectangle on either side. Lay the right hand rectangle onto the square with right sides together and stitch a 1/4″ seam along the edge. No need for pins :) Press. Now place the left hand rectangle onto the square with right sides together and stitch a 1/4″ seam along the edge. Press. Make 28 sets. (See below for chain stitching instructions)
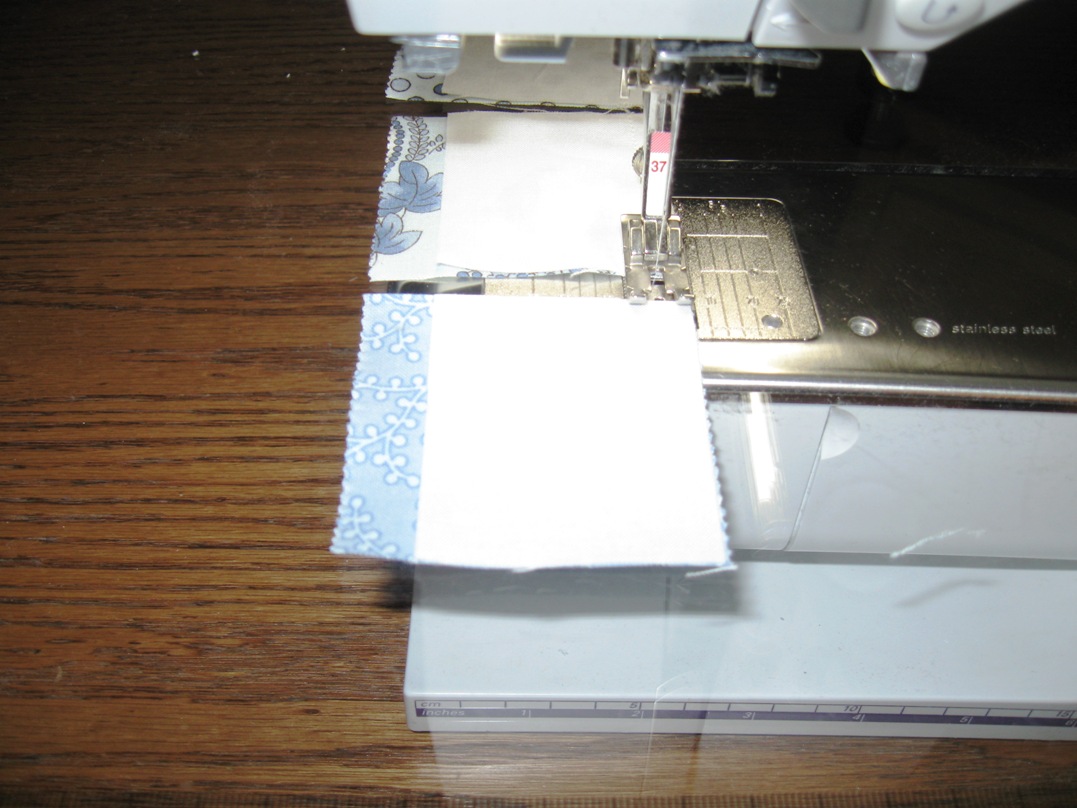
Chain Stitching wills save an enormous amount of time on this quilt, so when doing the step above (and steps to come), go ahead and place the right hand side on your block, stitch your seam, and then without clipping your threads, add another set, and another set, and keep stitching until you have done 28 sets. Then clip your threads, press them all, and then repeat on the left hand side.
Now, the bottom of the block. Lay 2 squares and an off white 1 1/2″ x 2 1/2″ rectangle out as shown below. Place the white rectangle onto the square on the right with right sides together and stitch a 1/4″ seam along the edge. Again, no pins needed  Press. Now place the left hand square onto the pieced rectangle with right sides together and stitch a 1/4″ seam along the edge. Press. Once again, chain stitch 28 sets.
Press. Now place the left hand square onto the pieced rectangle with right sides together and stitch a 1/4″ seam along the edge. Press. Once again, chain stitch 28 sets.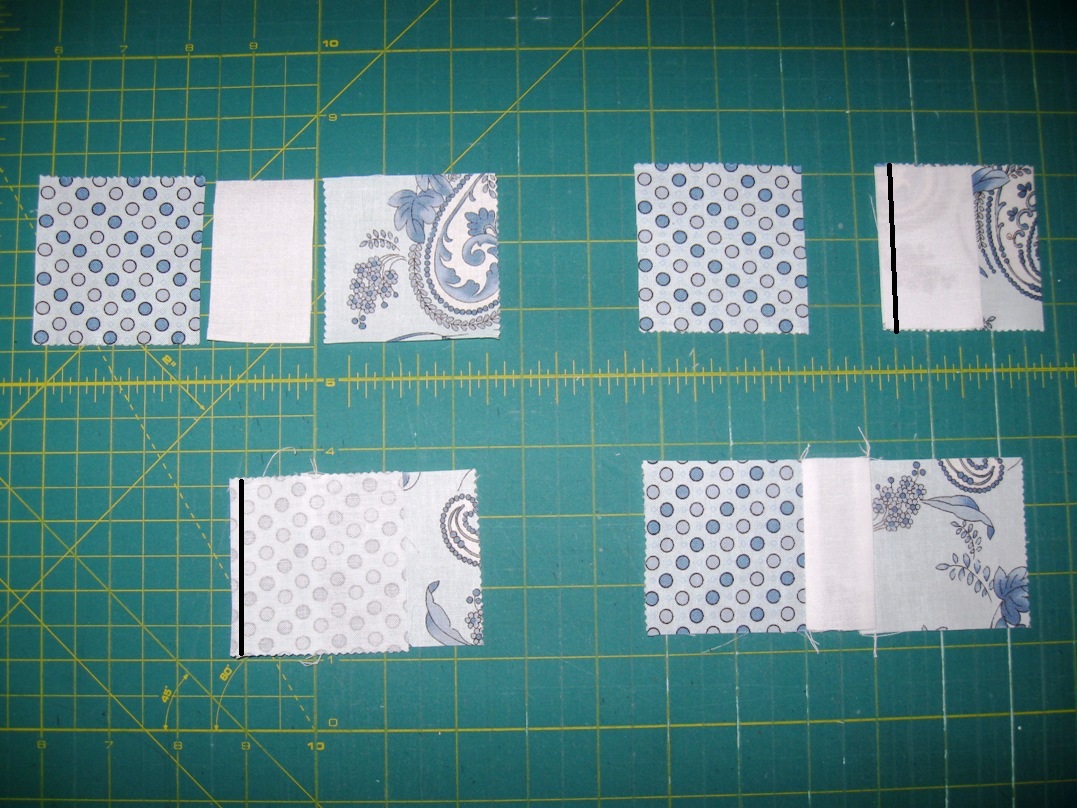
Now to finish making the block. And like before, you will be chain stitching each step for 28 sets. Lay your top and bottom pieced sets out along with your (2) 1 1/2″ x 5 1/2″ white rectangles as follows. Place a long white rectangle onto the top pieced set with right sides together and stitch a 1/4″ seam along the edge. (Once again, I didn’t use pins, but you do what you are comfortable with. Press. Lay your bottom pieced set onto your now pieced white rectangle and with right sides together stitch a 1/4″ seam along the edge. Press. Lastly, place the white rectangle onto the right hand side of your pieced block and with right sides together stitch a 1/4″ seam along the edge. Press.

Take your 28 pieced blocks and remaining 4 1 1/2″ x 5 1/2″ rectangles and lay them out as follows into 4 rows. Place the remaining rectangle onto the right hand side of the first block in each row and with right sides together stitch a 1/4″ seam along the edge. Press. Now, place the first block in the row onto the second with right sides together and stitch a 1/4″ seam along the edge. Repeat for each block until all 7 blocks are stitched into a row. Repeat for all 4 rows. Set pieced rows aside.

STEP 3 – APPLIQUE & TRAPUNTO
Trapunto is a technique in quilting that makes a chosen part of the quilt, normally applique, puffier. Start by gathering your 4 taupe bunny 5 1/2″ x 5 1/2″ squares and your (4) 2 1/2″ x 2 1/2″ repeat squares. Cut (4) 2 1/2″ x 2 1/2″ squares from a fusing agent, I use Heat N Bond. You will be repeating these steps for all 4 corner squares. Fold the taupe square into 4’s and finger press to find the center. Fuse the Heat N Bond squares to the repeat print squares. Then, fuse the repeat print squares to the center of the taupe square using the fold lines as a guide.
Trapunto is a technique in quilting that makes a chosen part of the quilt, normally applique, puffier. Start by gathering your 4 taupe bunny 5 1/2″ x 5 1/2″ squares and your (4) 2 1/2″ x 2 1/2″ repeat squares. Cut (4) 2 1/2″ x 2 1/2″ squares from a fusing agent, I use Heat N Bond. You will be repeating these steps for all 4 corner squares. Fold the taupe square into 4’s and finger press to find the center. Fuse the Heat N Bond squares to the repeat print squares. Then, fuse the repeat print squares to the center of the taupe square using the fold lines as a guide.
Now, for the puffy part. I like to use 2 squares of batting to make it extra puffy. Cut (8) 3″ squares from cotton batting. Spray them with a coat of spray baste and then stick them to the wrong side of the applique. You can see through the print to know where to place the batting. Try to center it directly on top of the applique. Simply stack the 2 squares on top of one another. If you don’t have spray baste you don’t need to run out and buy some. Just pin around the very edges of the batting to hold it in place.
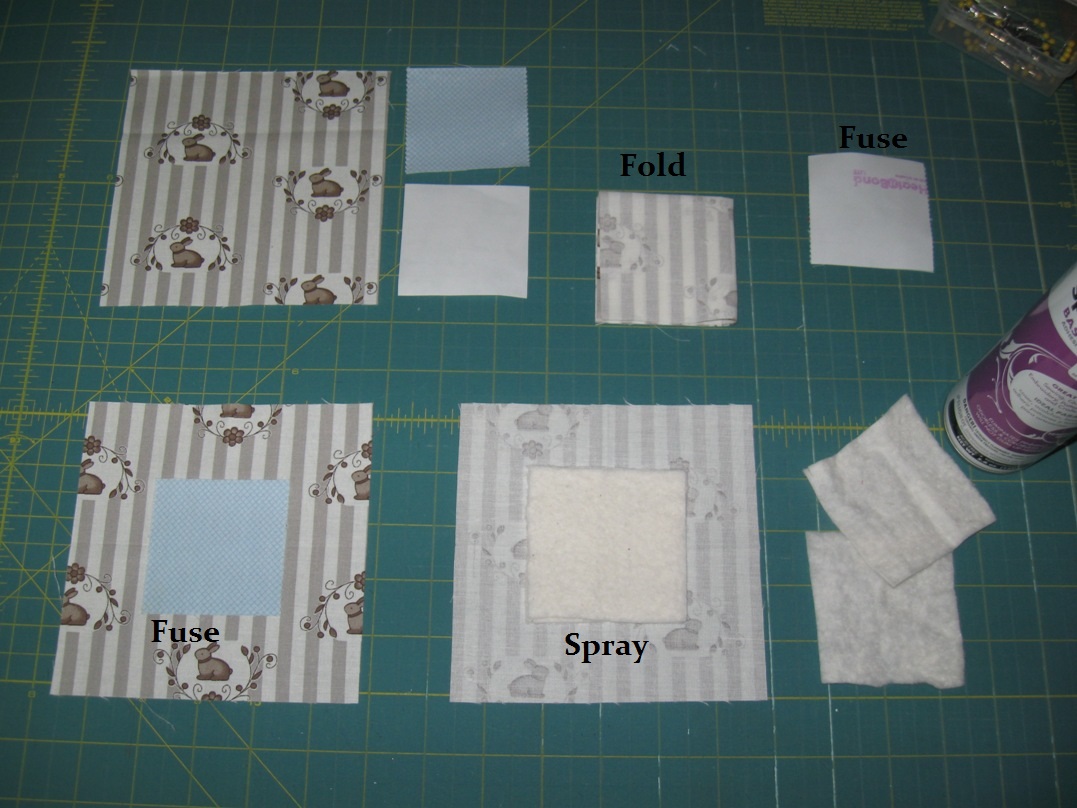
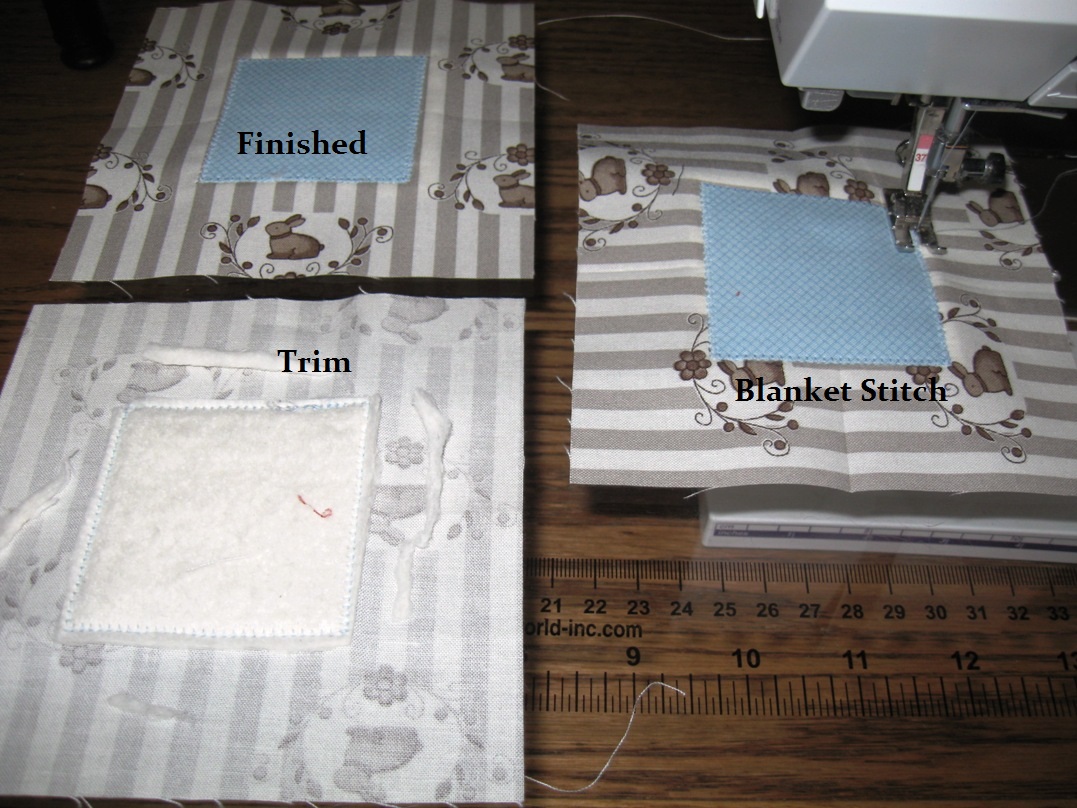
Now to tack it down. On the right side of your print, sew a blanket stitch (or zig zag or straight stitch, whichever you prefer) around the edge of the applique tacking it down. You will start to see it get puffy. Once stitched, flip your square over and trim away the excess batting so it is nice and close to the stitch line. Be super careful here not to cut your fabric. You will need to pull the fabric back so it no longer sticks to the batting before trimming :) Once you have your 4 corners done you can move to the center of your quilt.
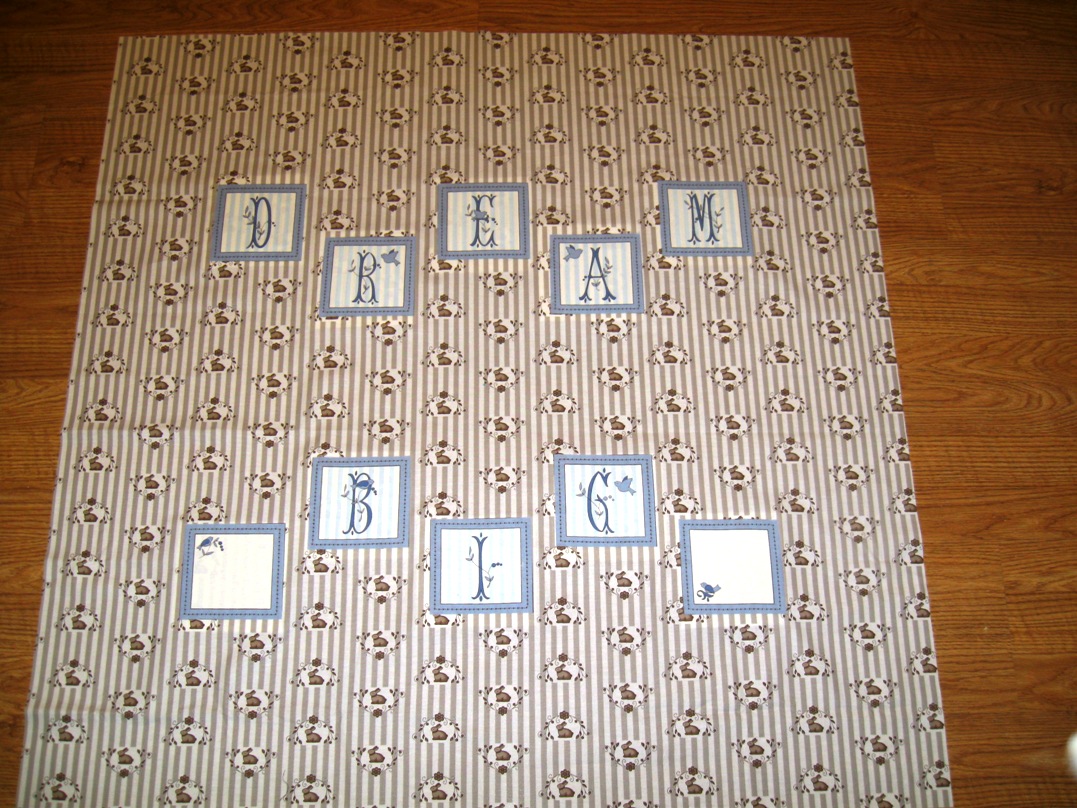
Cut your applique blocks from your panel. Lay them out in a pleasing manner and use the same applique technique as above to fuse them in place. If you don’t like Dream Big, you can use other saying with just one panel such as “Tuck Me In”, or “Precious” or “Charming” or “Rock A Bye” or “Love Bug” or any other phrase that only uses each letter once :)
Once your applique is fused in place, cut your batting into 5″ squares and adhere it to the wrong side of the fabric directly over the applique blocks, just like before.
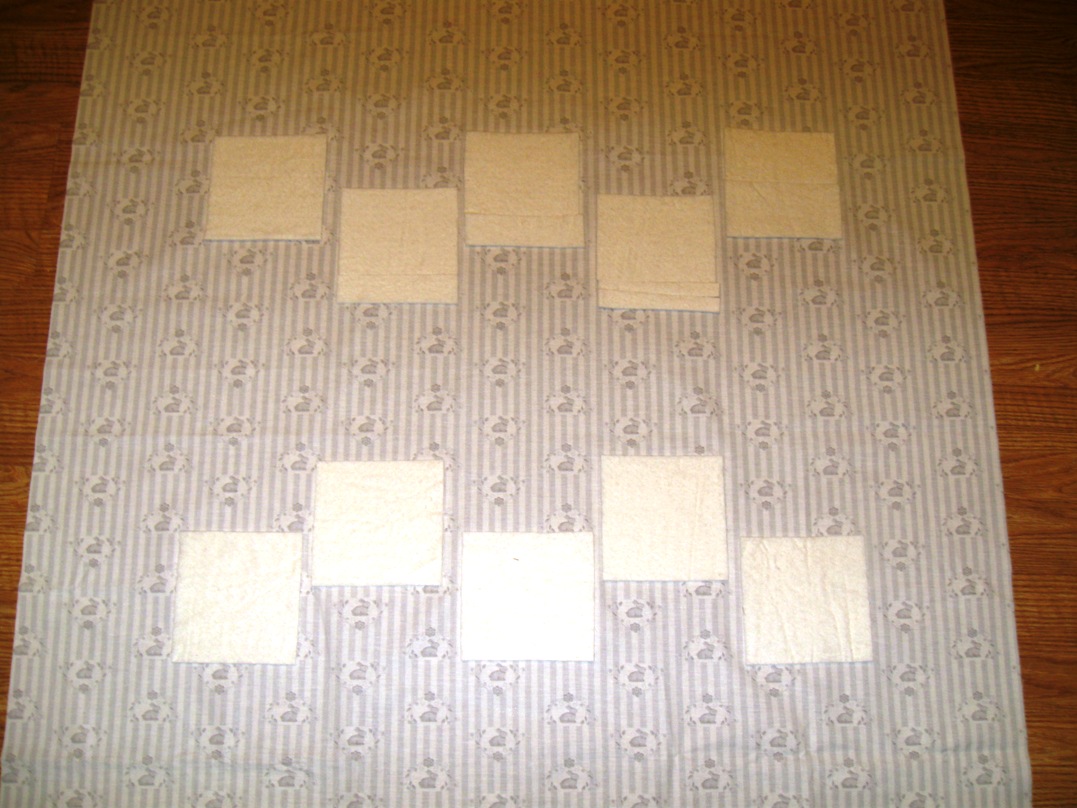
And once again, stitch a blanket stitch or preferred stitch around the edge of the applique. I added an extra straight stitch around the inside border of the blocks. Once you are done stitching trim your batting. It won’t be super puffy yet but don’t worry, it really pops up once you are done quilting!

STEP 4 – ADDING BORDERS
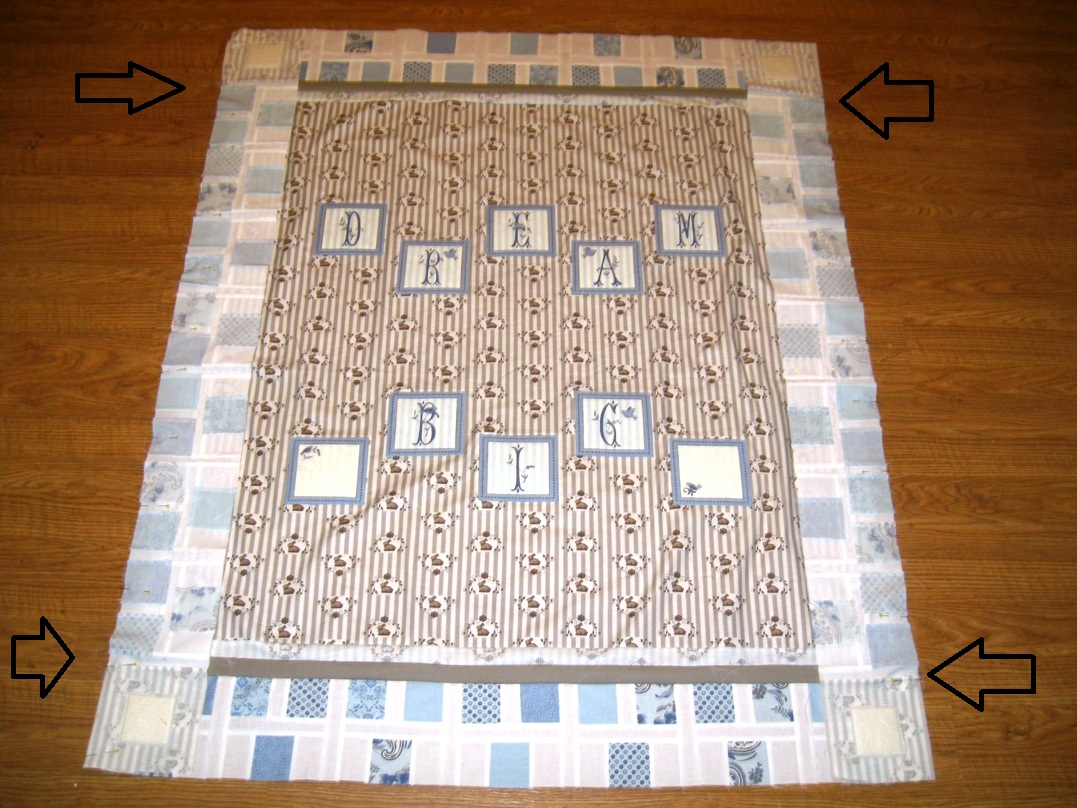
Now that the applique and trapunto is done you can finish piecing your quilt. Start by adding the white and blue striped borders. I added the bunny ones to the top and bottom and the plain stripes to the side. Lay them out as follows.
Now that the applique and trapunto is done you can finish piecing your quilt. Start by adding the white and blue striped borders. I added the bunny ones to the top and bottom and the plain stripes to the side. Lay them out as follows.
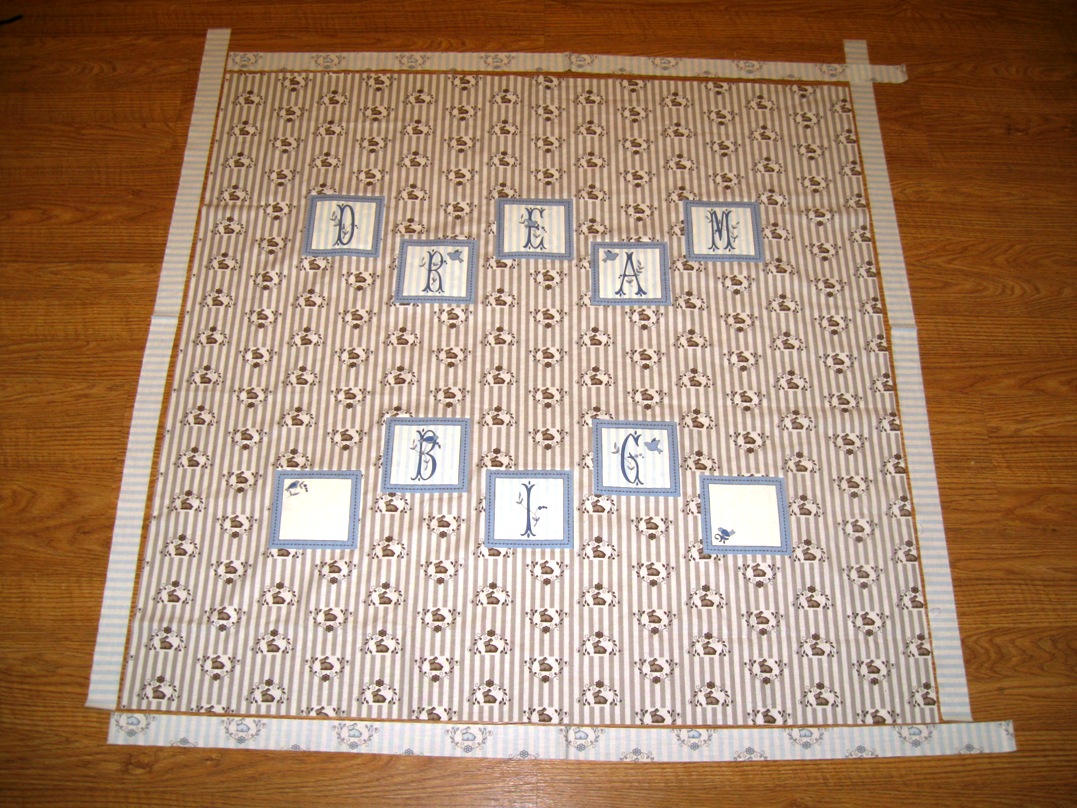
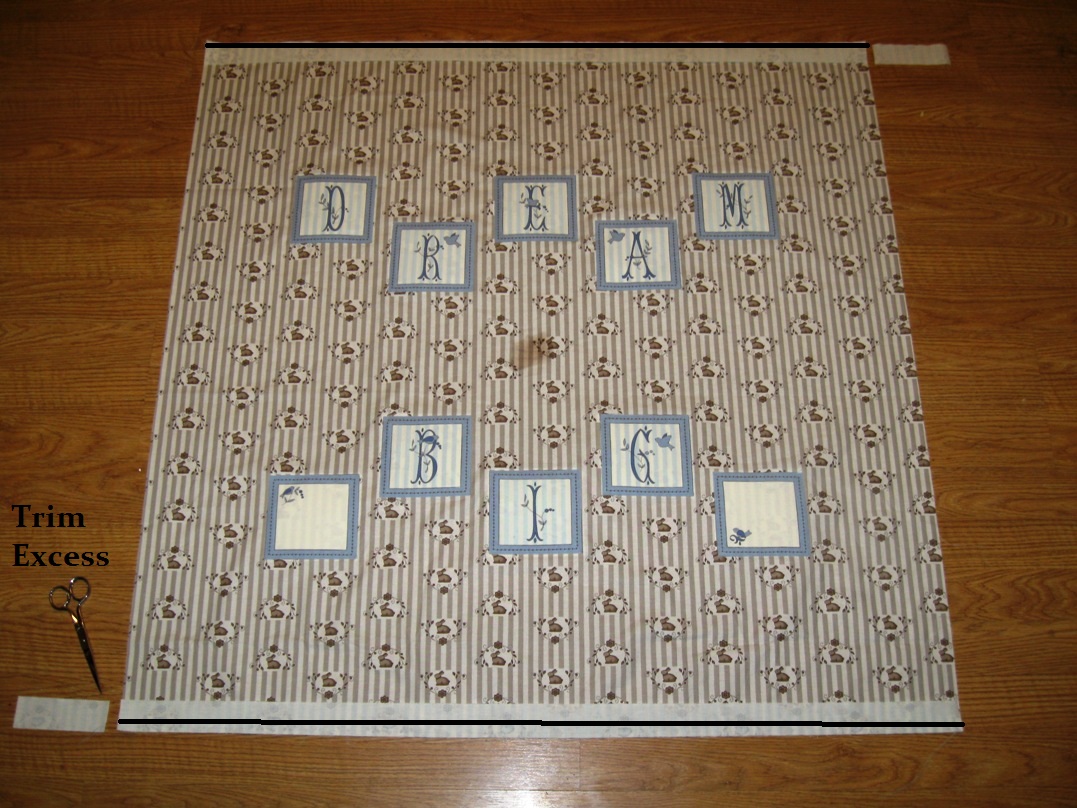
Lay the top and bottom border onto the edge of your quilt top. Sew a 1/4″ seam along the edge aligning as you go. Trim the excess fabric and then press towards the border. (Word of warning here, the trapunto makes the quilt a little heavier than usual and want’s to pull your quilt, be sure to align nice and tight or you will end up with wrinkles like I did. But if you do get wrinkles, don’t worry, you can smooth them out when you baste :)
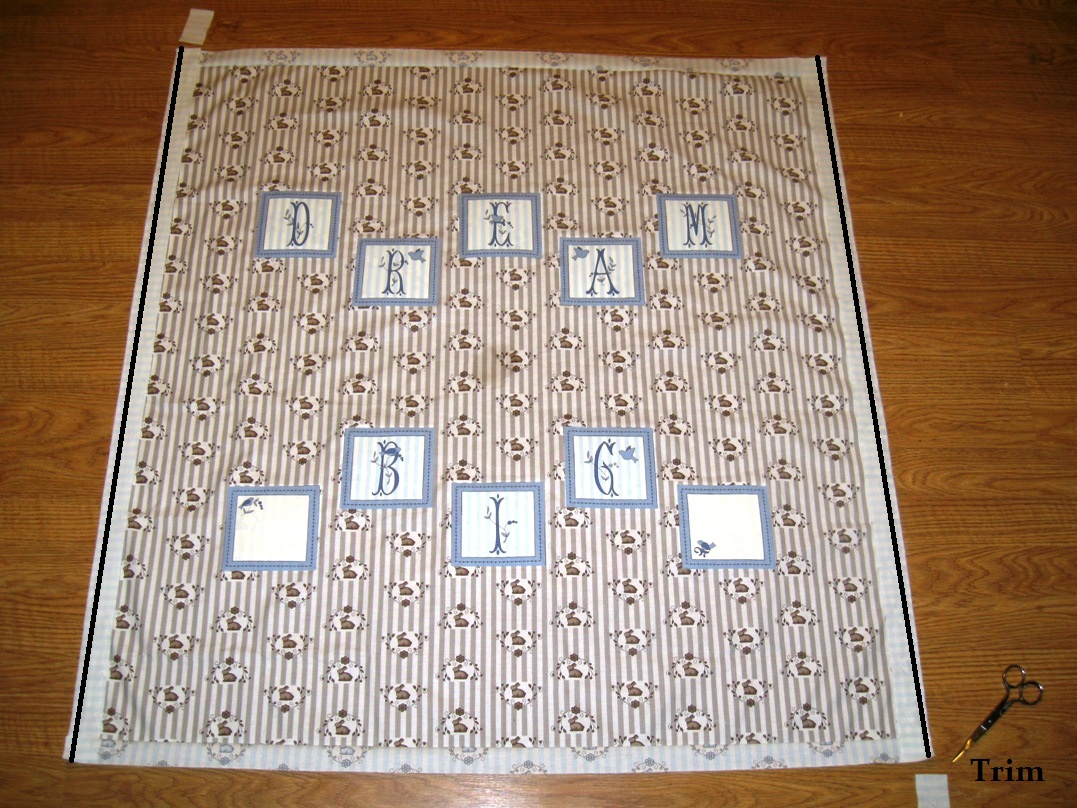
Now, lay the side borders onto either side of the quilt with right sides together. Stitch a 1/4″ seam along either side aligning as you go, trim the excess, and them press towards the border.
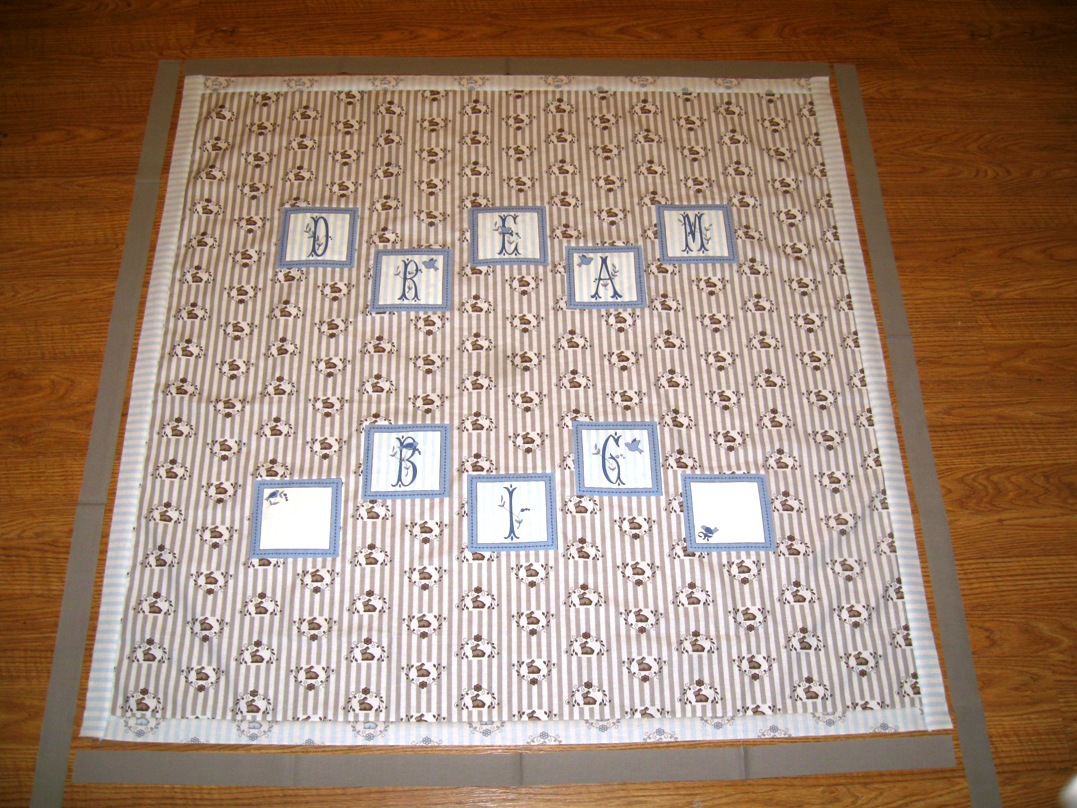
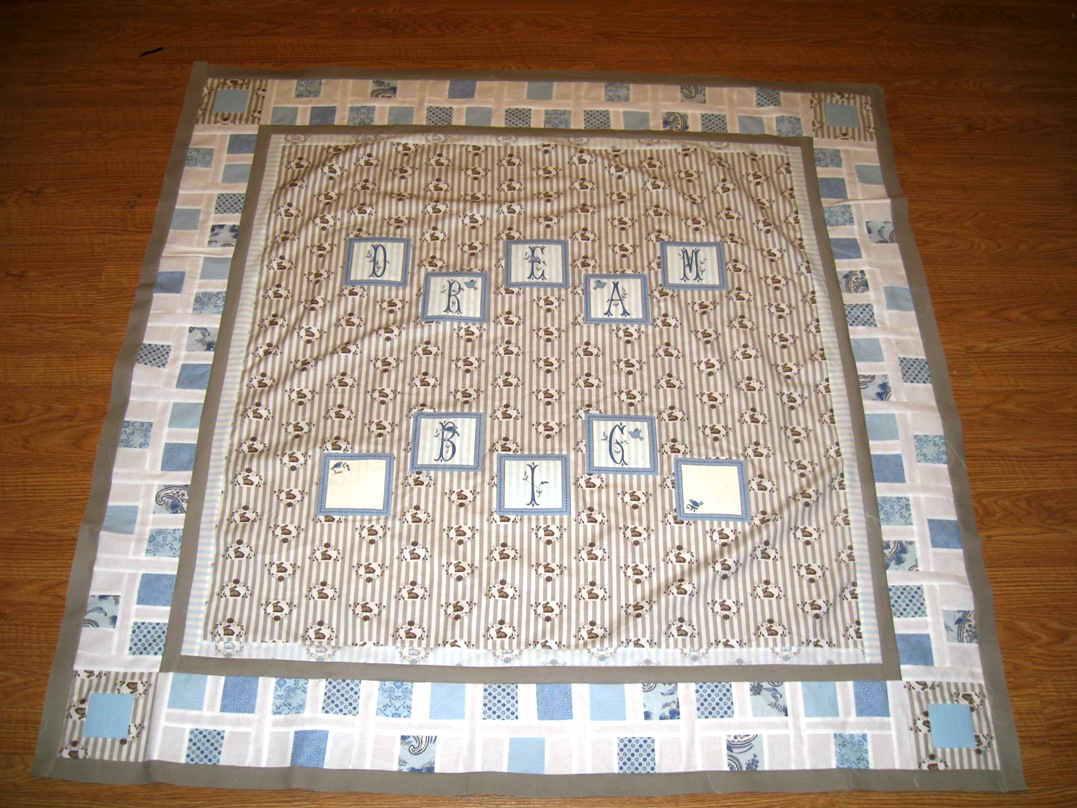
Now, lay your 2 wof stone strips along the top and bottom of your quilt and your 2 46″ stone strips along the sides of your quilt. Add this stone border using the same process as above.
Now, you are ready to add your block border. Start by laying out as follows. Place a corner block onto the top and bottom of each of your side rows. With right sides together stitch a 1/4″ seam along the edge and then press towards the corner blocks.

Now it is the same border adding process except you will want to pin these borders rathern than alignign as you go. Start by adding the top and bottom borders. Then add the side borders, taking care to match and pin your seams at the corner intersections.
Lastly, using your remaining 4 grey strips, add the final border using the same process, trimming the excess and pressing towards the border. And your top is finished!!
STEP 5 – FINISHING
So now it is time
to turn that finished quilt top into a finished Quilt ;) Time to
Baste It, Quilt It, and Bind It!!! Which is a whole lot in one
little sentence. If you are new to quilting, you can see my Finishing Your Quilt Series of video tutorials that will walk you through Basting,
Quilting, and Binding step by step ;)
I choose to do some custom quilting. You will want to do a rather dense quilting stitch around the trapunto to really make it pop!!
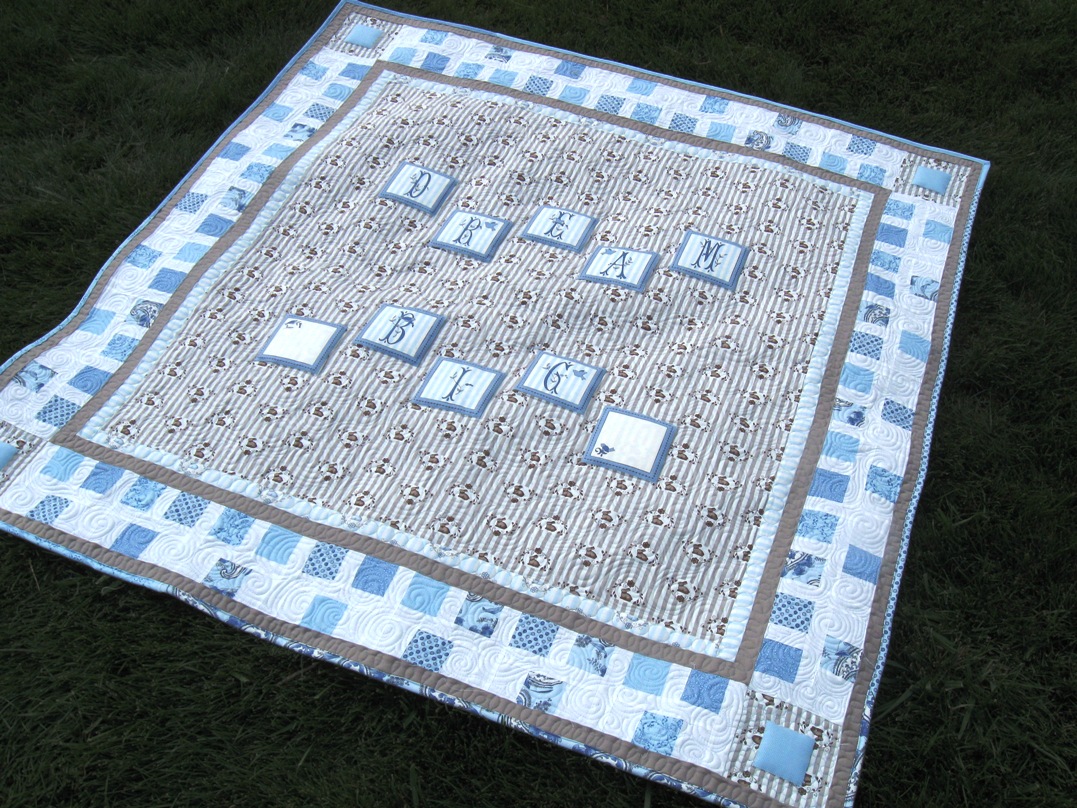

One adorable Bunny Blocks Baby Quilt measuring 55″ x 55″ with cute puffy blocks that any little one will enjoy playing with for hours!
I hope you have
enjoyed this tutorial and if you make your own Bunny Blocks Quilt I would love to see
it!! You can email me a picture at happyquiltingmelissa@gmail.com,
post it to social media with #happyquiltingwithmc or or add it to
my flickr group here ;) I can't wait to see your Bunny Blocks Quilts!!!


Is that Jocelyn? She is so big! I keep thinking she must be a little baby still.
ReplyDeleteI'm so excited you wrote a tutorial with trapunto in it! I'm going to go check it out right now.
I saw your tutorial on the Moda Bake Shop earlier this morning. Sweet quilt. Your little model is cute. I think she needs a cookie, Melissa.
ReplyDeleteLove your quilt and quilting! The link on Moda isn't working for the printer friendly version. They've had this problem before and not sure they ever fixed it (I had to get it from the designer), so you may want to check with them. Thanks for another great tutorial :)
ReplyDeleteThat is just adorable Melissa.
ReplyDelete