It's Month 3 with my good friends at Stitchin' Heaven doing their BOHO Heart Monthly Block of the Month program and that means another month of fun tutorials!!
Month 1 Month 2 Month 3 Month 4 Month 5 Month 6
Month 7 Month 8 Month 9 Month 10 Month 11 Month 12
And since each month has Lots and Lots of Tutorials in them . . . Here is a list to jump right to the tutorial you need for this month 3:
Square in a Square Block Mini Heart Block
Plus Sign Embedded in Background Block X's and O's Block
Offset Square Dresden Block Sewing Section 4
Sewing Group 1
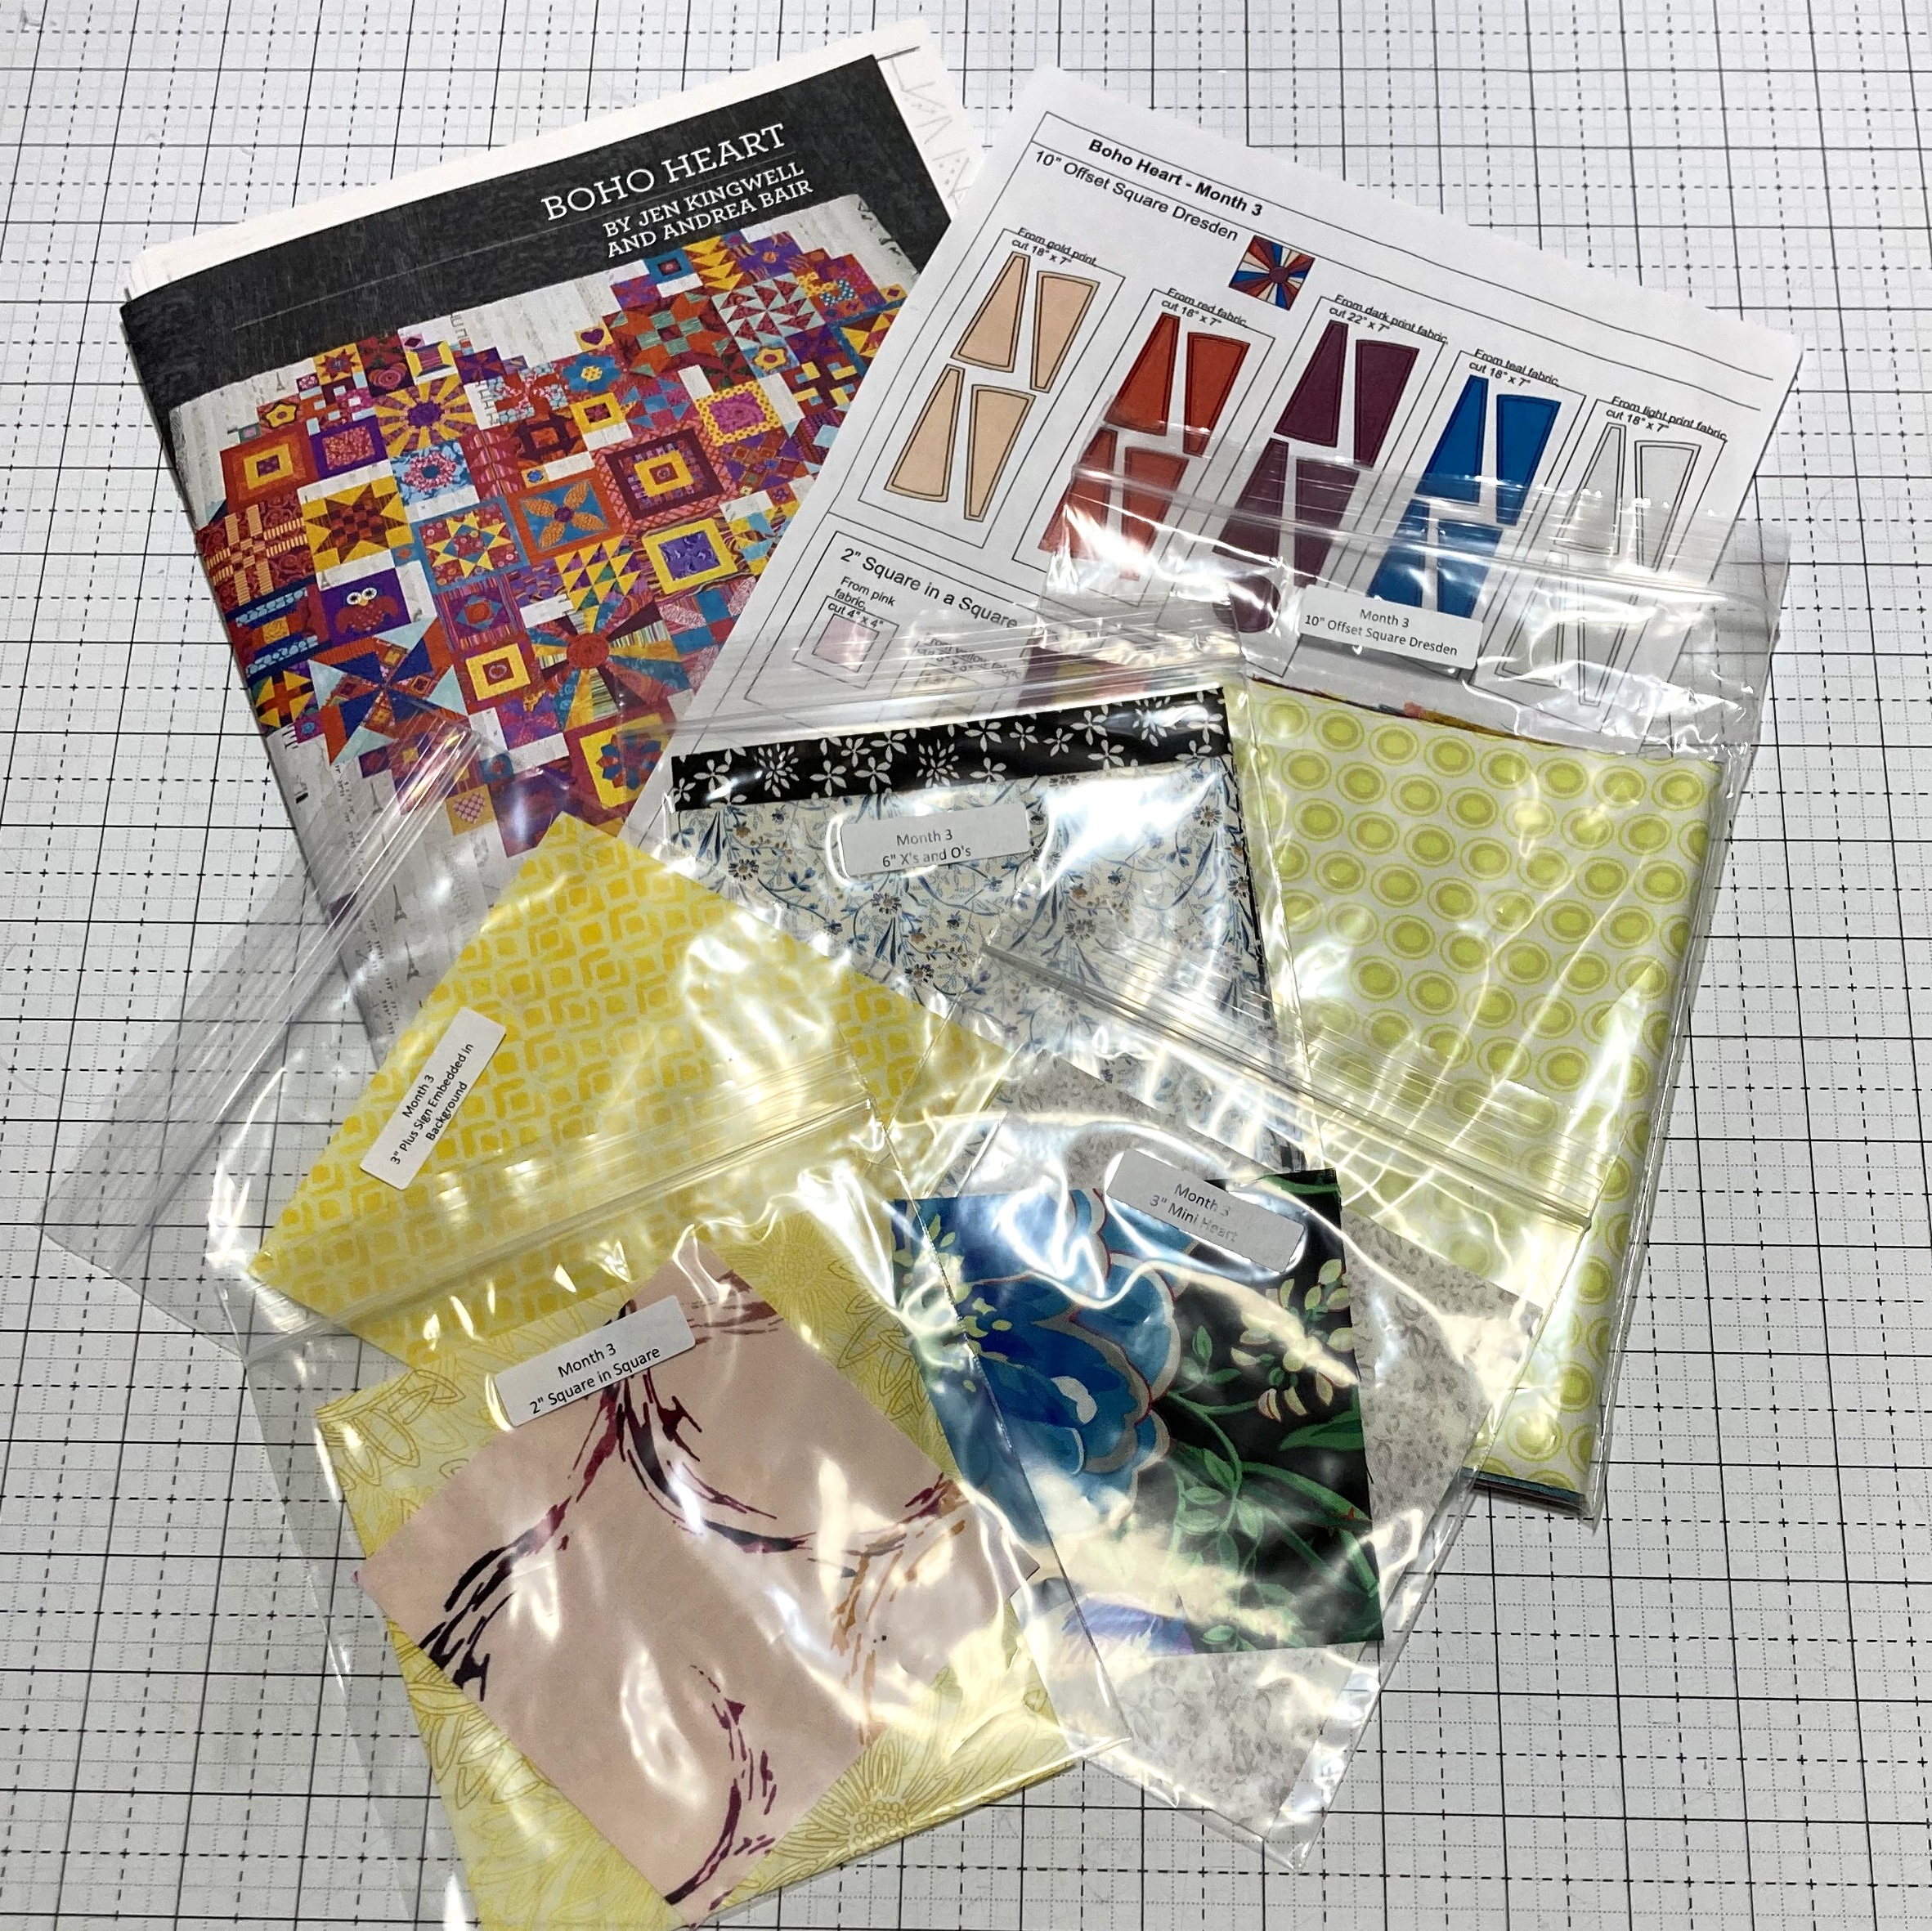
So you have your Month 3 BOHO Heart Packet . . . Lets get started!!!
We'll start with our first block of Month 3, the . . .
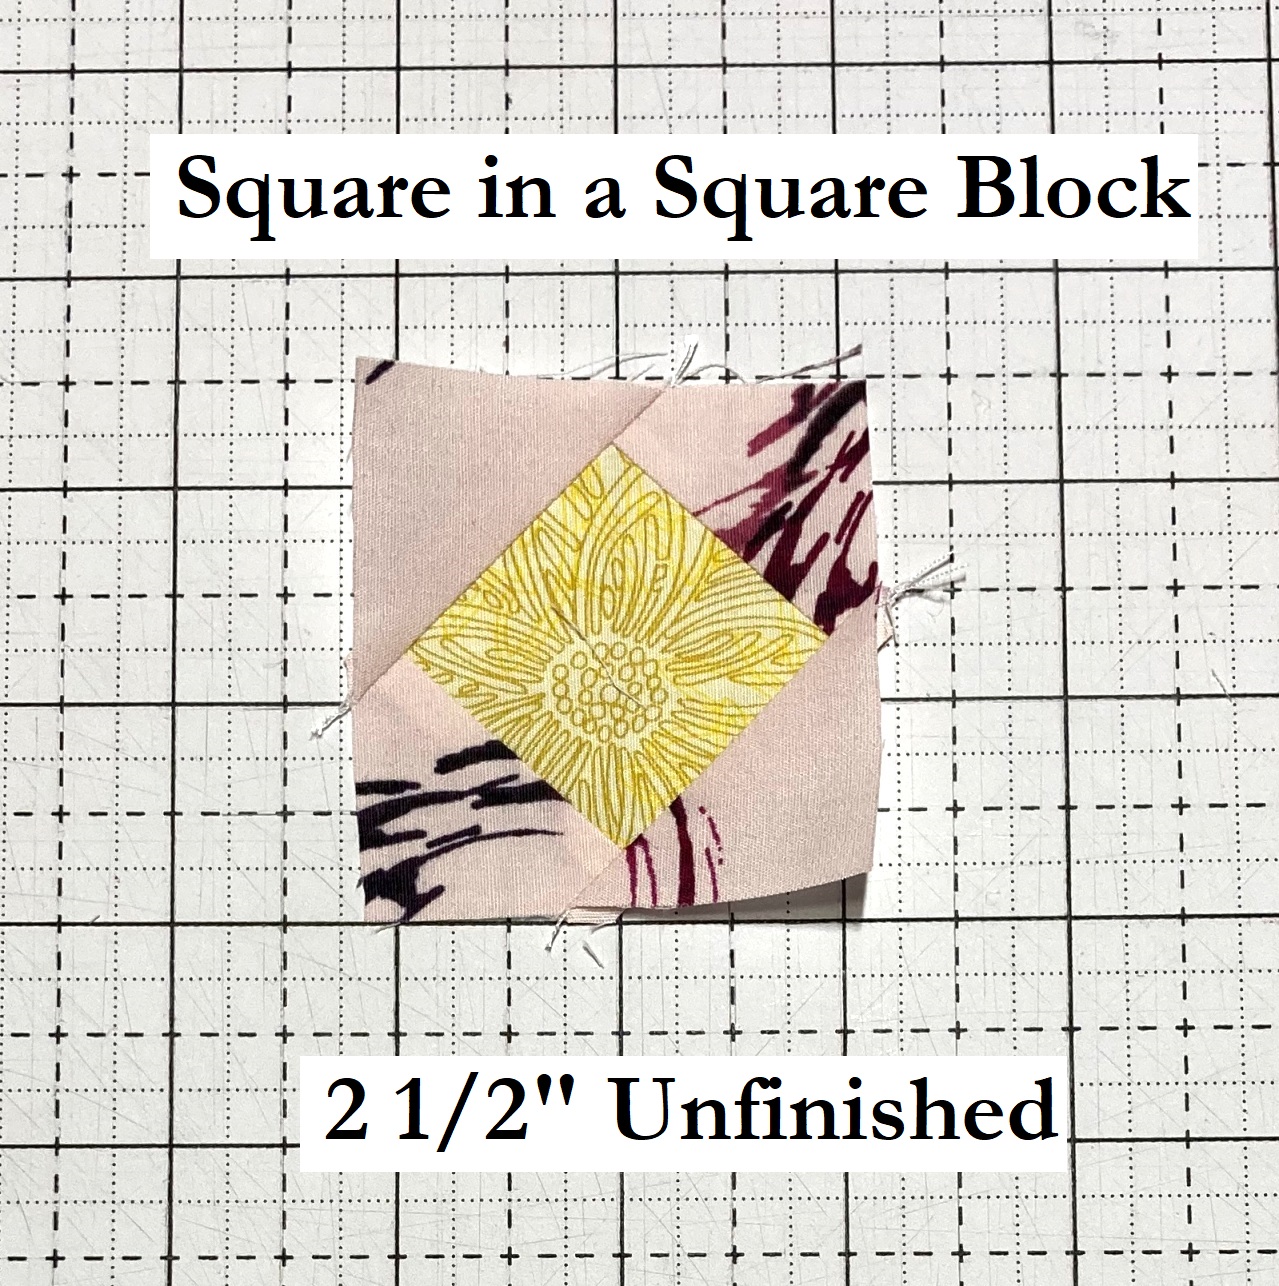
From your Month #3, Square in a Square bag, cut the fabrics according to the supplemental cutting list. And you will note . . . I cut my fabric square backwards!!! I don't know how I missed that, but ya, you want to cute your Pink Fabric into a 2 1/2" x 2 1/2" square and your Yellow Fabric into (4) 1 1/2" x 1 1/2" squares. Sorry about that.


From your Month #3, Mini Heart bag, cut the fabrics according to the supplemental cutting list. Also, cut out your Mini Heart Template. Trace your template on to the wrong side of your black square and then cut out your heart applique.
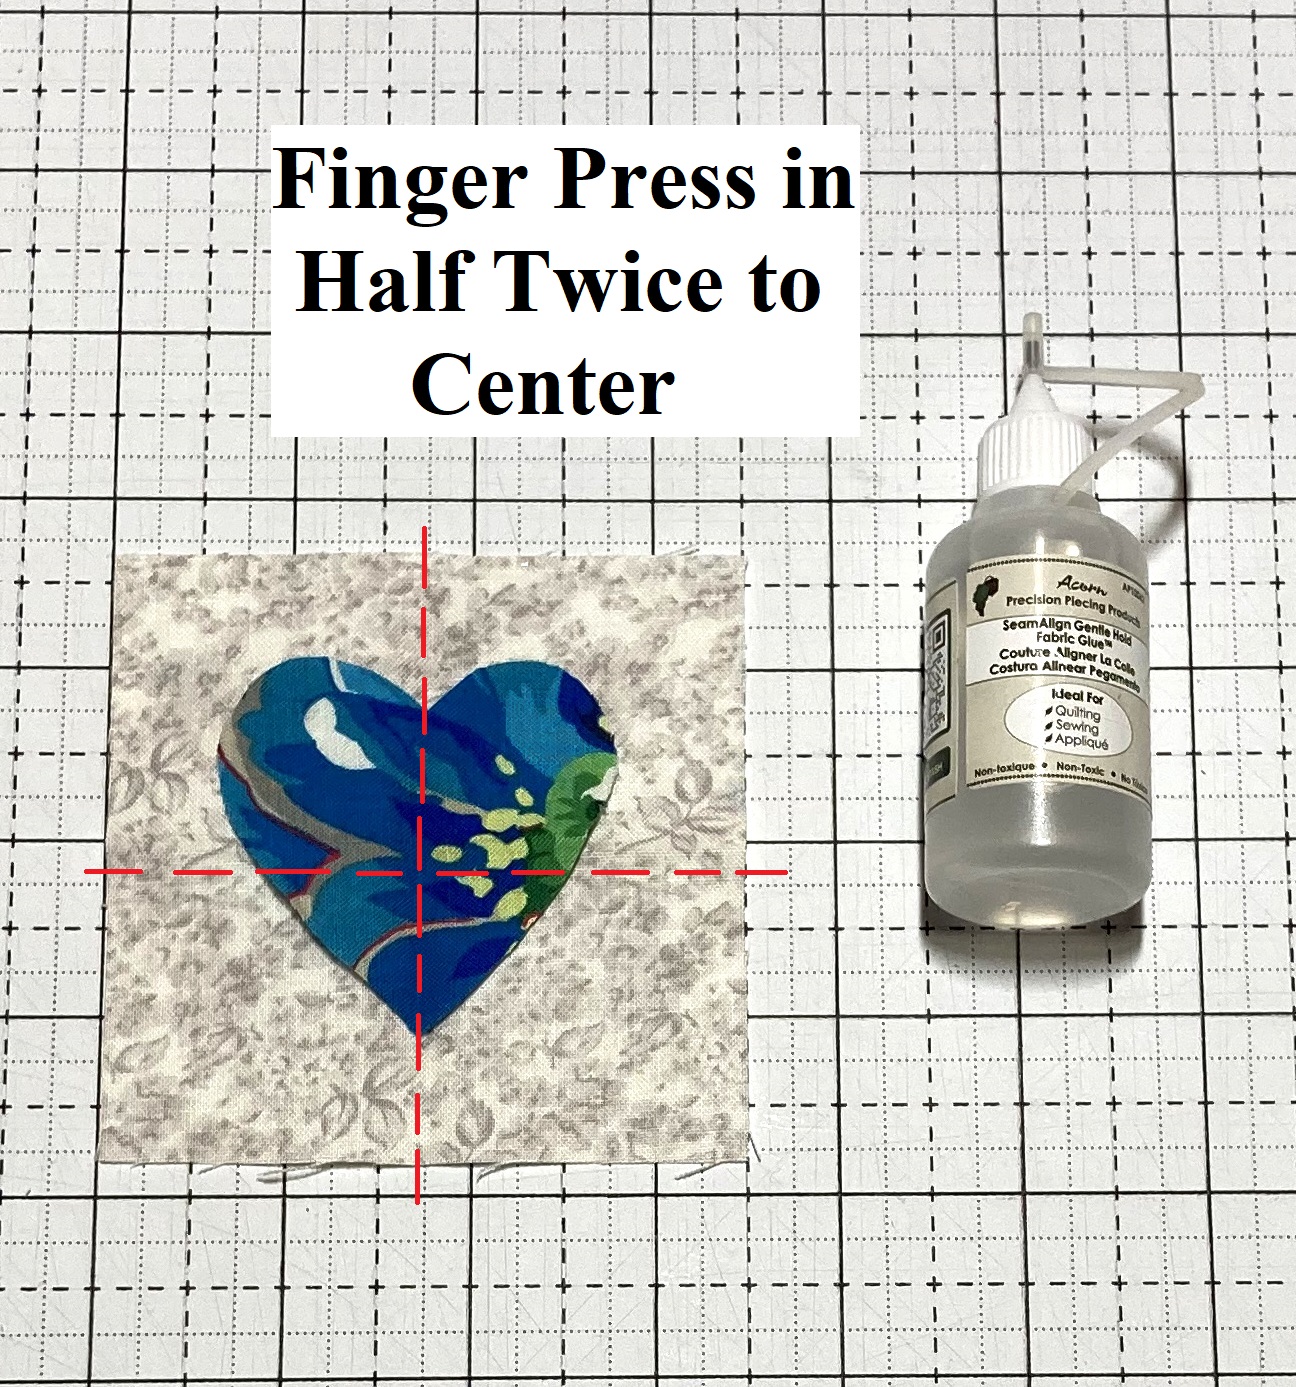
Fold your Grey Square in half twice and finger press the crease. Do the same for your Heart Applique. Align the creases in the Grey Square and the Heart Applique to center the applique. Dab some applique glue or just use a little glue stick to secure the Heart Applique in place.
And now it is time to secure stitch the block. You can do machine, hand, or needle turn applique and choose any color thread. Stitch around the entire Applique using desired secure stitch. I like to backstitch 1-2 stitches at the beginning and the end of my stitching just to hold it.
And you have your second block finished. A Mini Block measuring 3 1/2" x 3 1/2" unfinished.
And now we can move onto a fun new block, the . . .
Plus Sign Embedded In Background Block
From your Month #3, Plus Sign Embedded in Background bag, cut the fabrics according to the supplemental cutting list.

Then from your stash of strips, gather the remaining Strip 16, Strip 17, and Strip 18 pieces. You should have a 12 1/2" and a 14 1/2" strip of both fabric 16 and 18 as well as a 11 1/2" and a 13 1/2" strip of fabric 17.

Layout the Yellow pieces, and the strip sets as shown below.
Place the Yellow piece in each row onto the First strip in each row with right sides together and align the raw edges. Stitch a 1/4" seam along the three edges.
Place the Yellow piece in each row onto the Second strip in each row with right sides together and align the raw edges. Stitch a 1/4" seam along the three edges.

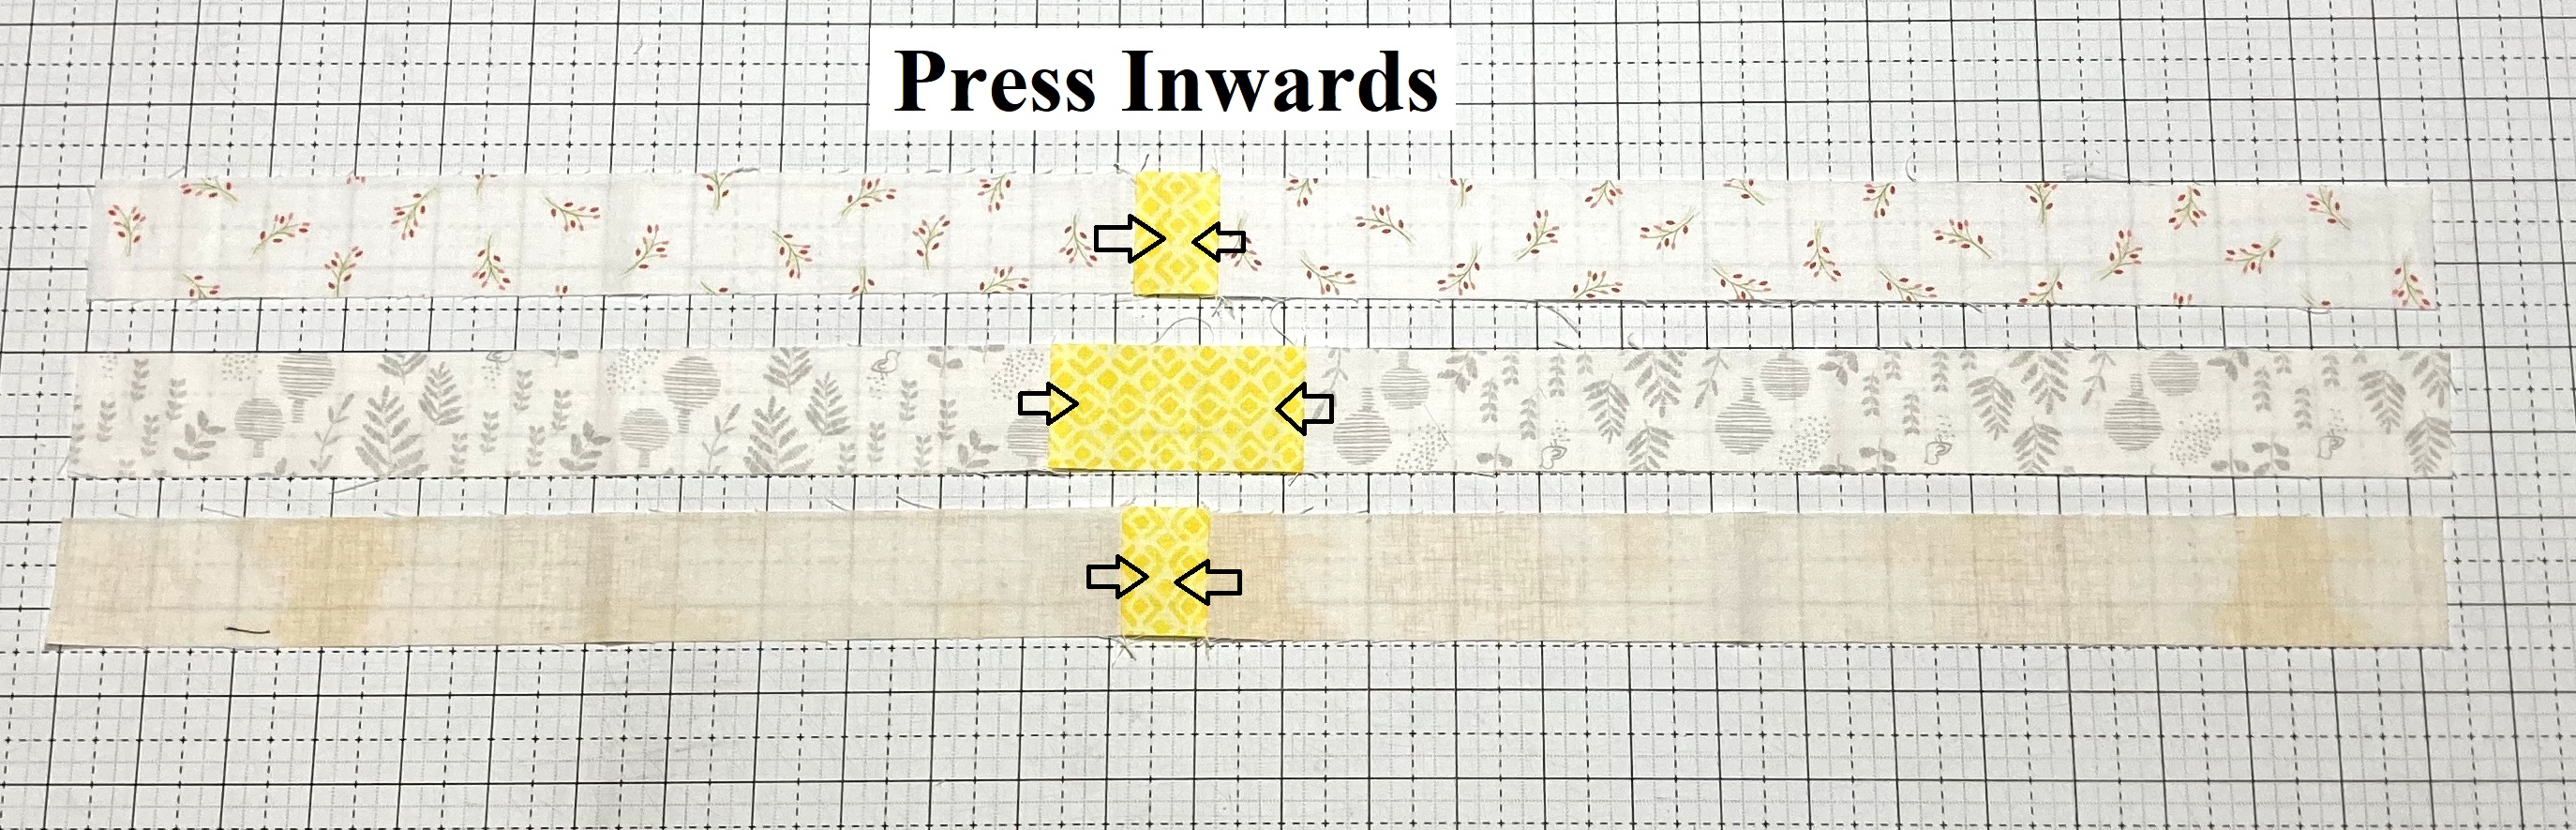
Press the seams inwards toward the Yellow Pieces.
Place the First Row onto the Second Row with right sides together and align and pin the raw edges. Stitch a 1/4" seam along the pinned edge. Press the seam open.

Place the Third Row onto the now sewn together Second and First Row with right sides together and align and pin the raw edges. Stitch a 1/4" seam along the pinned edge. Press the seam open.
And just like that, you have a Plus Sign Embedded In The Background Block measuring 3 1/2" x 27 1/2" unfinished.
And it is onto another block that looks familiar but has a new orientation with the. . .
X’s and O’s Block
From your Month #3, X's and O's bag, cut the fabrics according to the supplemental cutting list.
Draw a diagonal line from corner to corner on the 8 White fabric squares. Place two of the marked squares onto each of the 4 Black Squares with right sides together as shown and pin in place.
Stitch a seam directly on each of the drawn lines. Trim 1/4" over the stitched lines and scrap the excess. Press the seams so they are going in the same direction, this will allow you to nest them later. So one seam will be pressed to the dark, and one to the light on each O Unit.
Layout the 4 O Units as shown below, taking note of the direction of the pressed seams.
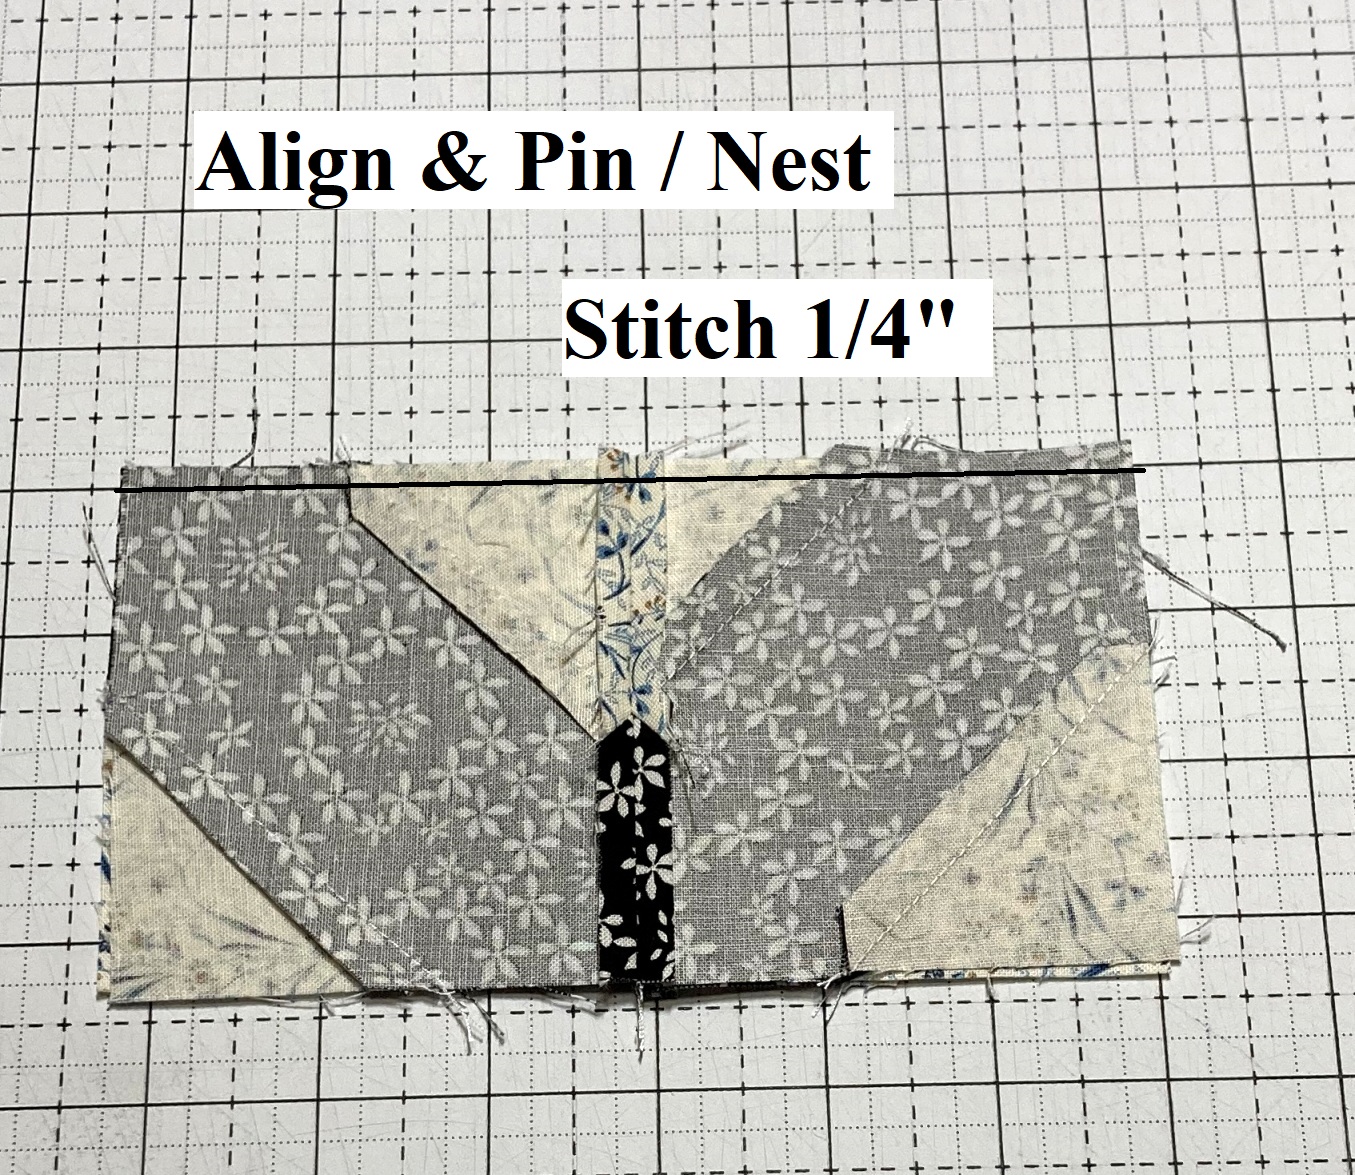
Place the Second Unit in each row onto the First Unit with right sides together and align and pin/nest the raw edges. Stitch a 1/4" seam along both pinned edges.
Press the Seams Open.
Place the First Row onto the Second Row with right sides together and align and pin/nest the raw edges. Stitch a 1/4" seam along the pinned edge. Press the seam open.
And you are done. The X's and O's Block should measure 6 1/2" x 6 1/2" unfinished.
And now for our last block of this month, we will be making the. . .
From your Month #3, X's and O's bag, cut the fabrics according to the supplemental cutting list.
From your Month #3, Offset Square Dresden bag, cut the fabrics according to the supplemental cutting list. Also, cut out your Offset Dresden Wedge Template and your 3" Circle Template. Trace the Dresden template on to the wrong side of each of your 5 prints and cut out 4 Dresden Blades from each fabric. Trace the Circle Template on the wrong side of the Maroon Fabric and then cut out your circle applique. I like to prepare the circle applique with Lite Heat N Bond as it is a little larger applique and will be appliqued over a hole in the center of the block so it needs to be a little sturdier.
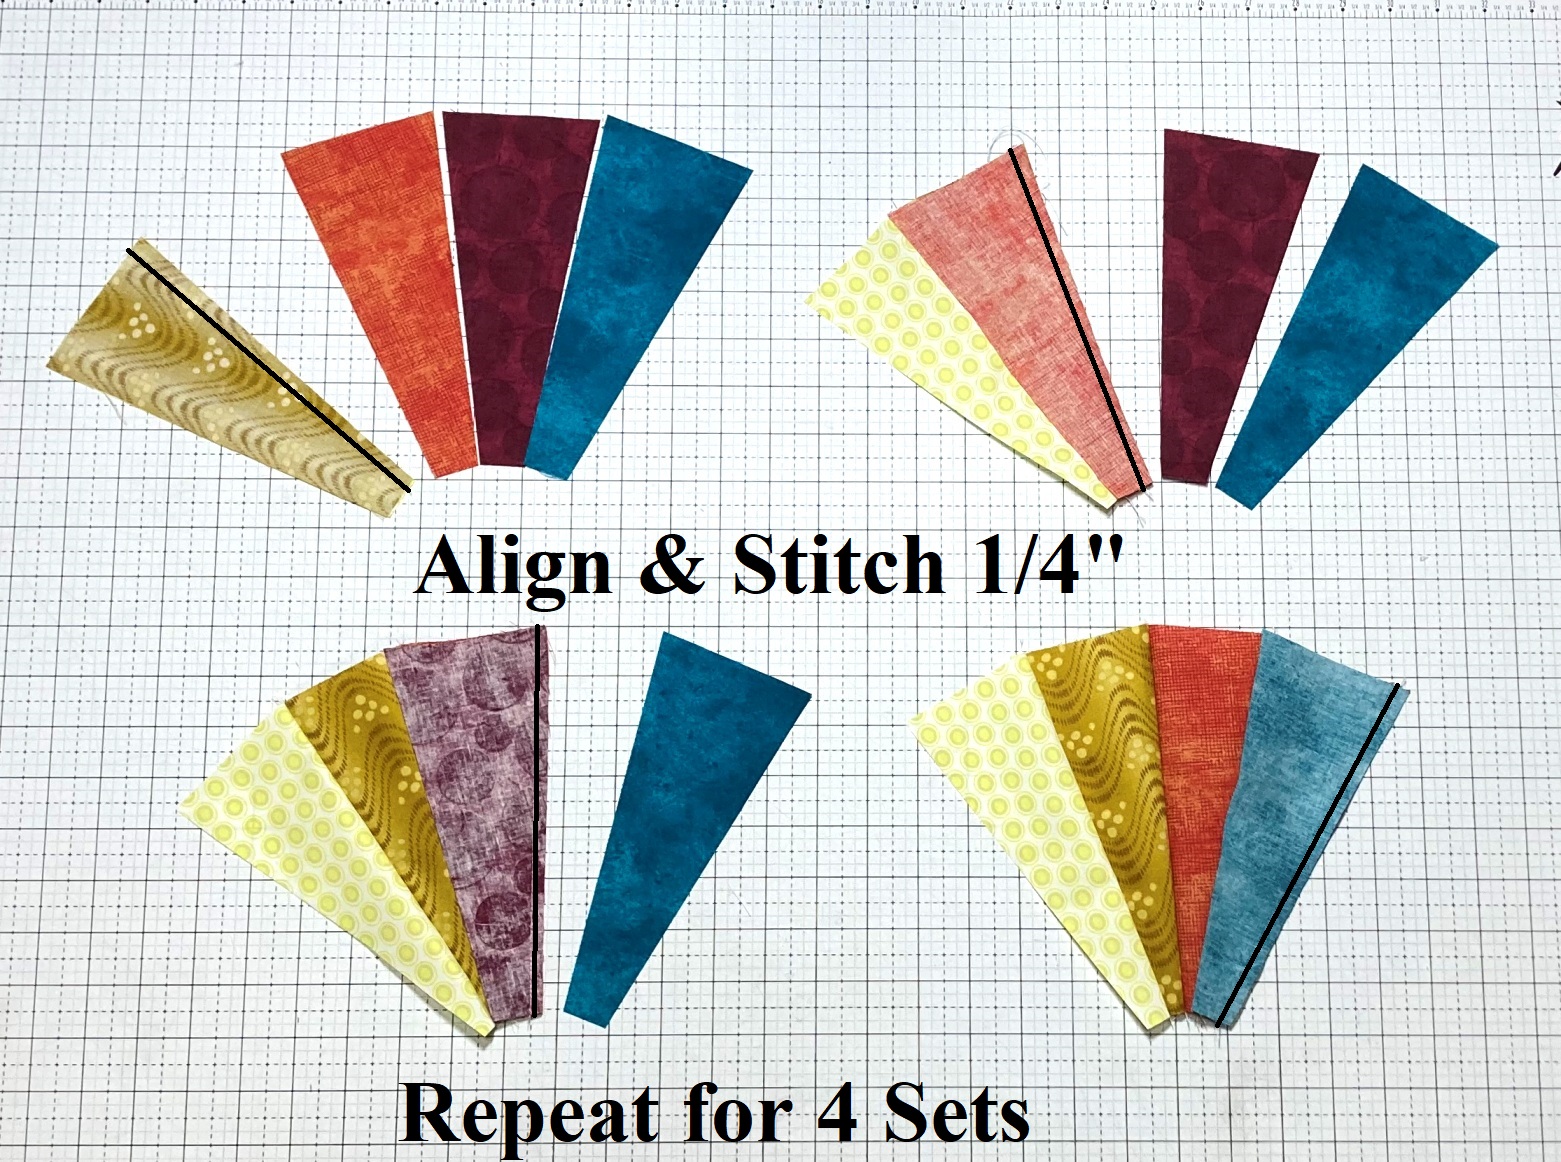
Layout 5 Dresden Templates, one of each fabric, as shown below. Layout an additional 3 sets in the same layout for a total of 4 so you can chain stitch the next step.
Place the Second Dresden Blade in each grouping onto the First Dresden Blade with right sides together and align and pin the raw edges. Stitch a 1/4" seam along the pinned edge of all 4 sets. Clip your threads and layout your units again. Now, Place the Third Dresden Blade onto the now Sewn together First/Second Dresden Blade with right sides together and align and pin the raw edges. Stitch a 1/4" seam along the pinned edge of all 4 sets. Continue in this fashion with the Fourth and Fifth Dresden Blades.
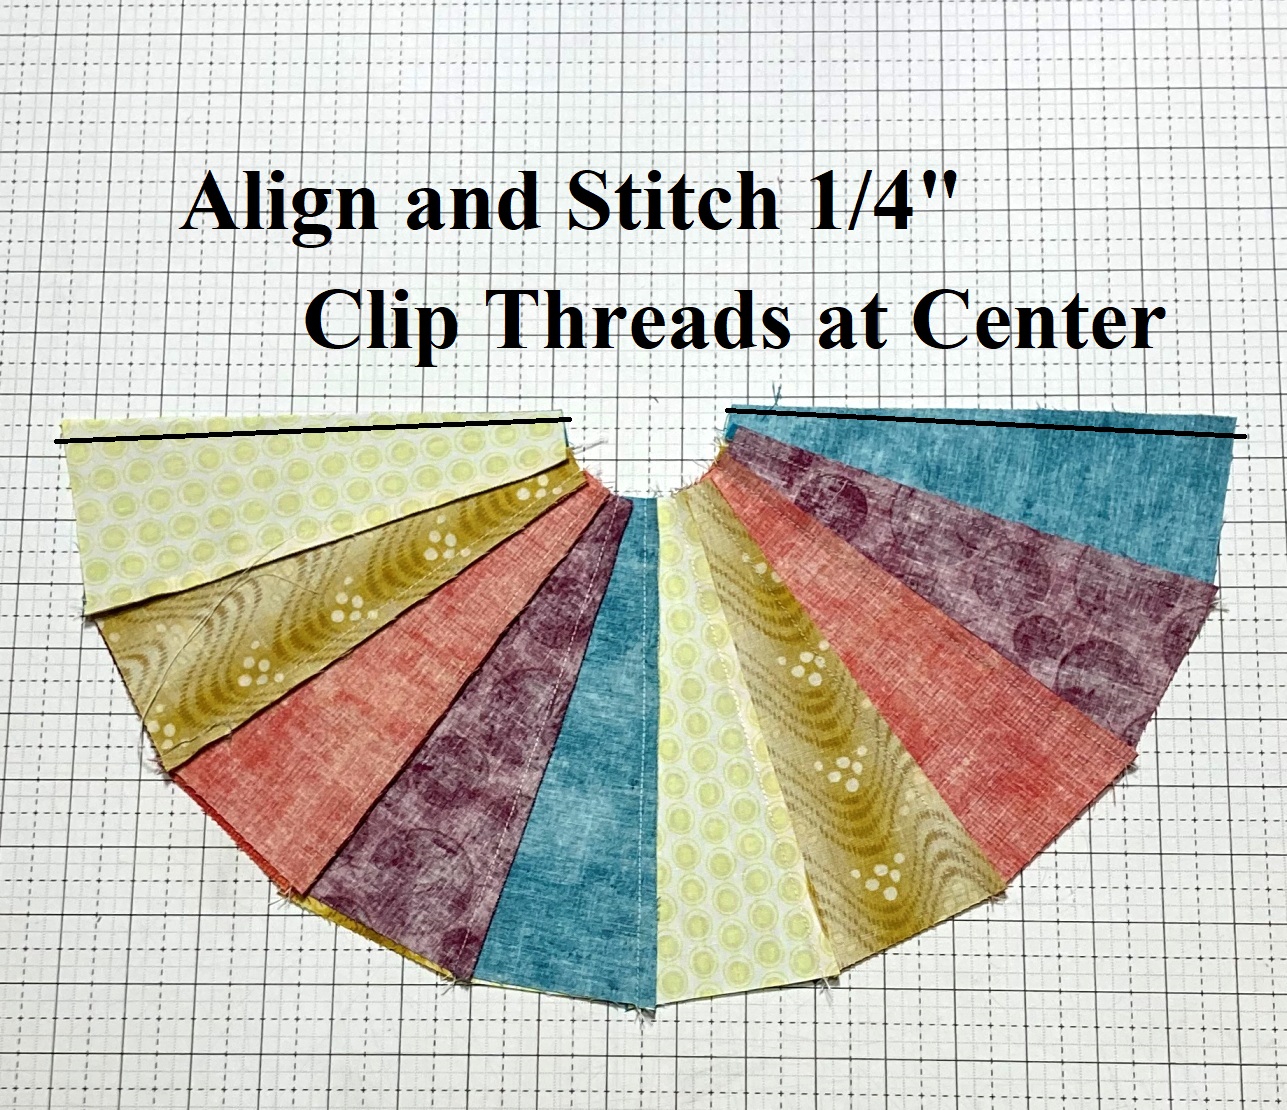
Press the seam to one side. I choose to press everything in the direction of the darker fabrics. Layout your 4 Units as shown below.
Place the Second Unit in each row onto the First Unit with right sides together and align and pin the raw edges. Stitch a 1/4" seam along both pinned edges.
Press the seams in the same direction as your previous seams, so for me, towards the Yellow Blade.
Place the First Row onto the Second Row with right sides together and align and pin the raw edges. Stitch a 1/4" seam along the pinned edge. You will need to stop and start at the center and clip the threads between the two seams.
Again, press the seams in the same direction as your previous seams, so for me, towards the Yellow Blade. And then Starch your entire Dresden Unit to ensure it is lying nice and flat before adding the center applique. You are basically ensuring that center "hole" is nice and stiff so it doesn't shift when stitching on it.
Remove the paper backing on your Circle Applique. Place your applique on the center of the Dresden Unit. To ensure centered, Fold your Maroon Circle in half twice and finger press the crease and then align the Finger Presses with the Maroon Seams in the Dresden Unit.

Once aligned, Press or Glue to secure the applique to the block. If you are Pressing with Lite Heat N Bond, be sure and put the Paper backing under the hole in the Center of the Dresden Unit to protect your ironing board cover from the Heat N Bond.
And now, you need to secure stitch the applique. You can do machine, hand, or needle turn applique and choose any color thread. Stitch around the entire Applique using desired secure stitch. I like to backstitch 1-2 stitches at the beginning and the end of my stitching just to hold it.
And all that is left, is to trim the block to a 10 1/2" Square that is offset. To do this, Use a large square ruler (mine is 12 1/2"). Align the ruler so the 10 1/2" Marks on the top and side are aligned with the seam allowance of the blades and the Diagonal center Line is through the center of the Maroon Blades as shown. Also, take special to care to ensure the bottom left hand corner has fabric under the 10 1/2" intersection.
Once your ruler is aligned, trim along the right hand side, and top of the ruler.
Now rotate the block 180 degrees on your cutting mat. Align the ruler on the Dresden Unit so that the 10 1/2" lines are along the edges you just cut. Once aligned, again, trim along the right hand side, and top of the ruler.
And just like that, you have an Offset Square Dresden Block that should measure 10 1/2" x 10 1/2" unfinished.
And that means it is time to start putting all the blocks together. So grab your Low Volume Background strips that we cut in Month 1, as well as your blocks and let's get going on . . .
Sewing Section 4

We will start by sewing some Strip Sets together. For all of these strip sets, press the seam allowance to the Larger Number fabric.
From Fabric 9 & 10, sew a 36 1/2" Strip Set together as shown.
From Fabric 11 & 12, sew a 34 1/2" Strip Set together as shown.
From Fabric 13, 14, & 15, sew a 30 1/2" Strip Set together as shown.
Now we will start sewing Blocks and Strip Sets together to make the Section.
Sew the Square in a Square Block and the 11/12 Strip Set together as shown.
Sew the Mini Heart Block and the Plus Embedded Block together as shown.
Press the Seams Open.
Sew the 9/10 Strip Set and the Sashed Square Unit together as shown.
Sew the 13/14/15 Strip Set and the Mini Heart Plus Unit together as shown.
Press the Seams towards the Strip Sets.
Sew the X's and O's Block and the Sashed Mini Heart Plus Unit together as shown.
Press the Seam Open
Sew the Sashed Square Unit and the Sashed Mini Heart Plus O Unit together as shown.
Press the Seam Open
Sew the Offset Square Dresden Block and the Sashed Mini Heart Plus O Square Unit together as shown.
Press the Seam Open.
And for the last step, you will need to gather your Section 4 Part 1 from last month as well as your 1 1/2" x 46 1/2" Strip 3 from your stash.
Sew the 3 Strip Set, Section 4 - Part 1, and Section 4- Part 2 together as shown.
Press the Seams Open.
And your Group 1 - Section 4 is complete. It should measure 16 1/2" wide by 46 1/2" high.
And now we can move on to . . .

And it's super easy. Just layout Section 1/2 from Month 1, Section 3 and 5 from Month 2, and Section 4 from this month as shown.
Place Section 3 onto Section 4 with right sides together. Align and pin the edges. Stitch a 1/4" seam along the edge. Press the seam open.
Then, place Section 5 onto Section 3/4 with right sides together. Align and pin the edges. Stitch a 1/4" seam along the edge. Press the seam open.
And finally, Place Section 1/2 onto Section 3/4/5 with right sides together. Align and pin the edges. Stitch a 1/4" seam along the edge. Press the seam open.
And your Group 1 BOHO Section is complete. It should measure 18 1/2" wide by 83 1/2" high. And that is 1/4 of the quilt top all done!!! How exciting is that ;) And that is it for BOHO Heart Block of the Month, Month 3 :)
If you have any questions on this tutorial, please don't hesitate to email me at happyquiltingmelissa@gmail.com or leave a comment.
Hope you have so much fun making all of this months blocks and really seeing a portion of your quilt top come together :)
Looking forward to Next Month!!


