It's Month 12 with my good friends at Stitchin' Heaven doing their BOHO Heart Monthly Block of the Month program and that means another month of fun tutorials!!
Month 1 Month 2 Month 3 Month 4 Month 5 Month 6
Month 7 Month 8 Month 9 Month 10 Month 11 Month 12
And since each month has Lots and Lots of Tutorials in them . . . Here is a list to jump right to the tutorial you need for this month 12:
Square in a Square Block Nine Patch Block Plus Sign Embedded Block
Wonky Flower Block Present Block Grandmother's Flower Garden Block
6" Square in a Square Block Sewing Section 4 Sewing Group 4
Sewing the Quilt Top
So you have your Month 12 BOHO Heart Packet . . . Lets get started because when we are done today, we will have a finished quilt top!!! So exciting!!!
We'll start with our first block of Month 12, the . . .
From your Month #12, Square in a Square bag, cut the fabrics according to Page 1 of the supplemental cutting list. The white square is 2 1/2" (just in case yours didn't print like mine ;)


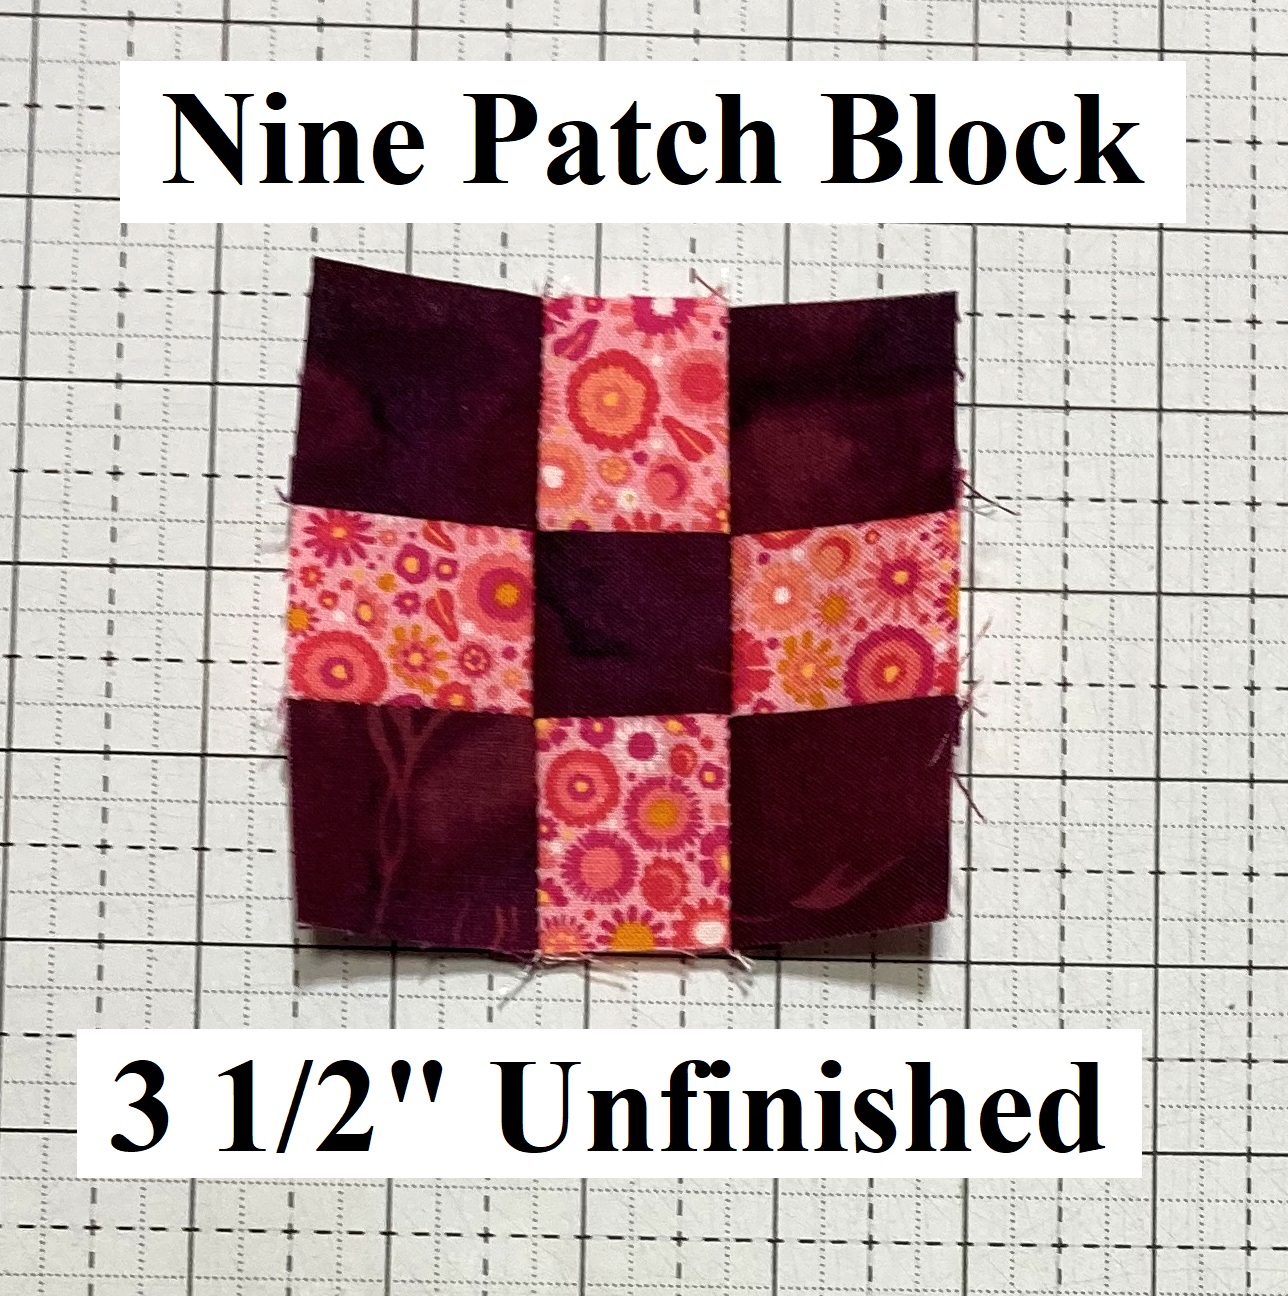
From your Month #12, Nine Patch bag, cut the fabrics according to page 1 of the supplemental cutting list.
Layout the 9 small squares as shown below. Sew the squares into a 9 patch. If you need a little extra help with this, you can use the 9 patch part of the
Shoo Fly Block Directions from Month 4.
And your Nine Patch Block is done and should measure 3 1/2" x 3 1/2" unfinished.
And now, we are moving on to a fun background block , the . . .
From your Month #12, Plus Sign Embedded bag, cut the fabrics according to Page 1 of the supplemental cutting list. From your pre-cut Strips, you will need to gather the following strips:
Strip 57 - 1 1/2" x 17 1/2" and 1 1/2" x 12 1/2"
Strip 58 - 1 1/2" x 16 1/2" and 1 1/2" x 11 1/2"
Strip 59 - 1 1/2" x 17 1/2" and 1 1/2" x 12 1/2"
Strip 60 - 1 1/2" x 30 1/2"
And now you are done and your Plus Sign Embedded in the Background Block should be measuring 4 1/2" x 30 1/2" unfinished.

And now we get to move to some more applique with the . . .
From your Month #12, Wonky Flower Bag, cut the fabrics according to page 1 of the supplemental cutting list using the 3 Wonky Flower templates.
We will move onto another super fun block , the . . .
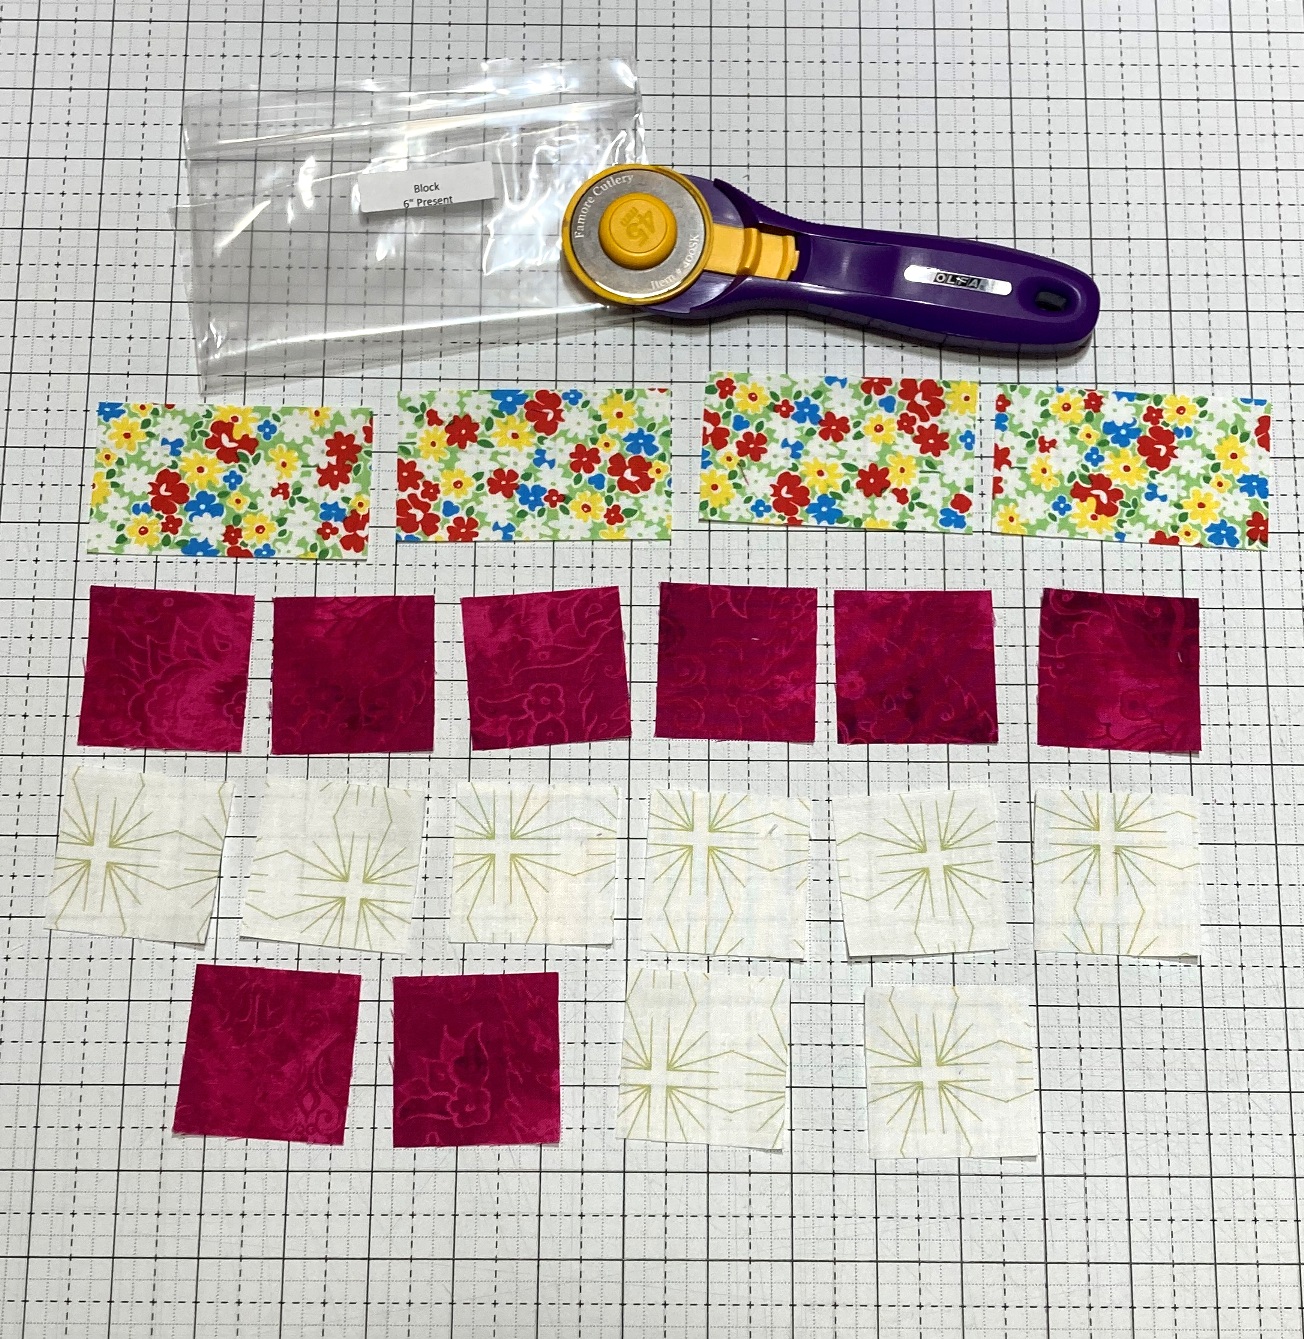
Present Block
From your Month #12, Present Block Bag, cut the fabrics according to page 1 of the supplemental cutting list.
And with that done, we will move onto a final familiar block , the . . .
Grandmother’s Flower Garden Block
From your Month #12, Grandmother's Flower Garden Bag, cut the fabrics according to page 1 of the supplemental cutting list. Also, cut at least 7 stiff paper templates of the Hexagon shape.
And now we only have 1 block left, the . . .
From your Month #12, 6" Square in a Square Bag, cut the fabrics according to page 1 of the supplemental cutting list.
And that means it is time to start putting all the blocks together. So grab your Low Volume Background strips that we cut in Month 10, as well as your blocks and let's get going on . . .

We will start by sewing some Strip Sets together. For all of these strip sets, press the seam allowance to the Larger Number fabric.
From Fabric 51, 52, & 53, sew a 23 1/2" Strip Set together as shown.
From Fabric 54, 55, & 56, sew a 26 1/2" Strip Set together as shown.
From Fabric 61 & 62, sew a 34 1/2" Strip Set together as shown.
From Fabric 63 & 64, sew a 1 1/2" Strip Set together as shown.
From Fabric 63 & 64, sew a 37 1/2" Strip Set together as shown.
From Fabric 65 & 66, sew a 40 1/2" Strip Set together as shown.
From Fabric 51, 52, 53, 54, 55, & 56, sew a 2 1/2" Strip Set together as shown. ( will fill a grey hole)

Now we will start sewing Blocks and Strip Sets together to make the Section.
Sew the Present Block and the 51/52/53/54/55/56 Strip Set together as shown.
Sew the Nine Patch Block and the 51/52/53 Strip Set together as shown.
Sew the Wonky Flower Block and the Plus Embedded Block together as shown.
Sew the Square in a Square Block and the 63/64 1 1/2" Strip Set together as shown.
Press the Seams Open.
Sew the Sashed Present Unit and the Grandmother's Flower Garden Block together as shown.
Sew the sashed 9 Patch Unit and the 54/55/56 Strip Set together as shown.
Sew the Wonky Plus Unit and the 61/62 Strip Set together as shown.
Sew the 63/64 37 1/2" Strip Set and the Sashed Square Unit together as shown.
Press the Seams towards the Strip Sets.
Sew the Sashed Present Flower Unit and the Sashed 9 Patch Unit together as shown.
Sew the 6" Square in a Square Block and the Sashed Wonky Plus Unit together as shown.
Sew the Sashed Square Unit and the 65/66 Strip Set together as shown.
Press the Seams Open
Sew the Sashed Present Flower 9 Patch Unit to the left side of the Sashed Square Wonky Plus Unit.
Then sew the Sashed Square in a Square Unit to the right side of the Sashed Square Wonky Plus Unit.
Press the Seams Open
And your Group 4 - Section 4 is complete. It should measure 16 1/2" wide by 40 1/2" high.
And now we can move on to . . .

And it's super easy. Just layout Section 1 from Month 10, Section 2, 3, and 5 from Month 11, and Section 4 from this month as shown.
Place Section 2 onto Section 1 with right sides together. Align and pin the edges. Stitch a 1/4" seam along the edge. Press the seam open. Then Place Section 3 onto Section 4 with right sides together. Align and pin the edges. Stitch a 1/4" seam along the edge. Press the seam open.
Now, place Section 5 onto Section 3/4 with right sides together. Align and pin the edges. Stitch a 1/4" seam along the edge. Press the seam open.
And finally, Place Section 1/2 onto Section 3/4/5 with right sides together. Align and pin the edges. Stitch a 1/4" seam along the edge. Press the seam open.
And your Group 4 BOHO Section is complete. It should measure 18 1/2" wide by 83 1/2" high. And that is the last Group of the quilt!!! How exciting is that ;) 
And now, all that is left is to . .

And it's super easy. From your Month 12 bag, cut 2 strips 1 1/2" x WOF each from the two low volume fabrics sent. Sew them together end to end. You can leave them the full length and trim when needed, or trim them to 83 1/2" long now. Layout the 2 strip sets, Group 1/2, Group 3, and Group 4 as shown.
Place Group 3 onto Group 1 with right sides together. Align and pin the edges. Stitch a 1/4" seam along the edge. Press the seam open.
Now, place the two Strip Sets on the outsides of Group 1/2 and Group 3/4 with right sides together. Stitch a 1/4" seam along the edge. Press the seam outwards towards the Strip Sets. If you didn't start with an 83 1/2" Strip Set, trim them even with the quilt top.
And finally, Place the Sashed Group 1/2 onto the Sashed Group 3/4 with right sides together. Align and pin the edges. Stitch a 1/4" seam along the edge. Press the seam open.
And your Boho Quilt Top is complete!!!! It should measure 70 1/2" wide by 83 1/2" high. Way to go!!!All that is left is to just
Baste It, Quilt It, and Bind it!!!! Yup, three big things in one little sentence. If you are new to quilting and need some tips on how to Baste It, Quilt It, and Bind It, you can check out my
Finishing Your Quilt Video Series. It will walk you through it all in step by step detail.
And that is it for BOHO Heart Block of the Month :)
If you have any questions on this tutorial, please don't hesitate to email me at happyquiltingmelissa@gmail.com or leave a comment.
I can't wait to see your finished quilts!!!
Happy Quilting!!


Amazing. I know how involved and time consuming this QAL was. It is amazing. Congrats. You deserve a huge medal and more.
ReplyDeleteI have been following along each month and now I am finally able to start this quilt. I don't have the supplemental cutting instructions and have been collecting fabrics for a few years so hopefully with the help of your tutorials plus the pattern book I will be successful
ReplyDeleteThere was previous talk about adding more strips to make it a litter bigger…..anyone do that?
ReplyDeleteI’m not sure what I did wrong but the 6” square in a square comes out to be 8” using the cutting guide provided. And the pink border measurements didn’t work either. Unless I wasn’t supposed to cut 2 3” squares if dark pink and 2 3” squares if dark? Now what do I do?
ReplyDelete