I am so super excited today to share with you a tutorial that I have been meaning to do for some time. I have shared so many
Charming Totes over the last few years. And then a few weeks ago I was asked by the wonderful folks at
Riley Blake Designs if I wanted to play with their new
Neverland Fabric by Jill Howarth and I knew it would be the perfect match!!!
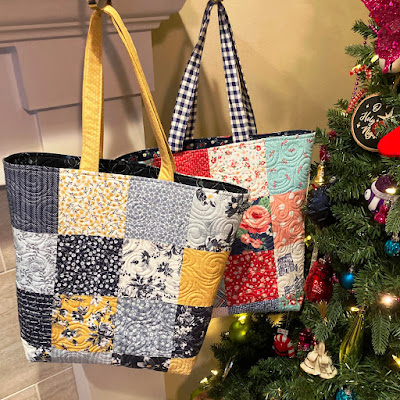
These Charming Totes are so much fun to make!!! They go together super fast, and are the perfect tote for beginners and experts alike. My children use them as piano bags, but they work great for just about anything you need to tote around.
And as you can
see from previous posts, you really can't make just 1 charming tote ;) You'll find so many uses for them. And they really do make wonderful gifts, so it's a good thing this tutorial is just in time for Christmas, right!!! So let's get to the tutorial!!!
To make a Charming Tote you will need:
1
Charm Pack or 5" Stacker - (Isn't that
Neverland fabric just to cute for words!!!)
2/3 Yard of a favorite coordinating print
2 scraps of batting 20" square or larger
STEP 1 - MAKING THE PATCHWORK SIDES
Select 16 squares from your
Charm Pack or 5" Stacker and lay them out in a 4 x 4 grid, playing with the placement until it is pleasing to the eye. And it is helpful to either mark the first blocks in each row with a pin or row marker of some sort, or be sure to take a picture of your squares so you can refer to it to keep your layout just the way you like it ;)
Sew the squares into rows. To do this, I like to place the second square onto the first with right sides together, and aligning as I go, stitch a 1/4" seam along the edge. (I chain stitch all 4 rows at a time.) Then, place the third square onto the second square, with right sides together, and once again, aligning and chain stitching as I go, stitch a 1/4" seam along the edge. And then repeat for the fourth square, sewing 4 rows of 4 squares.
Press the seams in opposite directions. So press row 1 and 3 to the left, and row 2 and 4 the the right. This will allow your seams to nest in the next step :)
Now, you can sew the rows together. This is just like making the rows, only on a bigger scale. Place row 2 onto row 1 with right sides together. Align and pin each of the seams. Sew a 1/4" seam along the pinned edge.
Now repeat this process adding row 3 to row 2 and then row 4 to row 3, moving down the tote ;) When you are finished sewing all 4 rows together, I like to press the seams open so they lay nice and flat, but you can press them to one side if you prefer.
Now repeat the process to this point of Step 1 to make a second Patchwork Side so that you have a total of 2 Patchwork Sides :) Each will measure 18 1/2" x 18 1/2".
And now, it is time to quilt the 2 Patchwork sides ;) Place your patchwork side onto a 20" square of scrap batting. You can baste it if you like, but I find it small enough to just start stitching on as the fabric tends to stick pretty well to my batting. Sometimes I will stick a pin in each of the 4 corners just to hold it in place :)
Quilt the 2 Patchwork Sides any way you like. You can then do Free Motion Quilting (
see tutorials here if this is new to you) or some straight line quilting. I decided on some simple straight lines 1/4" from the seams. Once you are done stitching, align your long ruler along the side of your Patchwork and trim the excess batting away from all 4 sides of your Patchwork. They should once again measure 18 1/2" square. (If they are a little off that is okay, as long as both measure the same size )
STEP 2 - MAKING THE PATCHWORK SIDES INTO A TOTE
Take your two Patchwork Sides and place them with right sides together. Take care to align each of the seam sets along the sides and bottom and pin them together. Sew 1/4" seam along the three sides of the bag, taking care to backstitch at the beginning of your side seams. You can pivot at the bottom corners, or simply sew off the end and start a new seam, whichever is easiest for you.
Now, using a small quilting ruler and marking tool, draw a 2 1/2" square in the bottom 2 corners of your tote. Using a sharp pair of scissors, cut the squares out of the bottom corners of your tote.
And now the fun part. Open the holes you just created and pinch them together, aligning the center seams and creating a straight line. Pin the edge closed with several pins. I like to align and nest my center seam and pin it open to help reduce bulk.
Once it is pinned nice and flat, sew a 1/4" seam along the pinned edge, taking care to backstitch at the beginning and end and over the center seam. I don't take the pins out as I sew along this as I don't want my seams to slide with all that batting, so I just slow down and go gently. And if you have a walking foot, it can help for this step ;)
Repeat the pinning and stitching on the other corner and then turn the tote right side out and push out your corners. And you have a Tote starting to form, so fun!!! You can now set this part of your tote aside for the moment and we can move onto the lining :)
STEP 3 - MAKING THE LINING
Press your selected 2/3 yardage to ensure it is nice and flat without any creases. Then from the yardage, cut the following:
(2) strips 4 1/2" x 21" strips and (2) squares 18 1/2" x 18 1/2"
And now we are going to repeat the process with the Patchwork Sides, only with a slight change. Place the 2 square lining pieces with right sides together, aligning and pinning the 2 sides and bottom. Stitch a 1/4" seam along the 2 sides taking care to backstitch at the beginning of each seam. When you get to the bottom, do not stitch straight across. Leave a 6" - 7" opening to turn the bag right side out later. Be sure to backstitch at the opening on either side along the bottom.
And that little opening is the only difference and now, you can repeat the same process as making the Patchwork Sides. Cut a 2 1/2" square out of the two bottom corners of the lining. Then pinch and align your holes into straight lines, and pin them closed. Then sew a 1/4" seam along the edge backstitching at the beginning and end of each seam.
Leave your lining right side in for the time, and just like that, you have the 2 parts for your tote all ready to go. Now all you need are some handles ;)
STEP 4 - MAKING THE HANDLES
Grab the 2 lining stripes and head to your ironing board. Fold and press the strips in half longways. Now open them up, and fold the top half in to meet the center fold line your just created. And then repeat for the bottom half pressing it to meet the center. Press both handles this way.
Now simply fold the rectangle in half again, hiding all the raw edges on the inside and press it flat. Then go to your machine and stitch an 1/8" seam along the edge of either side your handle. Stitch both handles this way. This will close up the handle on one side, and make a fun matching decorative stitch on the other side.
STEP 5 - PUTTING IT ALL TOGETHER
And now you have all the pieces made and are ready to put your tote together. Place the handles 1" away from your patchwork seams as shown below. Take care that your handle is not twisted as that is easy to do. Pin them in place with the pin heads sticking out as shown below. Repeat on the other side of the bag with the second handle.
Now, slide your lining over your pinned Patchwork tote with right sides together as shown below. Keep sliding it down until the top edges are aligned.
Align and pin the Patchwork and Lining pieces together at the two side seams first. Then pull the sides taught at the side seams and align and pin the two centers. Then, proceed to align and pin the rest of the tote top with plenty of pins. I like to put a pin through the handles as well so I know they won't shift anywhere.
Now stitch a 1/4" seam along the top, pinned edge of the tote. This is easiest if you put the tote onto the arm of your sewing machine. I like to start at a side seam, and be sure and backstitch at the beginning and end of your stitching. And again, a walking foot will really help with all of those layers ;)
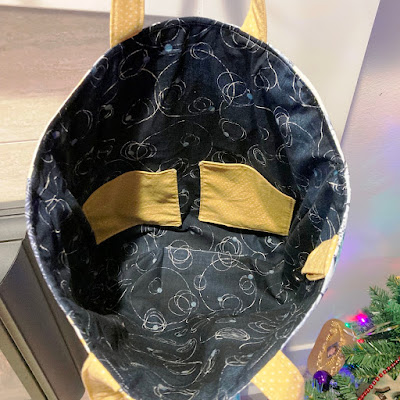
And with the top all stitched, you can now pull the Patchwork side of the tote out through hole in the bottom of the lining. This part is like magic to me!! I love how the patchwork, handles, and lining comes out of the hole perfectly sewn together, so fun!!!
And now with it's job done, we need to close up the hole. So press the raw edges of the hole in the lining inward and pin it closed. Then stitch the hole shut using a whipstitch if you are doing it by hand or machine stitch using a small 1/8" seam. Then Push the lining back into the Patchwork of the tote with wrong sides together.
Move over to the rounded end of your ironing board and place the tote around the edge. Press the top seam flat. It will want to roll up a bit, but just use your fingers to roll it back down and press it in place. You'll want a super hot heat on your iron for this ;)
Once it is pressed nice and flat, go back to your machine and stitch a 1/8" seam along the pressed edge. Again, I like to start at the side seam and backstitch a few stitches at the beginning and end of my seam. And take care while stitching to keep the handles out of the way :) This topstitch will keep the lining in the tote and the edges nice and crsip.
STEP 6 - ENJOY AND REPEAT
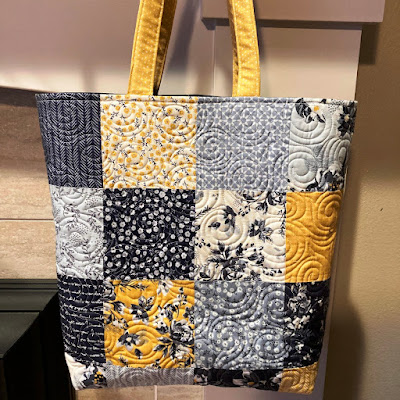
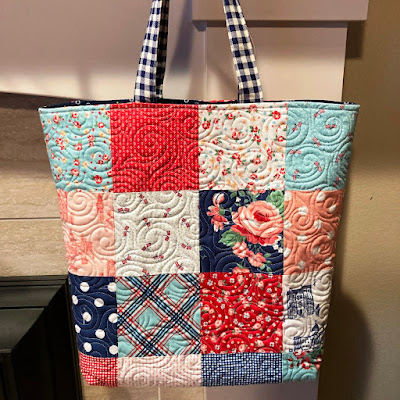
And before you know it, you are done!!! Now just sit back and enjoy your Charming Tote!!! It finishes at 18" x 16" x 4" so it really is the perfect size to tote around with you. And don't stop there, grab another
Charm Pack or 5" Stacker and get started on your next Charming Tote!! They really are just so much fun to make, I have lost track of how many I have whipped up :)
I hope you have enjoyed this tutorial and if you make your own Charming Tote I would love to see it!! You can email me a picture at happyquiltingmelissa@gmail.com or add it to my
flickr group here or post it to social media with the hashtag #happyquiltingwithmc ;) I can't wait to see your Charming Totes!!!
Thank you so much to
Riley Blake Designs for letting me play with these beautiful new
Neverland Fabrics by Jill Howarth!! They are absolutely adorable and made this Charming Tote into a treasure for a special girl :) And thank you so much for stopping in today to share this tutorial. It has been so fun to share it with all of you!!!
Have a very Happy Quilting ( and Charming ) Day!!!