Friday, June 28, 2013

Baby Refracted and Something Special

I have a fun new finish to share today that I am so excited about . . . And keep reading to the end because I also have a Special little announcement that is equally exciting!!

So baby quilts are probably my favorite size quilt to make.  Sure they go together fast, but it is so much more than that.  I just love that while I am putting a baby quilt together I keep thinking about a sweet little wee one on it's way to a family I love.  This particular quilt happens to be for my twin sister who is expecting her first boy, (second child)  next week, and I am so excited for my nephew to arrive!!!!


When I asked my sister what type of quilt she would like she requested something that would match the Snuggly Squares quilt that I made her for her first little wee one.  It is hanging in her nursery and since these little ones will be sharing a room, it needed to be matchy-matchy, but as she requested, not to matchy-matchy so it shows variety :)


So, I pulled out my treasured Pure by Sweetwater fat quarters that I had been stashing away for just such an occasion.  They have that same wonderful brown, white, and blue vibe that Snuggle Squares has, except for pink of course.


My sister loved my original Refracted Quilt  so I used the tutorial but made a  baby size version.    And . . . since I thought some of you might like the baby directions as well (and I have had several requests for the original)  . . . I made up a PDF that includes the original and baby size version.  It can be downloaded for free here :)


I quilted an all over pattern of stars and loops to finish off that All Boy feel :)  Just in case you missed it, I shared a FMQing video tutorial yesterday of how to do this design :)


I am so excited with how this quilt turned out and can't wait to give it to my sister.  I will update a picture as soon as she receives it :)

And Now . . . How about that Special Surprise.  Next week is  . . .

My 3 Year Blogiversary!!!!

I can not believe it has already been 3 years. Never in my wildest dreams would I have guessed 3 years ago that Happy Quilting would be where it is today.   What an amazing journey.  I am so grateful to all of you, my readers, for making this such a wonderful experience for me.  It would not be anything without all of you!!  And now I just can't wait to see where things go in the next year. 


So we are going to Celebrate all week long!!!  From July 1st to the 6th will be the Happy Quilting 3 Year Blogiversary Celebration!!  Each day I will share a special project that marked a milestone in the Happy Quilting Journey.  Sort of a trip down memory lane :)  And of course, it wouldn't be a party without prizes.   So each day next week there will be a fantastic giveaway. Be sure to stop by each day for a chance to win!!!!   Thank you to all of my wonderful sponsors for celebrating with me :)


And  to add a bit more to the celebration, I am marking down all of my patterns!!   From today until the 6th each of my patterns will be on sale for $5.00!!!  (And just a little note, after this week of being on sale, they will increase in price to $8.50, so if you have been thinking about it for a while, now is the time to jump on it :)  You can find instant downloads of all my patterns at my Etsy Shop :)


So That's it for today!!!  See you next week for the Happy Quilting 3 Year Blogiversary Celebration!!!!

Linking this finish to Amanda's and Sarah's :)

Pin It!

Thursday, June 27, 2013

Stars and Loops - A Free Motion Quilting Tutorial

Yup,  I have another little video for you today :)  This video walks you through the basics of creating a stars and loops all over free motion quilt design.  It's perfect for little boy quilts, especially those projects that have a bit of cowboy flair.   Hope you enjoy :)
Here is an example of the pattern :)


And here's the video :)


Have a Happy Quilting Day!!!

Pin It!

Wednesday, June 26, 2013

June's not quite over

And I have my bee blocks in the mail.  Yippee.  I tell you, this month has flown by.  I swear it was the 1st just yesterday :)

First, my blocks for the new bee I am in, The Bees Knees ;)  These blocks are for Sherri, who is crazy amazing and such a sweet person.  And she just finished her first book!!  Yippee for Sherri!!!  Sherri asked us to make some Christmas Trip Around the World Blocks.  This is my first time making these blocks (tutorial here) and it won't be my last.  These are totally addicting :)


Sherri sent these adorable Christmas prints to make the block with.  I just love the holiday colors, made we want to turn on some Christmas tunes while piecing them :)


 I pulled out my cherished Countdown to Christmas scraps to make a second block for Sherri.  I think this is still my all time favorite Christmas line!


For the Beejeeber's group, Susan asked us to make a Supernova block using bright colors.  I love the combo of colors used in the tutorial so I used the same :)  This was a great block to make and required some precision piecing which is always fun in my book :)


So my blocks are in the mail on the way to their partners, and with 5 days to spare :)

Have a Happy Quilting Day!!
Pin It!

Tuesday, June 25, 2013

While I was basting . . .

The other day I needed to baste a quilt so I let my wee ones watch a movie.  They were all sitting there happily enjoying the flick and I would pop my head out of the sewing room every so often to make sure everyone was okay.  Everybody was happy and enjoying the movie.  So imagine my surprise when I finished and went out to join the kiddo's to find my little baby girl with the remnants and the ink from the pen covering her arms and legs.

I immediately brought her upstairs and started a tub and I think she started to worry that she was in trouble so of course, she started to cry.  (For some reason, my kids still think that crying will get them out of trouble, I have never figured that one out as most often, it just gets them sent to their room faster)


 And then when mom just kept taking pictures she seemed to get a little confused so she switched tactics at that point to  stubborn pouting.   (Which made me laugh hysterically, and the whole, we don't play with pens teaching moment was over.)


She enjoyed the extremely long soak in the bath, the porcelain was stained a light tinge of blue (which I am hoping will come out in time) and there are still faint traces of the ink up her arms and legs.  

Just thought I would share this fun filled adventure to keep it real :)

Have a Happy Quilting Day :)
Pin It!

Monday, June 24, 2013

It's Here, Super Happy Dance(s)!!!

Last week a large white van pulled up outside Barbara's house  (she only lives 2 doors away so I could see it from the front window :)  and two fantastic men from Dave's Bernina started to unload these boxes.


Followed by these boxes.


And then those two wonderful men (father and son, so fun!!) set up this.


And before you know it, had this added this to it.


And then there was light!!!   It's on for the first time, so exciting!!!!


And wouldn't you know it, the first quilt top that just still happened to be in the WIP pile (shame on me) was my Tetris top :)  It is working perfect for our learning curve needs :)


Yup, pretty much happy dances all weekend long :)

So, did you do any happy dances in your sewing space this weekend ???

Pin It!

Friday, June 21, 2013

Boxes of Sweet Treats - A Baby Quilt Tutorial

Alright, so I have been sharing bits and pieces of this quilt for the last few days and I am so excited to finally get to share the finish.  So here it is . . . Boxes of Sweet Treats :)  This is a fun and easy quilt design that has lots of movement and pops here and there to really keep your eyes moving.


 The fabric is Simply Sweet by Lori Whitlock and it is just so cute and adorable.  It just made me smile to work with it.  I originally made this tutorial for Riley Blake Designs website, but when it got an update it was lost.  And I am so very sad to say, that I can't find a back-up of it.  So for now, it is lost.  But hopefully, one day, I can find it or make up a new one :)


But my absolute favorite part of the quilt . . . the cute little 3-D flower appliques in the corners.  They just add the perfect little finish and I know baby will just love playing with them.  (Not my baby, a friends baby that this is intended for :)  Just in case you missed it, I shared a tutorial for making these cute little appliques that you can find right here :)


Sorry for the Inconvenience.
Have a Happy Quilting Weekend!!

Linking this adorable finish up to Amanda's and Sarah's :)
Pin It!

Thursday, June 20, 2013

3-D Flower Applique Tutorial

I wanted to add some cute embellishments to the baby girl quilt I just finished.  I thought it would be fun to have a little something that the baby can grab on to and play with.  (Or more likely suck on :)  So I created some adorable little 3-D Flower appliques.  And I took some pictures along the way to share the process with all of you  :)


I used my Slice machine for this tutorial.  If you have been around here for a bit you know I love my Slice and use it for all of the applique in my quilts.  (which is a lot)  If you are wondering what a Slice is, you can read more on this guest tutorial I did a while back.   I also plan to do a Slice basics tutorial in the next few weeks (just need a few more hours each day :) so you can watch for that too :)  

Note - If you don't have a slice you can still do this tutorial, it just makes it a lot easier :)

To start, cut 4 1/2" squares from your desired material that you want your flowers out of.  Remember, you need a fabric for the front and the back, So you will be cutting 2 squares (can be different fabric) for each flower you want to create.  Then cut two 4 1/2" square of Fusible Web (I used the Fusible Web that Slice creates for their machine) for each flower you want to create.


Iron the fusible web squares to the wrong side of the fabric squares.  If you are using a Slice you can peel the paper backing off once it cools down.


To cut your designs out simply place your fabrics on your sticky glass mat and select a flower design you like from the Basics discs that comes with the machine and size it to 4".  Place the machine on the fabric and cut the design. (This is the first time I used the hand's free kit and I loved it!!!).   Be sure to cut the mirror image of your backing flowers so they will match up with wrong sides together.
 If you don't have a Slice, using a template trace a flower design on on the paper side of the web and cut it out using scissors, then remove the paper backing.  Again, be sure to use a mirror image of the backing.

Now, to have a cute squishy center you need some batting flowers.  Place a scrap of cotton batting on your sticky mat.  Select the same flower but size it to 3 1/2".  Place it on the scrap batting and cut the design.  It won't cut all the way through the batting (it's a little to thick) but it will give you enough of a guide and then you can go back and finish cutting all the way through with scissors.
If you are doing this without the slice, just trace a 1/2" smaller version of your template onto scrap batting and cut them out.

Now, you are going to make some mini flower quilt sandwiches.  Gather a top flower, a batting flower and a backing flower.  Layer them with right sides out and the batting in the middle and edges lined up.  Press.  The fusible web on the fabric will hold the three layers together!


Now, just to add a cute stitch around the edge.  You can use a satin stitch, zig-zag stitch, blanket stitch . . .  Whatever you like that will finish the edges and keep it securely together.  I choose to do a blanket stitch.  This can be a little tricky as you are sewing right on the edge, just be careful when lifting your presser foot to spin that you keep the fabric right next to your needle.


Stitch a button hole to the center of each of your flowers.  (I do button holes so infrequently, that I had to pull out my manual to figure out how to do it :)


Decide where you want to add the embellishments on your quilt.  Mark a dot through the button hole onto the quilt top as a reference.  Sew a button onto each dot.


And just button your adorable 3-D  appliques to the quilt top.  Done!!!  Now just sit back and enjoy watching a wee one play with those cute little appliques :)


I hope you enjoyed this tutorial.  If you decide to make your own 3-D Appliques I would love to see them.  You can add them to my Flickr group here :)

And for those wondering, I will be sharing this quilt tutorial tomorrow ;)  Until then, have a Happy Quilting Day!!!
Pin It!

Wednesday, June 19, 2013

Flower Quilting

So I am continually trying to stretch my quilting skills, especially with a long arm option that soon will be available.  I finished up a new baby girl quilt yesterday (tutorial coming soon :)  and wanted to quilt it with something new.  I opted for the Flower quilting pattern taught in Angela Walter's craftsy class and book.      Here's how it came out.  (And sorry, the threads really blend so it is a bit hard to see the design, but at least no one will see my mistakes :)


Now, this is a dense quilting pattern, which Anglea warned about on her video.  To quilt this baby quilt on my home machine, I used 12 bobbins of thread and 6 hours of quilting.  I don't think I quite knew what I was getting myself into.  It really does create a beautiful texture though, I started thinking of it as a type of girly pebbling.


In the end, I am back and forth on this design.  I haven't decided if I like the way the flowers all blend together so that you can't tell where one starts and one ends.  Sometimes I look and think cool because I just see all of that beautiful texture and other times I think man, you can hardly see all of those beautiful flowers I created.   I am sure I will do it again, because it is girly and creates amazing texture, which I love, but I think it will always stay a smaller quilt design :)
Pin It!

Tuesday, June 18, 2013

Quiltmaker Shuffle

Who knew that on top of all the mad quilting skills, that we could also dance!!!  While at Market in Portland, Barbara (my MIL) and I get our groove on with some of the 100 block designers and friends doing the Quiltmaker Shuffle.


This was so much fun!!!  Saturday morning, before the floor opened, we met with this little mob of friends.  We laughed, got super silly, danced with minimal stepping on toes, and then laughed a whole lot more. And as you tell by the video, we really had a great time!!

To find out more about the idea behind this and see the video on how to learn the Quiltmaker Shuffle pop on over to Quilty Pleasures.


Pin It!

Monday, June 17, 2013

More Starburst!!!

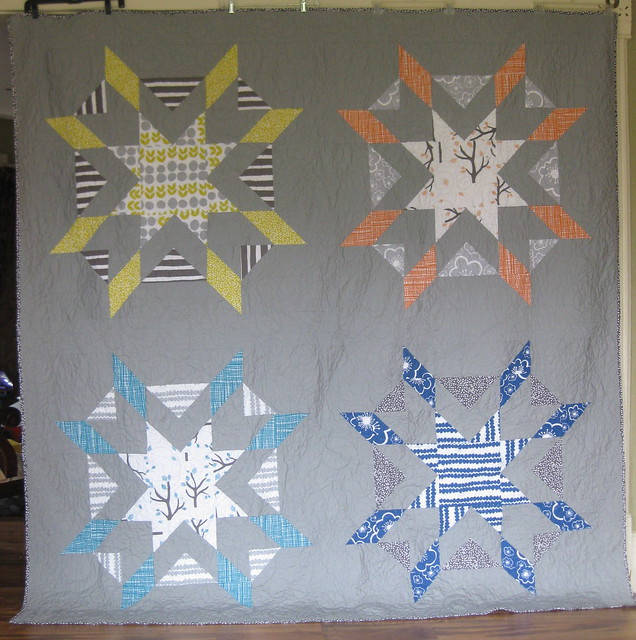
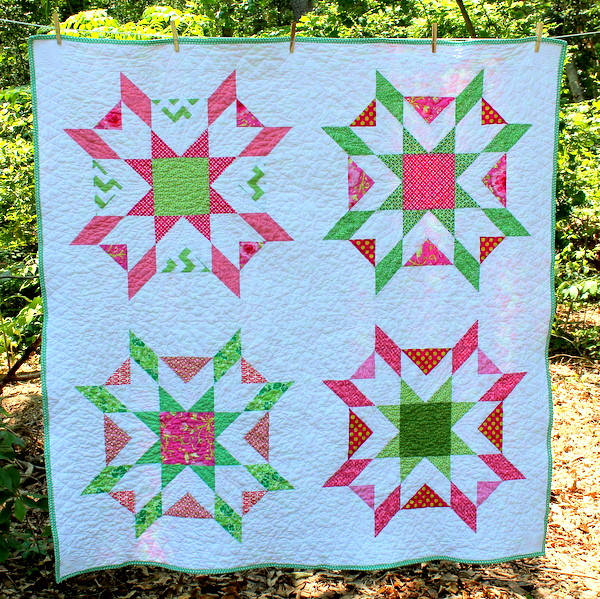
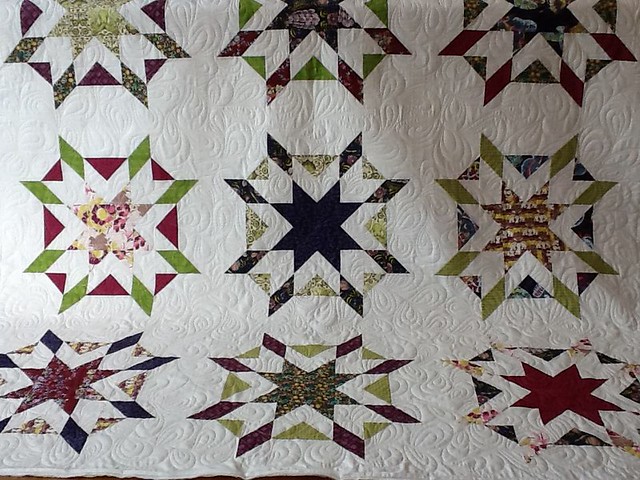
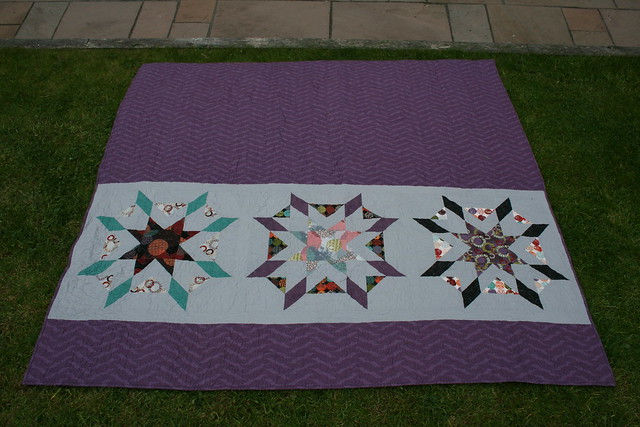
I love watching new finishes come into the Quilt-A-Long Flickr group.  It is so wonderful to see everyone's stunning creations.  So today I thought you might like to see some too.  These are the Starburst quilts that have been finished since the Parade.  I am so happy that these ladies stuck with it and finished their beautiful quilts.  Aren't they just beautiful!!


**Note - as these are taken from my flickr group I wasn't always able to find a real name to go with the quilt, so if one of these are yours and you want your actual name and location with it just email me :)  Also, all quilts are linked back to their creator's flicrkr photostream or blog, take a second and check em out :)  

Way to go ladies!!!  Your quilts are just stunning!!!

If you want to make your own Starbust Quilt you can find the Tutorial here and the Quilt-A-Long here :)

Have a Happy Quilting Day!!
Pin It!