Tuesday, November 30, 2021

Terrific Tuesday Giveaway Day!!!

 It's Terrific Tuesday Giveaway Day!! Let's have some fun :)

First, we need to announce the winner from last Terrific Tuesday Giveaway!!  
The winner of the Low Volume Christmas Bundle from Olie and Evie  is . . .   Number #362 . . . Congrats wkmyers1!  I have messaged you :)  


And on to today's

Today's Terrific Tuesday Giveaway is being sponsored by Green Fairy Quilts.  Green Fairy Quilts is your home for pre-cut goodness and they always have amazing sales going on every weekend on a selected pre-cut or notion!!!   And did you know that Green Fairy Quilts has a Deal of The Day, I just love these!!!    And Green Fairy Quilts is still having their CYBER MONDAY SALE with pre-cuts 50-75% off!!!!  It only goes till Wed. so get it while it lasts ;)
And for today's Terrific Tuesday Giveaway, Green Fairy Quilts will be giving one lucky reader 3 Moda Scrap Bags!!!  These bags are filled with Scrappy Goodness of some of your favorite Moda Lines, and it will be such a fun surprise to see which ones you get!!!!  


You have two entry chances here on the blog, and please leave a separate comment for each.  All Entries are welcome, including International Entries.   Please just be sure to leave an email address if you are a no-reply blogger ;)  

ENTRY 1 - Simply leave a comment that tells me if you have a themed Christmas Tree or A whole bunch of everything Christmas Tree??  

 ENTRY 2 - Show your Green Fairy Quilts love.   You can Sign up for their Newsletter which I highly recommend as it will ensure you catch all of their amazing sales!!  You can follow them on Instagram or Facebook,  or you can visit the Shop and then share a favorite item ;)   Just be sure to leave a comment of how you showed your Green Fairy Quilt Love!!!

And that's it ;)  The giveaway will be open until next Tuesday, December 7th, when I will announce a winner at the beginning of next weeks Terrific Tuesday Giveaway Post :)

You can also pop over to my Instagram and/or Facebook to enter there as well :)  

Good Luck and Have a Happy Quilting Day!!!
Pin It!

Monday, November 29, 2021

A Little Quiet

 Hi Quilting Friends,   Sorry it has been a little quiet around here in the last week.  I went out of town for the Holiday and was so busy before hand, I didn't even think about setting up pre-written posts before I left.   Which meant I totally missed my annual Black Friday - Cyber Monday posts.    So instead, I have decided I will be having a "Holiday Sale" soon.  I am working on a new pattern and would like to get it released with the sale, so I am not sure exactly what date the "Holiday Sale" will be, but just keep an eye out.  It's going to be a great one!!!

And just because every post should have a quilt picture . . . here is a sneak peek of one of my secret projects.  Can't wait to share more!!!


I hope you all are having a very Happy Quilting Day!!!  I know I for one am super happy to get back to my sewing machine and get stitching!!!  

Pin It!

Tuesday, November 23, 2021

Terrific Tuesday Giveaway Day!!!

 It's Terrific Tuesday Giveaway Day!! Let's have some fun :)

First, we need to announce the winner from last Terrific Tuesday Giveaway!!  
The winner of the Festive Figs Lou Lou Bundle from Lou Lou's Fabric Shop  is . . .   Number #115 . . . Congrats nanaani_creates!  I have messaged you :)  


And on to today's

Today's Terrific Tuesday Giveaway is being sponsored by Olie and Evie.  Rhonda's shop is so fun and full of so much amazing quilting goodness!!!!  Of course, there is the amazing fabric shop we all know and love along with longarm quiltinggift certificatespreorders, and an awesome Clearance Sale!!  And right now, get 15% off for this whole week, (excluding preorders, clearance items, and select curated kits)   Be sure to pop on over and check it out!!! 

And Rhonda's has a fantastic Terrific Tuesday Giveaway Day!!!!     Olie and Evie  is giving one lucky winner a Low Volume Christmas Bundle by Corey Yoder for Moda.   These are just such beautiful prints and perfect to get one lucky winner all set for some seasonal sewing ;)  

You have two entry chances here on the blog, and please leave a separate comment for each.  All Entries are welcome, including International Entries.   Please just be sure to leave an email address if you are a no-reply blogger ;)  


ENTRY 1 - Simply leave a comment that tells me if you have made a quilt with a Low Volume Background??  

 ENTRY 2 - Show your Olie and Evie love.   You can follow them on  FacebookInstagram  or Pinterest or you can visit The Shop and then share a favorite item ;)   Just be sure to leave a comment of how you showed your Olie and Evie Love!!!

And that's it ;)  The giveaway will be open until next Tuesday, November 30th, when I will announce a winner at the beginning of next weeks Terrific Tuesday Giveaway Post :)

You can also pop over to my Instagram and/or Facebook to enter there as well :)  

Good Luck and Have a Happy Quilting Day!!!
Pin It!

Saturday, November 20, 2021

3 New Sew Sampler Swirls!!!

This week I have been all about Sew Sampler box projects!!  I have had these "kits" sitting on my counter tops just waiting to be cut into.  So I finally dove in, and before you know it . . . 3 new quilt tops all swirled and waiting to be quilted!!!  I had so much fun just sewing these up.   Sometimes it is just so fun to sew up these projects that I can just follow a pattern and don't have to think about taking pictures or writing patterns.   ** Not that I don't love to do that for you all too, this is just a good mental break :)  


I absolutely fell in love with this Mon Cheri Pattern from last month's Sew Sampler box!!    In fact, I loved it so much, it is what prompted me to finally get going on these!!  Isn't  that Whimsical Romance Fabric Line by Keera Job for Riley Blake Designs just beautiful!!!  It is the same fabric I used for my Moonstones Quilt that I shared a Free PDF of a few weeks ago and I think it is so cute in this quilt.  It is the perfect fit for this adorable pattern :)  


And then from August Sew Sampler box, I whipped up this In Stitches quilt top.  Won't this just make the most adorable baby quilt!!   And when I say whipped up, it really does indeed whip up!!!   I had this top done in half a day, so fun and fast!!   The quilt uses a Stitch Jolly Bar and background, so it was super fun to just grab a background and get stitching :)


And last but not least, I finally started sewing up my Sprouts Sprouted quilt!!!  This is from the March 2019 Sew Sampler box  and last month I decided to use up some Sherri and Chelsi's Seashore Drive scraps (from a secret project, this line isn't available yet ;) and make up the Sprouts pattern, only I upsized the block, so it is Sprouts Sprouted ;)     And I love the low volume background, so fun!!!


So now, it is time to make up some quilt backs and get to some serious Happy Quilting!!!   Like seriously, I need a quilting marathon!!!   I think this makes over 20 quilt tops waiting to be quilted :)    Glad to be in great company with all you fellow quilters with a pile of "to be quilted" tops!!

I hope you are all having a very Happy Quilting Weekend!!

Pin It!

Thursday, November 18, 2021

Lake Powell Quilt Retreat!!!

 This last weekend I had the wonderful opportunity to teach at the Lake Powell Quilt Retreat and it was oh so much fun!!!   This was my first time teaching at this retreat in Page Arizona and it was so wonderful to get to meet so many new wonderful quilty friends!!!   I really loved that at this retreat, when you are not in class, they have tables set up in the hallways, and everyone just quilts and laughs together.  So much fun!!!  


The first class I taught was my Thursday evening and it was my  Scraptastic Stars pattern ;)  This is always a great class to teach as we play with scraps :)   I love bringing along lots and lots of 2 1/2" squares from my scraps that everyone can go through and add into their blocks ;)  It is just so fun to see a little scrap of my quilts added into theirs.   And everyone's blocks turned out just so cute!!  It was a great class ;)


Friday afternoon I taught my Nordic Nights pattern.   And yes indeed, we got our curved sewing on!!!  Everyone just did amazing, and for a lot of them, it was their first time piecing curves in quilting.   Just so awesome!!!  I just loved seeing all of their amazing blocks come together and I can't wait to see these quilts all finished up ;) 


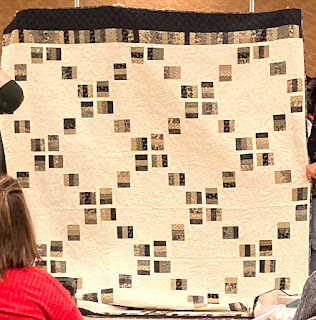
And speaking of finished quilts, Friday evening was an awesome Trunk Show and Shelly was one of the gals sharing.  She has taken my classes at other retreats, and so she shared a bunch of quilts from my patterns.   That was so fun to see and she was so sweet to say how much she loved my classes.   She has been making her way through my Charming Baby Quilts Book and shared these 4 amazing baby quilts!!  Aren't they just so fun!!!  I love the red backgrounds, so great!! 


Then Shelly shared this Coins in the Fountain quilt from my Irish Chain Quilts book.  I love it in the neutral colors, just gorgeous!!!  It was so great to see a quilt from my first book, that was a while ago so it was a great throwback ;)  


And then Shelly shared this beautiful Nordic Nights  quilt that she had started in one of those mentioned classes.   Isn't this just so fun in Kaffe, so bright and bold!!!  It was just such a treat to see so many of my quilt designs made by Shelly, she is just a sweetheart :) 


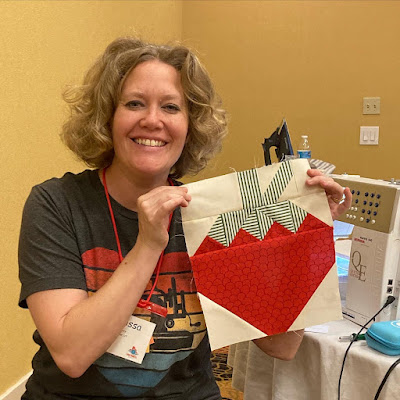
Oh, and one last note ;)   While at the Lake Powell Quilt Retreat I actually took a class as well.   Mimi and Diane were teaching this super adorable Strawberry Social class from The Pattern Basket.  And is this not the cutest class set up ever!!!   This was such a fun class and I really enjoyed it ;)    And best of all, I totally used scraps, yippee for another scrap buster!!! 


I started with one block, and of course, I choose the fabrics that reminded me the most of Strawberry Shortcake.  Don't these fabrics totally remind you of her little tights and dress, so fun!!!   And if ya can't tell from the picture, I totally enlarged the block :)   I wanted to make a twin size quilt without having to make a ton of blocks, so I just made them bigger.  Ya know me, always changing things up ;)


And I was having so much fun with this, it totally became a Quilt in a Day!!!   I couldn't sleep past 5 am so I went to class a "little" early and got started chain piecing.   I continued chain piecing in class, and then got right back to it after my Nordic Nights class ;)   By 10 pm, I had a finished quilt top!!!   So, so, so much fun :)   Now just to get this quilted up!!! 


And that was the Lake Powell Quilt Retreat in a nutshell.   I am already looking forward to next year and sewing the days away with so many wonderful friends.   

And I would love to sew with you all some time.  You can click on the Teaching Tab at the top of the blog to see a list of places I am teaching, I am mostly in the West, but who knows, maybe someday I will get out East ;)  

I hope you all have a very Happy Quilting Day!!
  
Pin It!

Tuesday, November 16, 2021

Terrific Tuesday Giveaway Day!!!

 It's Terrific Tuesday Giveaway Day!! Let's have some fun :)

First, we need to announce the winner from last Terrific Tuesday Giveaway!!  
The winner of the Red Barn Christmas Layer Cake from Fat Quarter Shop  is . . .   Number #447 . . . Congrats gracie_bird!  I have messaged you :)  


And on to today's

Today's Terrific Tuesday Giveaway is being sponsored by  Lou Lou's Fabric Shop .    Did you know that Jamie makes a new Lou Lou Bundle every Tuesday . . . a Lou Lou Bundle is 8 fat quarters curated by Jamie and they are always gorgeous and there are so many to choose from!  And right now, use code "HappyQuilting" to get 20% off all Lou Lou Bundles until Friday!!!       Such Fun Shopping :)  


Today's Terrific Tuesday Giveaway is for some Lou Lou Goodness!!  Lou Lou's Fabric Shop is giving one lucky reader a Festive Figs Lou Lou Bundle perfect to use for this festive time of year :)  What a great bundle to win!!! 


You have two entry chances here on the blog, and please leave a separate comment for each.  All Entries are welcome, including International Entries.   Please just be sure to leave an email address if you are a no-reply blogger ;)  

ENTRY 1 - Simply leave a comment that tells me a Festive Family Tradition from this time of year??  

 ENTRY 2 - Lets show Lou Lou's Fabric Shop some Love!!!!   You can follow them on   FacebookTwitterPinterest, or Instagram.  Or you can follow their blog or  visit The Shop and then share a favorite item ;)   Just be sure to leave a comment of how you showed your Lou Lou's Fabric Shop Love!!!

And that's it ;)  The giveaway will be open until next Tuesday, November 23rd, when I will announce a winner at the beginning of next weeks Terrific Tuesday Giveaway Post :)

You can also pop over to my Instagram and/or Facebook to enter there as well :)  

Good Luck and Have a Happy Quilting Day!!!
Pin It!

Wednesday, November 10, 2021

Texas Monthly - Month 11!!

Can you believe it!!!  It is the last month of piecing blocks for the  Texas Monthly Block of the Month program!   This BOM is hosted by Stitchin' Heaven  and is so much fun!!!    All we have left after this is Borders, so exciting!!!   

So let's get going!!  There are 2 blocks this month and we get to do regular piecing :)  The blocks are all pretty basic and fast and fun to sew.    So let's get piecing!!!  


Cutting

I like to start out by pressing all of my fabrics.  Then it is time for cutting!!!  I like to cut all of my pieces for all of my blocks at the start.  Just be sure to keep them in piles separate for each block.  

And with all your pieces cut . . . you are ready to move on to the first block.


The Log Cabin Block

Log Cabin Blocks are super fun to make and fairly simple.  Just make sure to pay attention that you always lay your block out in the same direction and continue to add pieces in a clockwise direction.  They can easily get flipped ;)  We will be making 2 Log Cabin blocks so you want to repeat each of these steps twice.

Layout your Fabric 22 Center square and Fabric 11 Short rectangle as shown.  Place the Fabric 11 rectangle onto the left hand side of the Fabric 22 square with right sides together and stitch a 1/4" seam along the edge.  


Press the seam towards the Fabric 11 Rectangle.   Then place the Fabric 11 Long rectangle onto the top of the Fabric 22 square with right sides together and stitch a 1/4" seam along the edge.  


Press the seam towards the Fabric 11 Rectangle.   Now place the Fabric 7 Short rectangle onto the Right Hand Side of the Fabric 22 square with right sides together and stitch a 1/4" seam along the edge.  


Press the seam towards the Fabric 7 Rectangle.   Now place the Fabric 7 Long rectangle onto the Bottom of the Fabric 22 square with right sides together and stitch a 1/4" seam along the edge.  


Press the seam towards the Fabric 7 Rectangle.   At this point, I like to place a Pin at the first seam.  This helps me to remember when adding more pieces where my start is and so I can make sure I lay out all my pieces correctly.  We are going to speed things up a bit now :)   


We will now add the Fabric 12 rectangles.   Place the Fabric 11 Short rectangle onto the Left Hand Side of the Log Cabin Unit with right sides together and stitch a 1/4" seam along the edge.  Press the seam towards the Fabric 12 rectangle.   Now place the Fabric 12 Long rectangle onto the Top of the Log Cabin Unit with right sides together and stitch a 1/4" seam along the edge.  Press the seam towards the Fabric 12 rectangle. 


Now we add the Fabric 21 rectangles.   Place the Fabric 21 Short rectangle onto the Right Hand Side of the Log Cabin Unit with right sides together and stitch a 1/4" seam along the edge.  Press the seam towards the Fabric 21 rectangle.   Now place the Fabric 21 Long rectangle onto the Bottom of the Log Cabin Unit with right sides together and stitch a 1/4" seam along the edge.  Press the seam towards the Fabric 21 rectangle. 

**And remember where I said at the beginning that these pieces can easily get flipped??  Ya, this photo needed a little editing thanks so a little whoops on my part ;)  


Onto the Fabric 9 rectangles.   Place the Fabric 9 Short rectangle onto the Left Hand Side of the Log Cabin Unit with right sides together and stitch a 1/4" seam along the edge.  Press the seam towards the Fabric 9 rectangle.   Now place the Fabric 9 Long rectangle onto the Top of the Log Cabin Unit with right sides together and stitch a 1/4" seam along the edge.  Press the seam towards the Fabric 9 rectangle. 


And finally, we add the Fabric 19 rectangles.   Place the Fabric 19 Short rectangle onto the Right Hand Side of the Log Cabin Unit with right sides together and stitch a 1/4" seam along the edge.  Press the seam towards the Fabric 19 rectangle.   Now place the Fabric 19 Long rectangle onto the Bottom of the Log Cabin Unit with right sides together and stitch a 1/4" seam along the edge.  Press the seam towards the Fabric 19 rectangle. 


And just like that, you have two gorgeous Log Cabin Blocks that should measure 10 1/2" x 10 1/2" unfinished.  


So now you are ready to move onto to making two of the . . . 

Quarter Square Triangle Blocks


We made Quarter Square Triangle Blocks back in Month 5 so this will be a snap ;)  Start by gathering your 16 squares and draw a diagonal line on the wrong side of each of the White squares.  


Match a Marked White square to each of the Blue/Green squares.  Align the two squares with right sides together.   Stitch a 1/4" seam on either side of the drawn line.  


Cut on the drawn line and then press the seam allowances towards the Blue/Green triangles.     Do not Trim at this point, I know that is what you are used to with HST's, but we don't need to trim with Quarter Square Triangles ;0  


Draw a diagonal line in the opposite direction of the seam on the wrong side of each of the Blue HST's.


Align a Marked Blue and a Green HST with right sides together nesting the center seam with the White fabrics on opposite sides.   Pin in place and then stitch a 1/4" seam on either side of the drawn line.  


Cut on the drawn line and then press the seam allowances open.  Trim the tails from the edges of the Quarter Square Triangle Units.  They should not need to be trimmed beyond the tails ;)  


You will have 16 Quarter Square Triangles but 3 can go in your orphan block pile as you will only use 13.    Layout 13 Quarter Square Triangles as shown below, one row of 9 and one row of 4 with the Blue Triangles on top for the long row and the Green Triangles on top for the short row.   


Place the second QST in each row onto the first QST with right sides together.   Align, taking care to match the seams on the corners and pin.  Stitch a 1/4" seam along the pinned edges.  


Then place the third QST in each row onto the second QST with right sides together.   Align, taking care to match the seams on the corners and pin.  Stitch a 1/4" seam along the pinned edges.   Continue in this fashion until you have stitched both rows together. 


You should now have a row of 9 QST Blocks and a row of 4 QST Blocks.   Press the seams open.  


And now you have 2 beautiful  Quarter Square Triangle Block Rows that are just so great!!!  The short row should measure 4 1/2" x 16 1/2" unfinished and the long row should measure 4 1/2" x 36 1/2".  


And now all your blocks are made for the entire quilt!!!!  So now let's take this month's blocks and sew them into the Bottom Section!!  

Bottom Section 


To start, we need to trim the Longhorns and Calves panel.  we will be trimming the panel to 5 1/2" x 16 1/2".  To do this and keep your cattle centered, measure in 1" from the top of the middle Longhorn's horns.   Also, measure in 1" from the rump of the right hand calf.  To double check you are aligned, at this point the left hand Longhorn  rump  should be at 15 1/2" on your ruler and the bottom of the hooves should be at 4 1/2" on your ruler.   Once you are all aligned, Trim along the top and and right hand side of your ruler.   


Now turn your Longhorns and Calves panel upside down.  Align the 16 1/2" Vertical Line and the 5 1/2" Horizontal lines on your ruler with the trimmed edges you just cut.     Once you are all aligned, Trim along the top and and right hand side of your ruler.     Your panel will now measure 5 1/2" x 16 1/2".   Also, from that random green strip in your packet, cut a 1 1/2" x 16 1/2" rectangle.  


Place the Green rectangle onto the bottom of the Panel with right sides together.  Stitch a 1/4" seam along the edge.  Press the seam towards the Green strip. 


Now place the Short Quarter Square Triangle row onto the bottom of the Green Strip with right sides together.  Stitch a 1/4" seam along the edge, taking care to stitch along the bottom of each of the Fabric V's so you get perfect points.    Press the seam towards the Green Strip.  


And now, we can add in the rest of this month's blocks!!  Layout your Panel Section, the Long QST Row, and the 2 Log Cabin blocks as shown below.  Take care your Log Cabin blocks are mirror images of each other in the layout.  


Place the Log Cabin Blocks onto the Panel Section with right sides together.  Sew a 1/4" seam along the edges.  Press the seams towards the Log Cabin blocks.  


Then place the long Quarter Square Triangle row onto the bottom of the section with right sides together.  Sew a 1/4" seam along the edges.  Again, take care to stitch along the bottom of each of the Fabric V's so you get perfect points.    Press the seam open. 


And the Bottom Section is complete!!! 


And now we can turn that Bottom Section into the Bottom Row!!!

Bottom Row

Layout your Paper Pieced Blocks from Month 10 on either side of the Bottom Section as shown. 


Place the Paper Pieced Blocks onto the Bottom Section with right sides together and pin and align them.  Stitch a 1/4" seam along the edges.  Press the seams towards the Paper Pieced Blocks.  


And just like that, your Bottom Row is done.  It should measure appx. 14 1/2" x 64 1/2".


And now, with all of your Quilt Section done, you are ready to assemble the Center of the Quilt!!!

Quilt Center

Layout your 5 Quilt Sections as shown below.  Isn't it so fun to see it all laid out together!!! 


Place the Left Hand Center section onto the Middle Center Section with right sides together.   Align and pin the seams.  Stitch a 1/4" seam along the edge, again, watching for your Fabric V's to stitch along the bottom to ensure those perfect points!!  


Now place the Right Hand Center section onto the Middle Center Section with right sides together.   Align and pin the seams.  Stitch a 1/4" seam along the edge, and once again, watch for your Fabric V's to stitch along the bottom.  


Press the two seams open.   And all that is left is to stitch these 3 rows together!!! 


Place the Top and Bottom Row onto the Center Row with right sides together.   Align and pin the seams.  Stitch a 1/4" seam along the edge, and you know, watch for your Fabric V's to stitch along the bottom.  Press the two seams open.  


And your Quilt Center is complete!!!  Isn't it just gorgeous!!!   It should measure appx. 64 1/2" x 70 1/2"


Great job!!!  So exciting!!!!!  Now we just have to wait for Month 12 to do the borders and finish this all up!!!  

Your Texas Monthly quilt is just about done!!!  Hope you loved this month ;)  

If you have any questions on this tutorial, please don't hesitate to email me at happyquiltingmelissa@gmail.com or leave a comment.  

Hope y'all enjoy making this month's blocks! 

 Looking forward to our last Month!

Pin It!