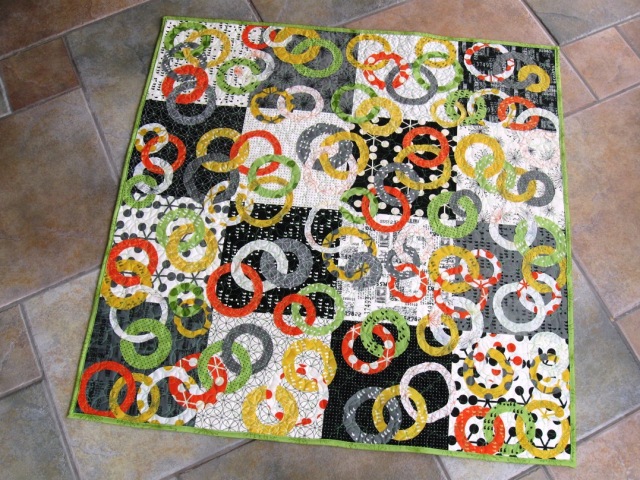
The quilt is made with raw edge applique and so it will get a scruffy look after each washing. So fun!!! And even though it looks a little complex, it is really beginner friendly and goes together quick. It measures 38" x 38", the perfect size for the on the go mom.
And now that this
Moda Bake Shop Tutorial has been published for a while, I can now post it here
on my blog for your convenience ;) So just follow along
below for the full step-by-step tutorial. And if you love it, you can get
the printer friendly version here :)
And I also have a bonus tutorial today!! So Be Sure to scroll down to find that!!!

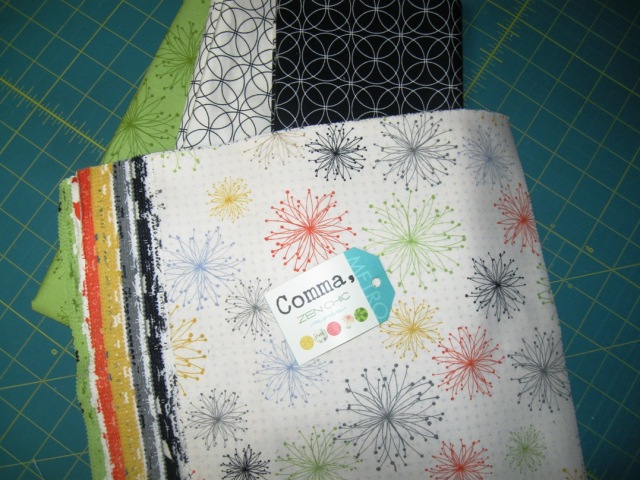
1 Comma Layer Cake
1 yard of favorite black print for pieced back, I used 1513 16
1/4 yard of favorite white print for pieced back, I used 1513 11
1/3 yard of favorite print for binding, I used 1512 20
Spray Baste
1 yard of favorite black print for pieced back, I used 1513 16
1/4 yard of favorite white print for pieced back, I used 1513 11
1/3 yard of favorite print for binding, I used 1512 20
Spray Baste

STEP 1 – PIECING THE QUILT TOP
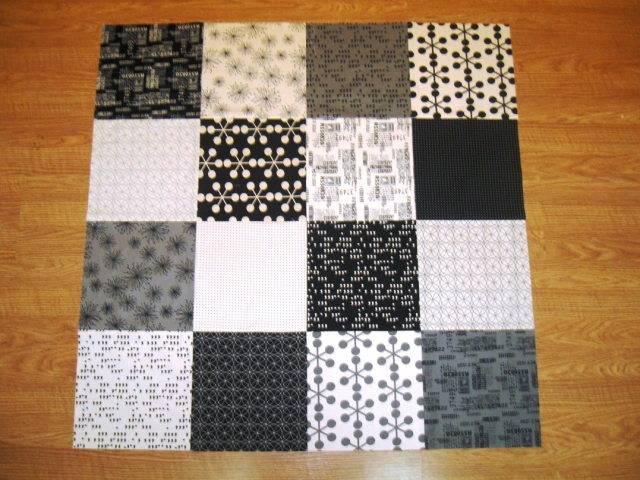
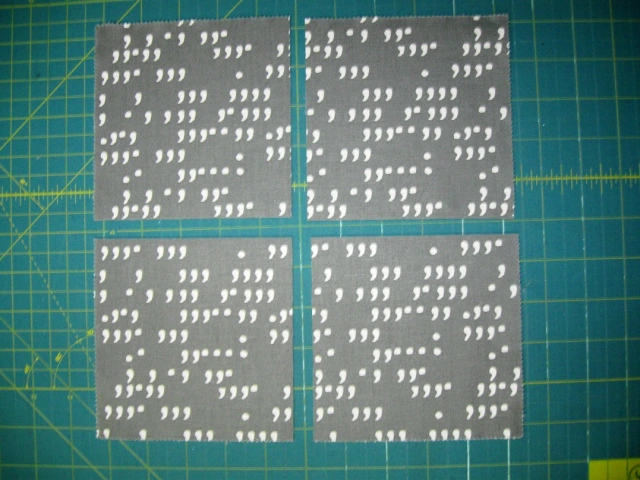
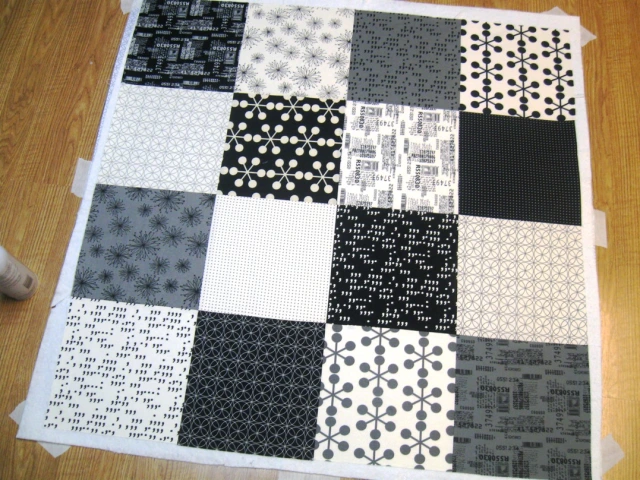
From your layer cake select the 5 black/white squares, the 3 grey/black squares, and the 8 white/black squares. Lay them out in a 4 x 4 grid alternating black and white prints as shown.
From your layer cake select the 5 black/white squares, the 3 grey/black squares, and the 8 white/black squares. Lay them out in a 4 x 4 grid alternating black and white prints as shown.
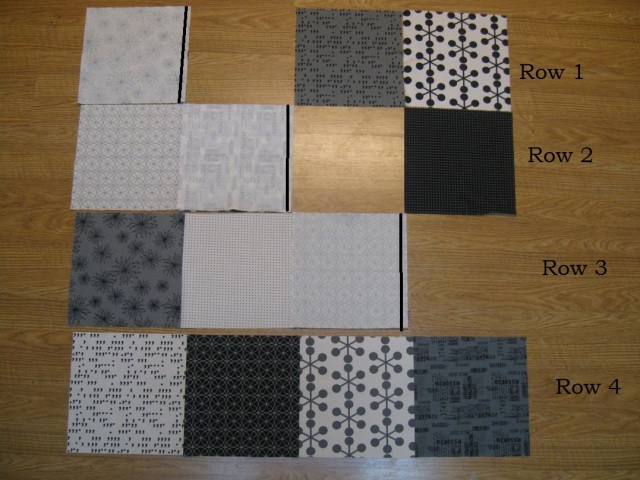
Sew the blocks into rows. Place the second block onto the first with right sides together and sew a 1/4″ seam along the edge as shown in row 1. I don’t pin these, I just align as I go. Then place the third block onto the now sewn together 1st and 2nd blocks and sew a 1/4″ seam as shown in row 2. Repeat process for the fourth block as shown in row 4. Press towards the black/grey blocks.
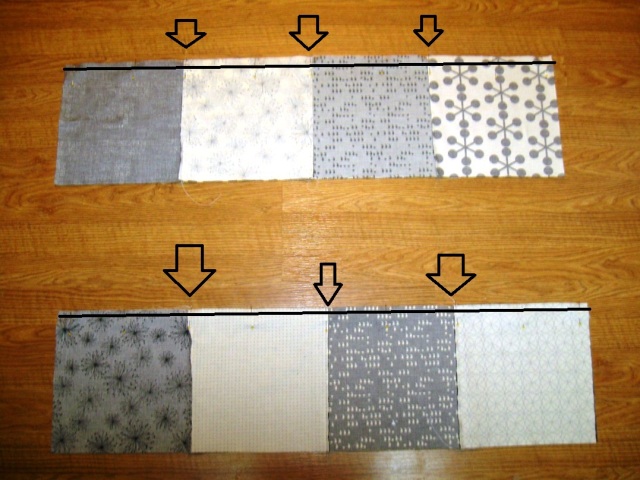
Now you can sew the rows together. Place Row 1 onto Row 2 and Row 3 onto Row 4 with right sides together. Take care to nest your seams and pin in place. Sew a 1/4″ seam along the pinned edges. Repeat the same process to sew Row 1/2 and Row 3/4 together.
Press your rows. Your quilt top will look something like this:) Go ahead and set it aside for a bit.
STEP 2 – CUTTING THE APPLIQUE
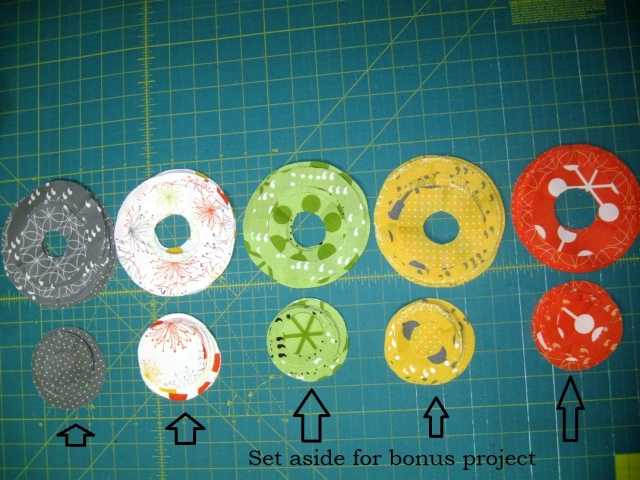
Gather your remaining layer cake squares. I set aside the 2 reprint squares and the square that matched my binding fabric to use on my Bonus Tutorial mentioned later. Cut each of the remaining (21) 10″ squares into (4) 5″ squares. For your applique, you can choose to cut perfect circles or wonky circles.
Gather your remaining layer cake squares. I set aside the 2 reprint squares and the square that matched my binding fabric to use on my Bonus Tutorial mentioned later. Cut each of the remaining (21) 10″ squares into (4) 5″ squares. For your applique, you can choose to cut perfect circles or wonky circles.
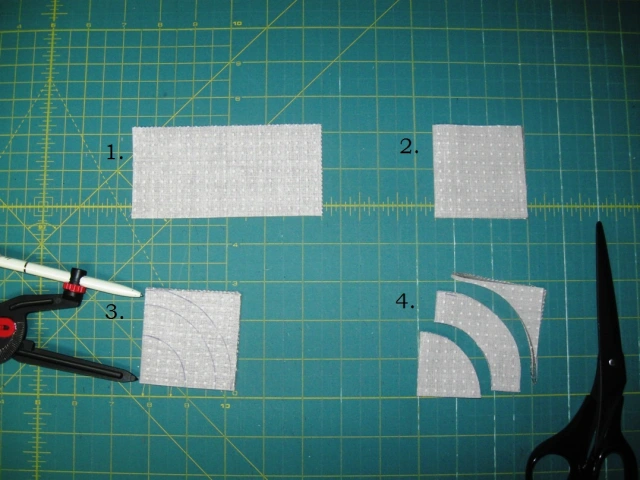
To make perfect circles . . . Fold your charm square in half with right sides together. Then fold in half again the opposite direction. Press the folds. Using a compass, align the point on the folded center and draw a quarter circle. Repeat for one to two more arcs. Cut along the drawn lines.
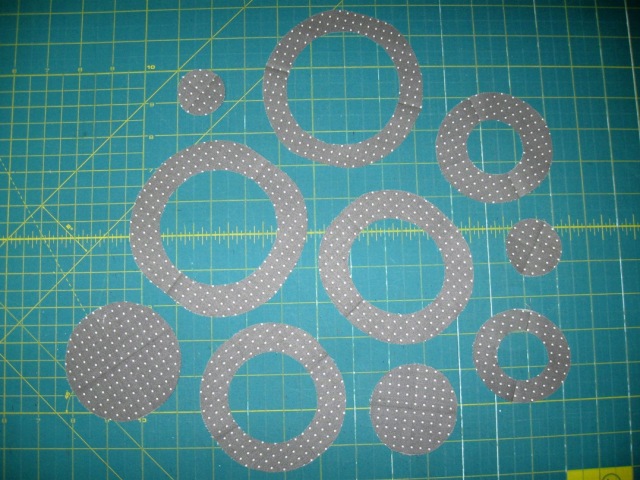
And you have a varied number of rings and circles. Feel free to change the size and amount of arcs so that you get a lot of different size and widths of rings.
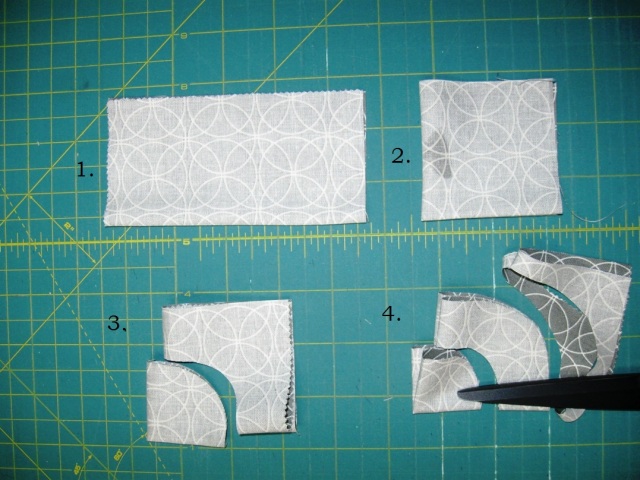
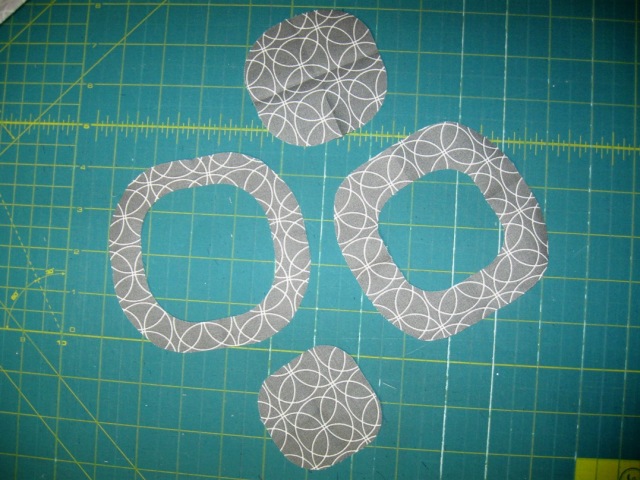
To make wonky circles . . . Fold your charm square in half with right sides together. Then fold in half again the opposite direction. Finger press the folds. Cut an arced shape over the folded center Repeat for one to two more arcs.
And you have a varied number of wonky rings and circles. Feel free to change the size and amount of arcs so that you get a lot of different size and widths of rings. And you can really play with the wonky factor here.
Repeat for all of your 5″ squares so you end up with a pile of rings and a pile of circles. Set the circles aside as you wont be needing them. (They can be used in the Bonus Tutorial.)
STEP 3 – ADDING APPLIQUE TO QUILT SANDWICH
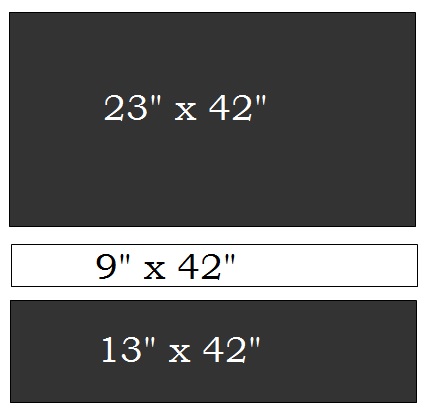
First, you need to piece the quilt back so you can make a quilt sandwich. Cut your yard backing piece into 2 pieces measuring as follows. Trim the selvages from your 1/4″ fabric. Sew the three pieces together using a 1/2″ seams. Press the seams to the darker print. (Sorry, I forgot to take a picture so you get a graphic.)
First, you need to piece the quilt back so you can make a quilt sandwich. Cut your yard backing piece into 2 pieces measuring as follows. Trim the selvages from your 1/4″ fabric. Sew the three pieces together using a 1/2″ seams. Press the seams to the darker print. (Sorry, I forgot to take a picture so you get a graphic.)
Create your quilt sandwich using spray baste. The reason I suggest Spray Baste is because it will be difficult to add the applique with a whole bunch of pins in the way. If you are new to using spray baste for creating a quilt sandwich you can see my video tutorial on how to do so.
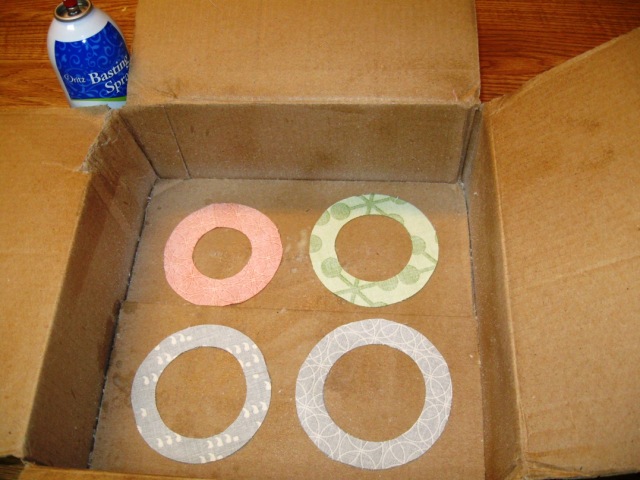
And now you are ready to add the rings :) Place approximately 4 rings in a box an spray with a coating of spray baste. You don’t want to work with much more than that at a time or the baste will start to dry out.
Place the first ring onto your quilt top leaving a bubble where you would like to add the next ring.
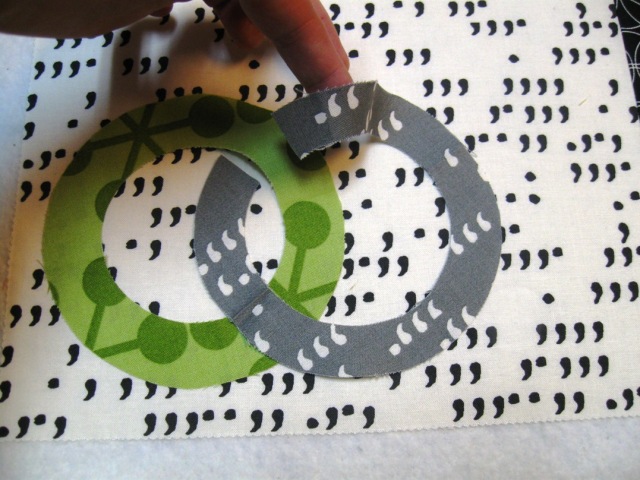
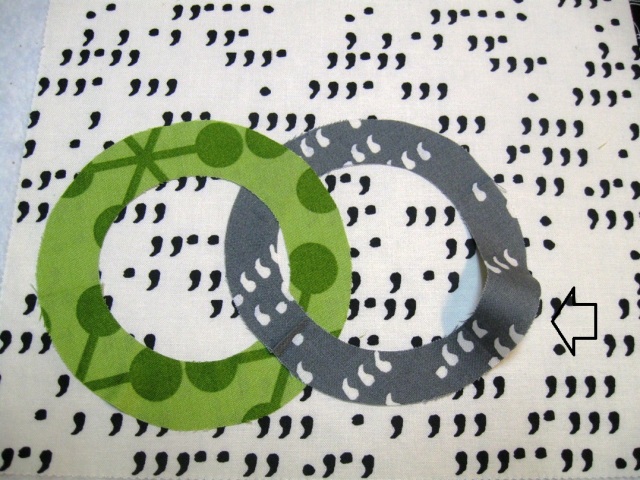
Place the next ring onto the quilt top so that it links with the first. At one of the intersections of the two rings, cut the new ring as shown.
Slide the two cut edges under the bubble of the first ring. Press the rings in place leaving a new bubble in the second ring to add a third ring.
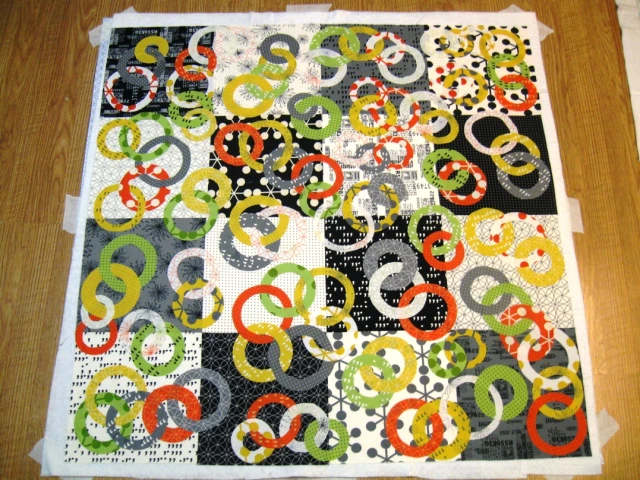
Continue the process. Start new groupings and vary the size and shape of each grouping. Some of my groups have up to 6 rings and some only two. The more variation the better.
Continue until you have covered the entire quilt. I ended up with about 2 rings left over.
STEP 4 – FINISHING QUILT
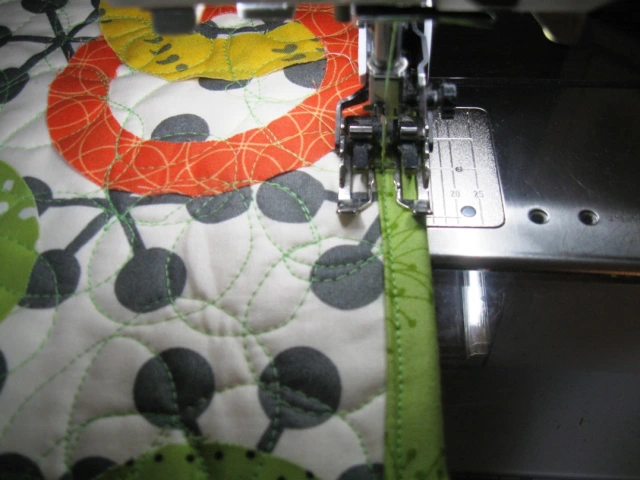
And now you are ready to finish the quilt. Your quilt sandwich is already made so you can move right onto quilting. You will want to quilt this with a rather dense FMQ design to ensure that all of those cut edges get stitched down. I choose to do a Interlocking Circles FMQ design . You will have to stop occasionally and lift your presser foot and then place it on top of the edge of the applique as sometimes it tends to pop up. You will notice a few of my circles have been pinned. Those were for the really stubborn ones that just didn’t want to stay in place.
And now you are ready to finish the quilt. Your quilt sandwich is already made so you can move right onto quilting. You will want to quilt this with a rather dense FMQ design to ensure that all of those cut edges get stitched down. I choose to do a Interlocking Circles FMQ design . You will have to stop occasionally and lift your presser foot and then place it on top of the edge of the applique as sometimes it tends to pop up. You will notice a few of my circles have been pinned. Those were for the really stubborn ones that just didn’t want to stay in place.
Once you are finished quilting all that remains is to bind it. Cut your binding fabric into (4) 2 1/2 ” strips and bind your quilt. I machine quilted this to add strength as it is a baby quilt. If you are new to this you can see a video tutorial on binding here.

One adorably chic and modern Ring Around baby quilt measuring 38″ x 38″, a perfect gift for a special little one.
BONUS TUTORIAL!!!!
Every adorable blanket deserves a matching car seat cover!!! And so I whipped up this little Chic Circles Quilted Car Seat Cover. So fun, right :) So let's get right to the tutorial.
MATERIALS NEEDED:
Leftover circles from Ring Around Quilt or 75 to 100 circles in varying sizes, prints, and colors
1 10" square of pop color fabric for handles (green print)
1 yard of focal fabric for quilted cover top (black print)
1/3 yard of contrasting fabric for quilted cover top (white print)
1 yard of matching fabric for cover lining
1 yard of batting (low loft or cotton)
2 small pieces of velcro
STEP 1 - CUTTING
Cut your focal fabric into (4) 4" x 42" strips and (1) 15" x 42" strip. Cut your contrasting fabric into (4) 2" x 42" strips.
Cut your remaining contrasting fabric into (2) 3 1/2" x 9" rectangles. Scrap remains of strip. Cut pop color fabric square into (2) 4 1/2" x 9" rectangles. Scrap remains.
STEP 2 - PIECING AND ADDING BATTING
Lay your (9) 42" strips out as follows.
Piece the strips together using a 1/4" seam. The easiest way is to just place your second strip onto the first with right sides together and sew a 1/4" seam along the edge, aligning as you go. Then place the third strip onto the now sewn together first and second strips. Sew a 1/4" seam along the edge again, aligning as you go. Repeat for each strip until all are sewn together. Press towards the darker fabric.
And now the top is all pieced, and should measure 35" x 42", and you are ready to add batting. This is like making a partial quilt sandwich. Place your batting on the floor and tape or pin it down so it has no bubbles and is taught. Baste the pieced top to the batting piece. I used spray baste but you can use pins as well. If you are new to basting you can see a video tutorial here that goes over both methods.
STEP 3 - ADDING APPLIQUE
And now you are ready to add the applique. Gather your fabric circles. I liked to keep mine dived by color just so I made sure they were distributed evenly.
Or you can randomly place them on your top and pin them in place.
Now, to keep those circles all in place, you simply quilt your partial quilt sandwich. I choose to use an all over pebbling FMQ design. You can refer to this video if the quilting of Ring Around to get an idea of how quilting with raw edge applique will be. Just be sure to use a dense design so that all of those circles are secured in place.
Once your pieced top is all quilted, you are ready to turn it into a cover by adding lining. First, take a place and draw around the 4 edges of the quilt to give the cover nice curved edges.
Then go ahead and trim the excess batting and the curved corners you just drew.
Now, gather the fabric you choose for the lining of your cover. Give it a good pressing and the lay it flat with right side up. Place your pieced and quilted top onto the lining with right side down so that both right sides are facing each other. Pin around the edges of the top.
Sew a 1/4" seam (or if you walking foot is like mine, more like a 3/8" seam) around the entire top leaving a 5" hole at the bottom for turning. Be sure to back stitch at the beginning and end of your stitching.
Turn the cover right side out and then press the edges flat. Take time here to make sure your pressing the seams nice and even.
Now, sew a 1/4" seam around the entire edge of the cover to keep the edges from rolling.
STEP 5- ADDING HANDLES
Last but not least, time to make some handles. Gather your (4) 9" rectangles. Place the smaller onto the larger with right sides together and stitch a 1/4" seam along the edge aligning as you go. Repeat for the second handle.
Now align the other 2 raw edges together and pin. The right side won't lay flat. Sew a 1/4" seam along the pinned edge. Turn the handle right side out and press flat so that 1/4" of your pop fabric is on either side of your contrasting fabric. Repeat for the second handle.
Turn the top and bottom raw edges under 3/8"ish and pin in place. Stitch a 1/4" seam along the top and bottom to secure in place. If you like, you can stitch along the sides in the ditch for decorative purposes. Repeat for the second handle.
Place the soft side of one piece of velcro onto the front top of the handle centering it and putting it down about 1/2", pin in place. Place the scratchy side of the velcro onto the back bottom of the handle once again centering it and putting it up about 1/2", pin in place. Stitch the velcro in place. I like to stitch a rectangle and then 2 angled lines to make an x and really keep it in place. Repeat for the second handle.
Finally, place the handles onto the cover. You can either use your car seat to measure the best places for the handles, or I found it was pretty standard to center them at 19" from the top of the cover. Place the handles 6" apart and use the contrasting lines to center them in the middle section. Sitch the same pattern you did for the velcro at the center of each handle.
And now, attach the velcro straps around the handle bar of your infant car seat and stand back and enjoy your Chic Circles Quilted Car Seat Cover!!!
Don't they make a perfect pair!!! I actually get to give this little handmade duo to my twin sister today!!! She is expecting a little boy this summer and I am so excited for her!!! Won't she just look super stylish sporting these beauties :)
I hope you have
enjoyed both the Ring Around Baby Quilt Tutorial as well as the Matching Car Seat Cover tutorial and if you make either one or the other, or both I would love to see
it!! You can email me a picture at happyquiltingmelissa@gmail.com,
post it to social media with #happyquiltingwithmc or or add it to
my flickr group here ;) I can't wait to see your Ring Around projects!!!


