Note - Just in case you missed it yesterday, be sure to check out the
Mother's Day Giveaway Celebration Announcement from yesterday. It is going to be so much fun!!
Many of you
commented last week that you would like a tutorial on Crazy Patch Piecing. Here it is a week later, and here is the tutorial all finished. Not to shabby :) I can't wait to see your Crazy Patch Piecing :)
Crazy Patch Piecing is so fun because there really are no rules. Just a few simple guidelines and before you know it, you have "Made Your Own Fabric", as some refer to it. It is also a wonderful way to use up some of those scraps that always seem to pile up :) This tutorial is the way I like to Crazy Patch piece, but know that there are lots and lots of ways to go about it. With that said, let's get to it.
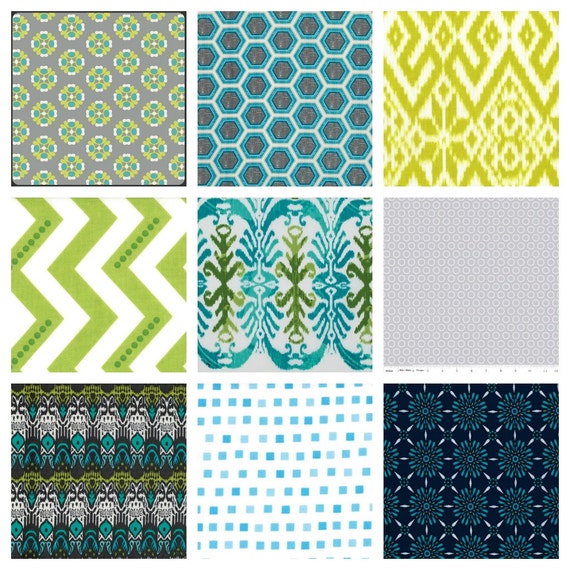
For starters, gather a large pile of scraps for your block. I have been on a monochromatic kick lately, but of course, you don't have to stick to one color, use what makes you happy.
I like to start by sorting my scraps into similar size piles. This just makes it easier when I start adding pieces to have relative size groupings.
Now, if you go to your scrap stash and find that you only have largish size scraps, don't be afraid to make your own. You don't need to use a ruler or anything, just randomly cut your piece into scraps a little smaller.
I like to start with my "small square pile" and my "small rectangle pile". Group your scraps in sets of 2 with right sides together. You don't have to worry about the edges lining up, as long as the edges you are sewing align. Sew a 1/4" seam along the edge.
If I am working on a substantial size block (and in this format I would say substantial is anything over 7") I like to chain piece a few sets. Such a time saver ;)
Press all of your sets. Now, lay them out on your bad and once again, match the sets up in groups of two that have relatively similar sizes.
This is where the basic guideline comes into play. The most important thing to remember when Crazy Patch Piecing (at least in my humble opinion) is to always create a straight edge. So, using your ruler aligned along the"matching" edge of your 2 patches, cut a straight edge on both pieces. You only have to cut the straight edge on the side that you will be sewing. And just because it is straight, doesn't mean it can't be angled. That will add some punch in your piecing ;)
So, just like making your two patches, lay the newly cut straight edge pieces with right sides together. Sew a 1/4" seam along the edge. One again, no worries if the rest of the sides don't line up :)
Press your pieces, and once again, group them in similar sizes.
Create a straight edge and then lay the straight edges with right sides together and stitch a 1/4" seam along the edge.
And your block is really starting to grow. That is the absolute basic of how to crazy patch, Match, Straight Edge, Sew. Over and over. Here are a few tidbits of how to keep it fun and interesting and some ways to mix it up, especially as you start to deal with larger shapes.
As your pieces start to get larger, you will find that they don't "match up" as well. In this case, you can always "add some more" to one side or the other before you match it up. My right hand side is much shorter than my left. So before I sewed them together, I added the two strips on the top.
Then I recreated my straight edge with the new pieces I had added and was then ready to sew the two pieces together.
At about this time, your block is getting large enough to start just adding to the outside, rather than always piecing two pieces together. Now, you will be using those grouped pieces you have sewn earlier to the block. When creating new straight edges to sew new pieces to, try to remember to think outside the box. You don't always have to work with 4 sides. This will add lots of variety.
And I know it is hard to cut off a lot of fabric when trimming, I mean really, you just pieced that together. But, cutting large angled pieces will add so much variety to your block.
It also gives you an opportunity to use up some of those random triangle scraps you might have laying around from cutting a few hexies ;)
Here is another little trick I like to use. When I have gone through my "small scrap" piles, it is time to move to the big scrap piles. Sew these together in the same fashion you did before. But of course, you don't want to add these huge scraps to your small scrap project.
So, lay the two sets on top of each other with right sides facing up on both patched unit. Then, cut them diagonally in half.
Now switch the groupings and sew them back together with a 1/4" seams.
Instant angles and smaller scraps. It is a super easy way to add lots of variety without tons of tiny piecing ;)
Then you can take those pieces, and add them to your ever growing block. You can see them over on the left and you can also see the fun triangle shapes I added to the top an bottom on the right :) Just keep building moving outward and remember to match a piece, cut a straight edge, and then sew the piece. It really is so much fun!!! When you have pieced to the desired size of your block, square it up. And now you have a wonderful Crazy Patch Block. So fun!!!
If I am Crazy Patch Piecing, and I know I will be subcutting my block down into other size pieces, I often use this little trick to speed things up. It isn't as "crazy" looking as the method above, but subcutting the original unit hides most of that.
I start by taking all of those little 2 patch units and turning them into little 4 patch rows. Then I cut a straight edge along the rows and sew the rows together. You get a block much quicker and it looks pretty much something like this. All decently straight rows. You will want to make 2 of these.
Just like we did with the "Large Square pieces" Cut both blocks in half diagonally.
Then mix and match them and sew them together once again.
You can subcut these as many times as you like and in any direction you like.
I did 2 subcuts and both were diagonal. Now, of course these aren't quite as "crazy" as the block above.
But, when I use them as "fabric" to cut the sub pieces I need, they get pretty crazy indeed :)
And then you can use that fabric to create your Crazy Patch project. I loved this little A from last week.
So I decided to make another one ;) Here is a fun L all finished. This will be another mini.
I have both basted and hopefully will be sharing them all quilted and bound. What fun!!!
I hope you enjoyed this tutorial. I would love to see your Crazy Patch projects :) You can add them to my
flickr group here ;)
That's all for today :) Have a Happy (and maybe a tad bit Crazy) Quilting Weekend!!
Linking up my Little L finish to
Sarah's,
Amanda's, and
Fort Worth Fabric Studio :)