Friday, December 10, 2021

2 Charming Totes for Christmas!!

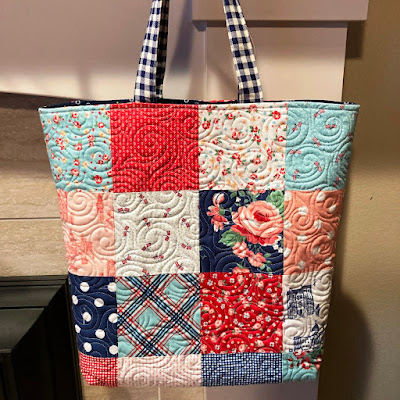
 Charming Tote's just make the cutest Christmas Presents!!!   So excited to get these 2 totes in the mail for two very special people :)   I just love whipping up these totes, and have totally lost track of how many I have made to this point.  If you haven't made one yet, you can pop over here for the free step by step tutorial to whip one up yourself ;)  All you need is a Charm Pack and 2/3 Yard of a coordinating print.  But seriously, grab a few charms, because you can't make just one ;)  


The first  Charming Tote is in Gingham Foundry by My Mind's Eye for my Twin Sister.   When she was last visiting she mentioned how handy my tote was, so of course, I instantly figured I needed to make her one.   And I love the sophistication of this line, making it perfect for work for her.  


The second  Charming Tote is for my Mom ;)    I choose to make it in Notting Hill by Amy Smart, because she was born in England and lived there as a young child.  So of course, the cabbage roses, vintage drawings of English landmarks, and tiny British flags are just perfect for her!!   

And since these are for "super special people", I made them Deluxe :)  I added in some pockets in the lining, a small key chain holder, and put a strip of batting in the handles for extra comfort.  It only takes a second to add in these little features and I know they will be so super helpful to them both :)  

Now to get these in the mail :)   Homemade Merry Christmas is always so fun!!!

So do you have someone special you want to make a Charming Tote for??  Pop over here for the free step by step tutorial 

I hope you all have a very Happy Quilting (and Merry and Charming) Weekend!!! 

Pin It!

Tuesday, December 7, 2021

Terrific Tuesday Giveaway Day!!

 It's Terrific Tuesday Giveaway Day!! Let's have some fun :)

First, we need to announce the winner from last Terrific Tuesday Giveaway!!  
The winner of the 3 Moda Scrap Bags from Green Fairy Quilts  is . . .   Number # 211. . . Congrats thesmittenchicken!  I have messaged you :)  


And on to today's

Today's Terrific Tuesday Giveaway is being sponsored by Fat Quarter Shop.   Fat Quarter Shop is amazing and they never cease to amaze me with everything they have going on at their shop!!!     And did you know they have a 24 Hour Flash Sale every day with 2 Flash Sales on Tuesdays!!   And not only do they have a daily deal, they have a Fabric Basic, Pattern, and Notion of the Month!!!!     All Kimberbell Basics are on sale and you all know how I just love polka dots!!!  Also, All Fiskars Products are on sale for the Notion (Time to Stock Up on Blades!!!) , and Me and My Sister Designs Patterns are on sale for the Pattern.   Save 20-30% off of all of them for the whole month of December!!  So great ;) 

24 Hour Flash Sales at the Fat Quarter Shop!


And for today's Terrific Tuesday Giveaway Fat Quarter Shop is giving away this amazing Rainbow Speckled Fat Quarter Bundle  by Rashida-Coleman-Hale!!!!  This is one of my new favorite basics, doesn't that metallic speckle just make you so happy!!!   It's just so pretty in all it's sparkly rainbow goodness!!!   


You have two entry chances here on the blog, and please leave a separate comment for each.  All Entries are welcome, including International Entries.   Please just be sure to leave an email address if you are a no-reply blogger ;)  


ENTRY 1 - Simply leave a comment that tells me what was the last song you sang along to?? 

 ENTRY 2 - Show your Fat Quarter Shop love.   You can follow them on   FacebookTwitterInstagramPinterestYou Tube or at their Blog.  You can Sign up for their Newsletter which will ensure you catch all of their amazing sales, or you can visit The Shop and then share a favorite item ;)   Just be sure to leave a comment of how you showed your Fat Quarter Shop Love!!!

And that's it ;)  The giveaway will be open until next Tuesday, December 14th,  when I will announce a winner at the beginning of next weeks Terrific Tuesday Giveaway Post :)

You can also pop over to my Instagram and/or Facebook to enter there as well :)  

Good Luck and Have a Happy Quilting Day!!!
Pin It!

Monday, December 6, 2021

Planning Some 2022 Projects!

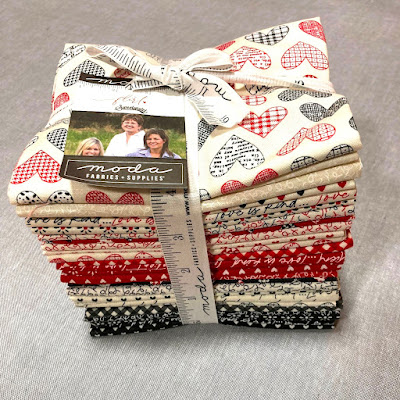
 Yup, we are still just starting December and  I find myself planning my sewing for 2022 :)   Gotta love it!!  But my fabric for the Heart Felt Charity Quilt Along arrived the other day and I just can't wait to get started on it!!!   I have already pressed it all and am gearing up for cutting.  I am so looking forward to making this quilt next year, this will be my 8th year participating in the Fat Quarter Shop Charity Quilt Along and it is truly one of my favorites every year!!!  Are you going to quilt along??  You can see more details about it here!! 


And, speaking of charity quilting . . . If you have been around here for a bit, you know I do a lot of Quilting in Red, White, and Black.   And just about every Red, White, and Black quilt I make is donated to my Alma Mater, Southern Utah University.   The quilts are raffled or auctioned at school events and all the proceeds go to Scholarships.   I just love being able to use my passion for quilting to help my favorite school!!!  So when I saw that Riley Blake is coming out with a Red Hot Fabric Line that has 21 Red on White and 21 White on Red prints, the gears started churning!!!   I popped over to EQ8 and came up with 5 quilts in these fabrics, I just couldn't stop :)   They are so easy because all I have to do is pop in the prints into a design and add a black background.  The first quilt I designed is going to be a free tutorial in February, (more coming) and the second is going to be a picnic size version of my Ring Around the Rosies Quilt from Charming Baby Quilts ;)   Isn't that just so fun!!!   So ya, lots of Red, White, and Black for 2022!!  


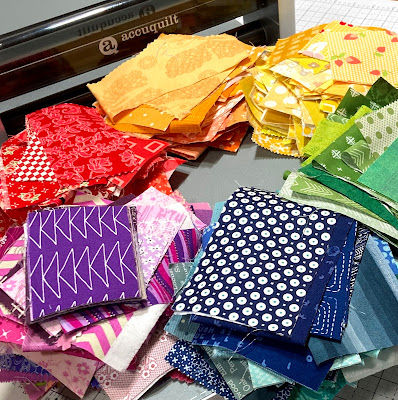
And finally, I always try to make a Scrap Quilt or two each year.  This year I made the Cabin Among the Stars Quilt to par down my Neutrals scrap bucket, and the Stacked Squares Quilt to par down my Low Volume scrap bucket.   So for 2022, It's back to a Rainbow of scraps!!!   And I have some fun ideas for using up all these little rainbow scraps.  And I am so grateful that my AccuQuilt will make quick work of the cutting!!!   Truly, when it comes to scrap quilts, (especially small scraps)  I have found my AccuQuilt is my best friend, it just saves so much time :)   And ya know, time is that thing that I always seem to be running short on, as here I am planning for 2022 when I still have 25+ quilt tops to quilt, tee hee hee.   


So how about you . . . any plans starting to percolate for 2022 quilts??   What is on your To Make List that you just know you are going to cross off in 2022???  

Pin It!

Saturday, December 4, 2021

Texas Monthly - Month 12!!

 Can you believe it!!!  It is the last month of the  Texas Monthly Block of the Month program!   This BOM is hosted by Stitchin' Heaven  and is so much fun!!!    Were making the borders this month and then it's on to finishing it all up, so exciting!!!   

So let's get going!!  There are 2 sets if borders blocks this month.     So let's get piecing and get to see this quilt top all finished up!!!  


Cutting

I like to start out by pressing all of my fabrics.  Then it is time for cutting!!!  I like to cut all of my pieces for both borders as well as the binding at the start. 

And with all your pieces cut . . . you are ready to move on to the first border.


The Inner Border

The inner border is 4 sets of mitered seams.  To do this, choose 4 of your 2 1/2" x WOF strips. (You can choose any colors you like, I just picked the ones to match the original ;)   Be sure and trim the selvages from your strips before starting.  On the wrong side of the 4 strips, mark a dot at 2 1/2" in from the edge of the strip.  Then draw a line from the top corner to the dot. 
 

Now you are ready to stitch your mitered seam.  Place a Marked strip onto a strip (again, you can choose any colors) with right sides together and with the strips at 90 degrees as shown.  Pin the strips together at 90 degrees and then stitch directly on the drawn line.  Repeat this for all 4 strip sets.  


Now trip a 1/4" away from the seam line and press the seam to one side.  It doesn't matter which ;)  You will now have 4 mitered strip sets.  


And it is time to add them to the quilt center.   Layout your 4 strip sets on either side of the quilt center as shown.  Obviously, these are larger than the quilt center, but no worries.  We are going to center them first and then trim the excess before we stitch.  


So to center the first two side strips, fold the quilt center in half as shown.  Mark the center points with a pin.  Then open your quilt center again.


Place your side inner borders onto the quilt center with right sides together.  Align the center of the Inner Border seam with the Marking pin on your Quilt center.  Pin the center in place on both inner side borders.  


Then align the rest of the 2 inner borders with the side of the quilt top and pin in place.   Trim the excess on the ends of the border.  I find the easiest way to trim is to simply flip the corner of the top over, align with the edge of the quilt and trim (shown on bottom left corner.)   Once you are all pinned, stitch a 1/4" seam along the pinned edge of both inner side borders.  


Press the seams outwards towards the inner borders.   Now we will repeat the same process for the top and bottom inner borders.


Find the center of the Top and Bottom of the quilt top.  Align and pin the top and bottom inner border's with the center and then the rest of the border.   Trim the excess on the edges.  Stitch a 1/4" seam on the top and bottom of the quilt top. 


And once again, press the seams outwards towards the inner borders.   Your quilt top should measure appx. 72 1/2" x 74 1/2" unfinished.    Now go ahead and set your quilt top aside for a minute so we can move on to piecing the outer borders.


 The Outer Border

FLYING GEESE UNITS

We start the outer border by making some Flying Geese.  We made Flying Geese Units back in Month 5 so this will be a snap ;)  Start by gathering your Outer Border pieces.   We will be making 2 sets of Flying Geese in each color, one with a White Goose and one with a Colored Goose.   We will make 8 sets of each in the blue, yellow, and purple, and 16 sets of each in the red. Note, this means you will have 16 red, 8, purple, 8 yellow, and 8 blue 2 1/2" x 4 1/2" rectangles that you will not be using for flying geese ;)  


On the wrong side of all the 2 1/2" squares mark a diagonal line.   For the rest of this, I will be showing the process on two flying geese units, the right side is the Colored Goose and the left side is the White Goose.  But you will want to chain stitch all 80 Flying Geese units for each step of the process as  it will save you a lot of time ;)  
Place a marked square onto the left side of the rectangle with right sides together as shown.  Stitch on the drawn line.  Trim a 1/4" away from the seam line.  Press the seam upwards towards the small triangle. 


Now repeat for the right side.  Place a marked square onto the right side of the rectangle with RST as shown.  Stich on the drawn line.  Trim a 1/4" away and press upwards towards the small triangle.  


With your chain stitching, you should now have 80 Flying Geese each measuring 2 1/2" x 4 1/2" unfinished with the total number of each layout as shown below.   I don't trim my geese, but if you decide to trim them exactly to 2 1/2" x 4 1/2" be sure that you leave a 1/4" seam allowance on the top and that your side corners point.  


ARROW BLOCKS

Now it is time to sew the Flying Geese Units into Arrow Blocks.   Here you can grab those colored 2 1/2" x 4 1/2" rectangles that were set aside.   And again, I will show the process with one, but you will want to chain stitch all  40 of your Arrow Blocks to save time.
Layout the following three units in the same color: a Colored Goose Flying Geese Unit, a 2 1/2" x 4 1/2" Rectangle and a White Goose Flying Geese Unit as shown.   Place the Top unit onto the center with right sides together.  Stitch a 1/4" seam along the edge.   Then place the Bottom unit onto the center with right sides together.  Stitch a 1/4" seam along the edge, and be sure to stitch directly through the center of the Thread X to get a perfect point.  Press the seams inwards towards the 2 1/2" x 4 1/2" rectangle.  


With your chain stitching, you should now have 40 Arrow Blocks each measuring 6 1/2" x 4 1/2" unfinished with the total number of each layout as shown below.   Again, if you decide to trim, be sure and leave your seam allowances and corner points.  


PIECING THE OUTER BORDERS

Now it is time to start piecing the outer borders into rows.  Place 5  Arrow Blocks in the following color order in a row.  Layout 8 sets just like this and chain stitch all 8 sets.  Place the second Block onto the first Block with right sides together.  Sew a 1/4" seam along the edge.   Then place the third Block onto the first/second Block with right sides together.  Sew a 1/4" seam along the edge.  Continue in this fashion until you have sewn all 5 blocks into a row.  


And a little helpful hint, if you flip your blocks over when you take them to the sewing machine, you can see the thread X and sewing directly through the center of it will give you your perfect points ;) 


Once you have all 8 rows sewn together, press the seam allowances open.  


Now all that is left is to add in your White squares and rectangles.  Layout your 8 Arrow Rows with the White squares and rectangles as shown below.  The side borders have the larger rectangles in the centers and the the top and bottom borders have the squares on the ends.   


Sew the pieces into the 4 border rows.  Press the seam allowances towards the white squares and rectangles.   And now you are ready to add the Outer Border to your quilt top!!!  


ADDING THE OUTER BORDERS TO THE QUILT CENTER

This is just like adding the inner border, but on a larger scale.   Layout your 4 Outer Borders as shown below.  


Place the 2 side borders onto the sides of the quilt top center with right sides together.  Align and pin the sides.  Stitch a 1/4" seam along the pinned edges.   And note, when stitching the seam, if you sew directly at the bottom of the Fabric V's on all your flying geese units, you will get nice perfect points.  


Press the two outer side borders inwards towards the inner borders.   Now just repeat for the top and bottom outer borders.  Place the top and bottom outer borders onto the top and bottom of the quilt top center with right sides together.  Align and pin and then stitch a 1/4" seam (catching the Fabric V's)  along the pinned edges.   Press the seams inwards towards the inner border. 


And your Quilt Top is complete!!!  Isn't it just gorgeous!!!   It should measure appx. 80 1/2" x 82 1/2"


Great job!!!  Isn't this just so exciting!!!!!  A year of stitching together and what an amazing finish to show for it!!!!   All that is left now is to Baste it, Quilt It, and Bind it ;)  If you are new to quilting, I have some Video Tutorials here that can help you with finishing up your quilt!!! 

I can't wait to see all your Texas Monthly quilts done!!! 

If you have any questions on this tutorial, please don't hesitate to email me at happyquiltingmelissa@gmail.com or leave a comment.  

 Hope you all loved stitching along, I know I sure did and I can't wait to get this all finished up and gifted to a special Texas friend ;)  

Pin It!

Thursday, December 2, 2021

Simple Sewing

 It's been a crazy few days, but I have managed to squeeze in a little simple sewing!!!  And nothing is more simple then sewing strips!!   Remember those Jelly Rolls from back here . . . I got them all sewn into blocks and here is a little sneak peek :)  I can't wait to see this one come together.  I just love the Fat Quarter Shop Short-cut Quilts, they are so fun and fast!!  I will be sharing more of this one in January ;)  


But first . . . Christmas!!!  After Jessi finished up her Charming Tote  I thought they would make a wonderful Christmas Present for some special people.  So I ordered 2 special Charm Packs to fit just right.   And they came the other day and I couldn't wait to whip up the Charming Tote sides ;)    The first one is in Notting Hill by Amy Smart.


And the second one is in Gingham Foundry by My Mind's Eye.   I just love both and I just picked out the lining fabric this morning so I am hoping to get these finished up soon and in the mail :)


So I am off to go cut some linings.

Hope you are all having a very Happy Quilting Day!!!

P.S. . . . I am sure by know, you all know these are like my favorite Tote to make and there is a free tutorial for Charming Totes over here . . . but just in case you don't . . . . there is a free Charming Tote tutorial here :)   

Pin It!