Even with a bonus day in February, this month has flown by!!! But that's okay because with with the end of the month comes a new Sew Sampler Box as well!! The theme for this month is Trending Tradition and it is just such a cute box filled with gorgeous quilting goodness :)
How pretty is this Thick and Think quilt pattern!!!! It is made with a Thick and Think Quiet Grace 2 1/2" Strip set by Kim Diehl for Henry Glass Fabrics. Kim's fabrics are always so pretty with their bright lights and dazzling darks ;)
And the notions for this month are just great!! I am so excited about this Sewing Machine Light!!! At the last retreat I was at, I was thinking, I need a travel light for open sew time. And wouldn't you know, it just showed up in my Sew Sampler Box, so great!!! And the quilting needles will go straight to mom, since she is the hand sewer :) And you know, I just love me some thread, this is Gutermann thread and what a pretty Copper color!!!
And just a note, there are currently some openings for Sew Sampler boxes, so no need to wait;) A new year begins in April, so now would be a great time to join in and get ready for the new QAL!!
And that is February Sew Sampler Box. I am so looking forward to March, and hopefully quilting some of the projects I finished in February so I can add more to the pile, like this Thick and Think quilt ;)
This morning I got working on a new project that is all grunge in all the purples!!! You know how I love purple ;) Well, I had to laugh when I realized that the three tools I use the most in my sewing room are also all purple, I mean, are you surprised??
I love my Olfa Splash Rotary Cutter for cutting. The blade is super easy to change and the grip fits perfectly in my hand. Olfa Splash comes in lots of colors (and yes, I have all of them :) but the purple cutter is the one on my sewing room cutting table!!!
And this is my all time favorite seam ripper!!! It is a hand-turned wood seam ripper made by a wonderful couple from Gunnison Utah who vend at lots of the Utah retreats I teach at. They are the Westenskows and they have a little etsy shop here ;) Their hand-turned tools are just beautiful, and they have a "flat spot" on the underside so they don't roll off the table, I just love that!!! They come in natural wood colors as well as dyed wood, and you know I needed a purple one ;) And my favorite thing about these seam rippers . . . anytime my blade gets dull, the Westenskows will replace the blade with a new one at retreat. So great!!!
And finally, my favorite thread snippers, and lucky me, they just happen to be made in purple!!! These are the Gypsy Quilter's EZ Snips. I have tried so many thread snippers and these are by far my favorite. They are a little pricey for thread snips, but they are well worth the cost. I love that they are spring loaded so I don't have to "open" them each time I snip. And I have been using this pair for over 5 years now and they still cut smooth and quick.
In fact, I love these tools so much, I know have 3 sets of all of them!!! One set for my sewing room . . . one set for my traveling sewing machine case . . . and one set for my teaching bag of tools!!! And can I just say, it is so nice to have the tools you love anytime and anywhere you are quilting ;) And the fact that they are all purple . . .well that is just a super happy bonus!!!!
What are your favorite tools and just because I am curious . . . does anyone else collect their tools in their favorite color ?? Leave a comment below ;)
Wow, January has come and almost gone ;) What a whirlwind this month has been so far, but oh so much crazy fun!!! And with the end of the month comes a new Sew Sampler Box as well!! The theme for this month is Hats off to You! and it is just such a cute box filled with Lori Holt goodness :)
How adorable is that Haberdashery Quilt Pattern!!!! So can't wait to make this!!! And it will be just delightful in the new Mercantile fabrics by Lori Holt. Her fabrics always have such a vintage charm to them. And I just love the saturated colors, so fun ;)
And the notions for this month are some more Bee in my Bonnet goodness!! This Busy Bee Thread Cutter will be great to go on my travel sewing machine!! And the Bee Binding Holder will keep bindings nice and straight. And I love this new Quilty Tools 1/4" Plus Ruler from Riley Blake. It really is great for everyday use. And yes, I an always use more Schmetz Needles ;)
And just a note, there are currently some openings for Sew Sampler boxes, so no need to wait;)
And that is January Sew Sampler Box. I am so looking forward to February, it is going to be a fun month of lots of projects.
December is always such a wonderful month filled with friends and family!!! We had such a lovely Christmas Season and hope that you and yours did as well!!! I haven't gotten to my machine a whole lot the last few weeks, but that is all good, because the kids are back in school soon, and I get to spend lots and lots of time in my sewing room. And now I can add my new December Sew Sampler Box project to the mix!! The theme for this month is C'est La Vie and it is just such a great box this month and was a wonderful added present under the tree!!!
I am so in love with this Lovestruck Bundle by Lella Boutique!!! I was so excited when Lella Boutique shared sneak peeks of this Lovestruck Fabricand now I can't wait to create with it!!! Isn't it just so pretty!!! And of course, Fat Quarter Shop has made a gorgeous pattern to go with this gorgeous fabric!!! Can't wait to get this Dulce pattern cut out ;)
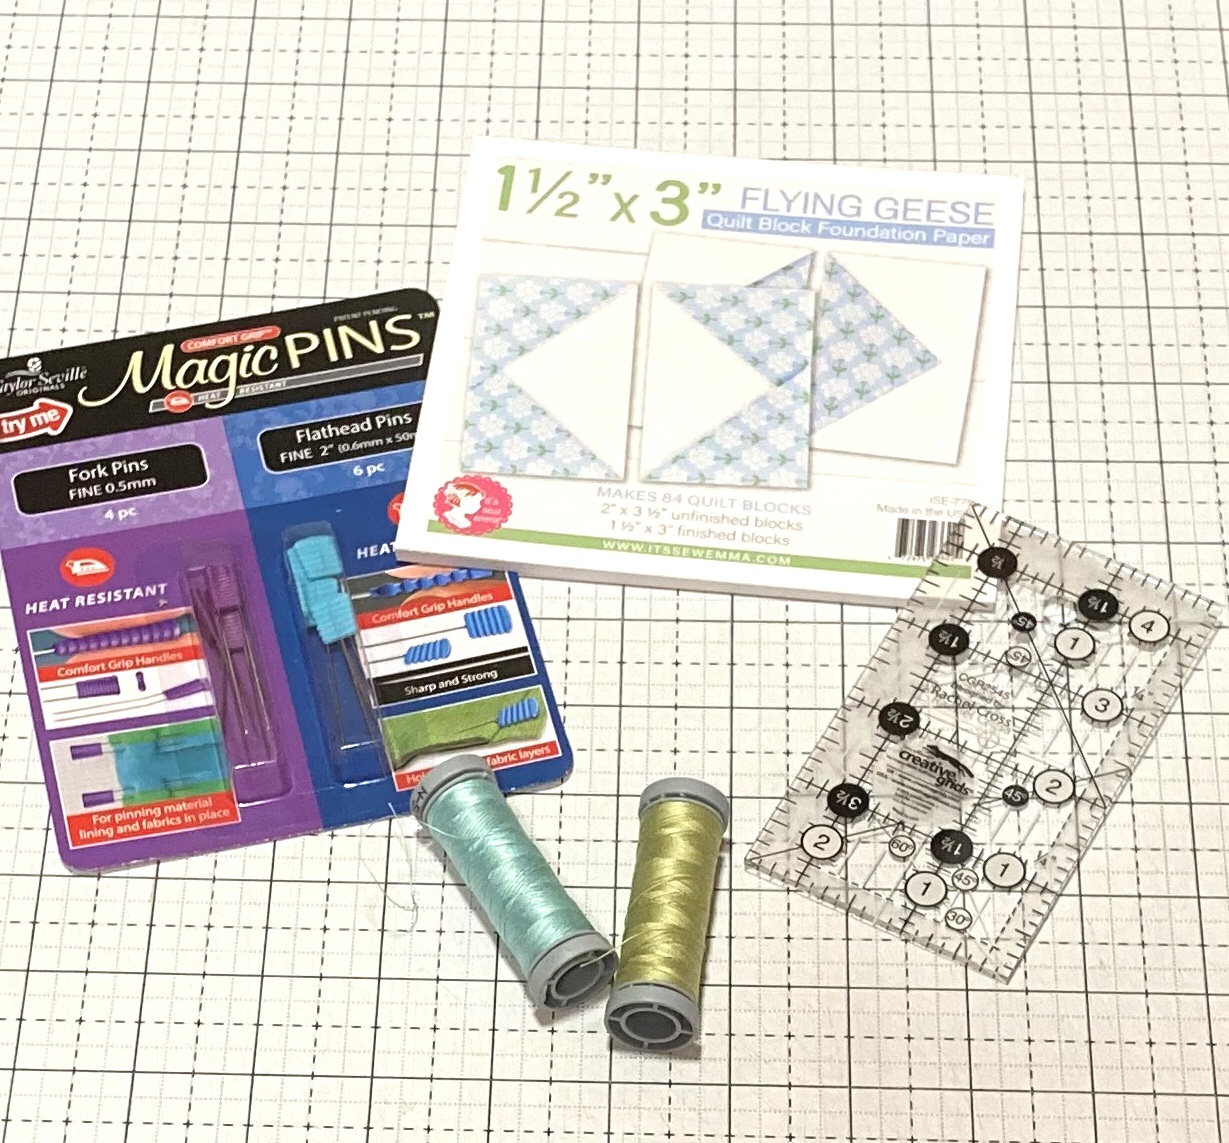
And the notions for this month are so great!! I love how Fat Quarter Shop added the Flying Geese Paper Pad to go with the Dulce pattern. And I just love Creative Grids Rulers and this 2 1/2" x 4 1/2" Quilt Ruler is just so cute and will come in handy for small trimming and marking. And the Magic Pins are just so cool, I am excited to try the Fork Pins. And as always, you can never have enough thread and I am excited to try this Presencia Thread as it is new to me ;)
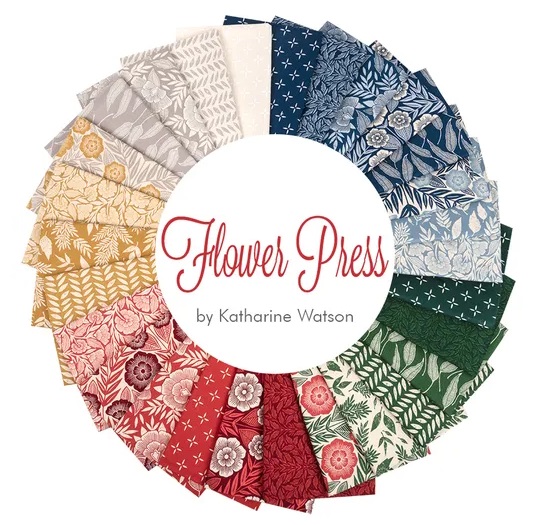
And the Pressed Flowers Quilt Along is not going to happen this year, But I did get a bundle of the Flower Press Fabrics and it is now sitting with the patterns for a "someday project" . I mean, Pressed Flowers, Flower Press . . . It's like they were meant to be together.
And just a note, there are currently some openings for this new years Sew Sampler boxes, great way to start the new year ;)
And that is December Sew Sampler Box. I am so looking forward to January and all of the new projects it will bring, including another Sew Sampler Box Project :)
Just like all of the Fast & Fun Lap Quilts, it is made with 1 Layer Cake and some background fabric. I used the above mentioned Christmas Eve Fabrics by Lella Botique for Moda and paired it with my favorite . . . Grunge!!! This is Grunge Black Dress and it just so makes these happy Christmas fabrics pop!!! I just love it ;)
And while this quilt might look a little complicated, it actually quite Fast & Fun to make, surprise, surprise!!! The quilt is made with No-Waste Flying Geese, (which if you haven't made yet, you are going to love!!) and Half Square Triangles. Those go together with some basic piecing of 12 blocks that are then surrounded by some tiny cornerstones to make this amazing The Christmas Star quilt. It finishes at 56" x 74" so it is a great lap size quilt to snuggle up in ;)
When it came time to quilt my The Christmas Star quilt, I decided to to an all over echoed paisley design. I love how it adds so much movement to all of those crisp points. And if you love this design, I just happen to have a free Video Tutorial for creating this free motion quilting design on your home machine ;) It's always fun to be Happy Quilting!!
I hope you love this The Christmas Star quilt as much as I do and if you make your own (or any of the quilts from Fast & Fun Lap Quilts) I would love to see them! You can share your projects with me on social media with the hashtags #happyquiltingwithmcand #fastandfunlapquilts and tagging @happyquiltingmc or email me a picture at happyquiltingmelissa@gmail.com. I can't wait to see your Quilts!!
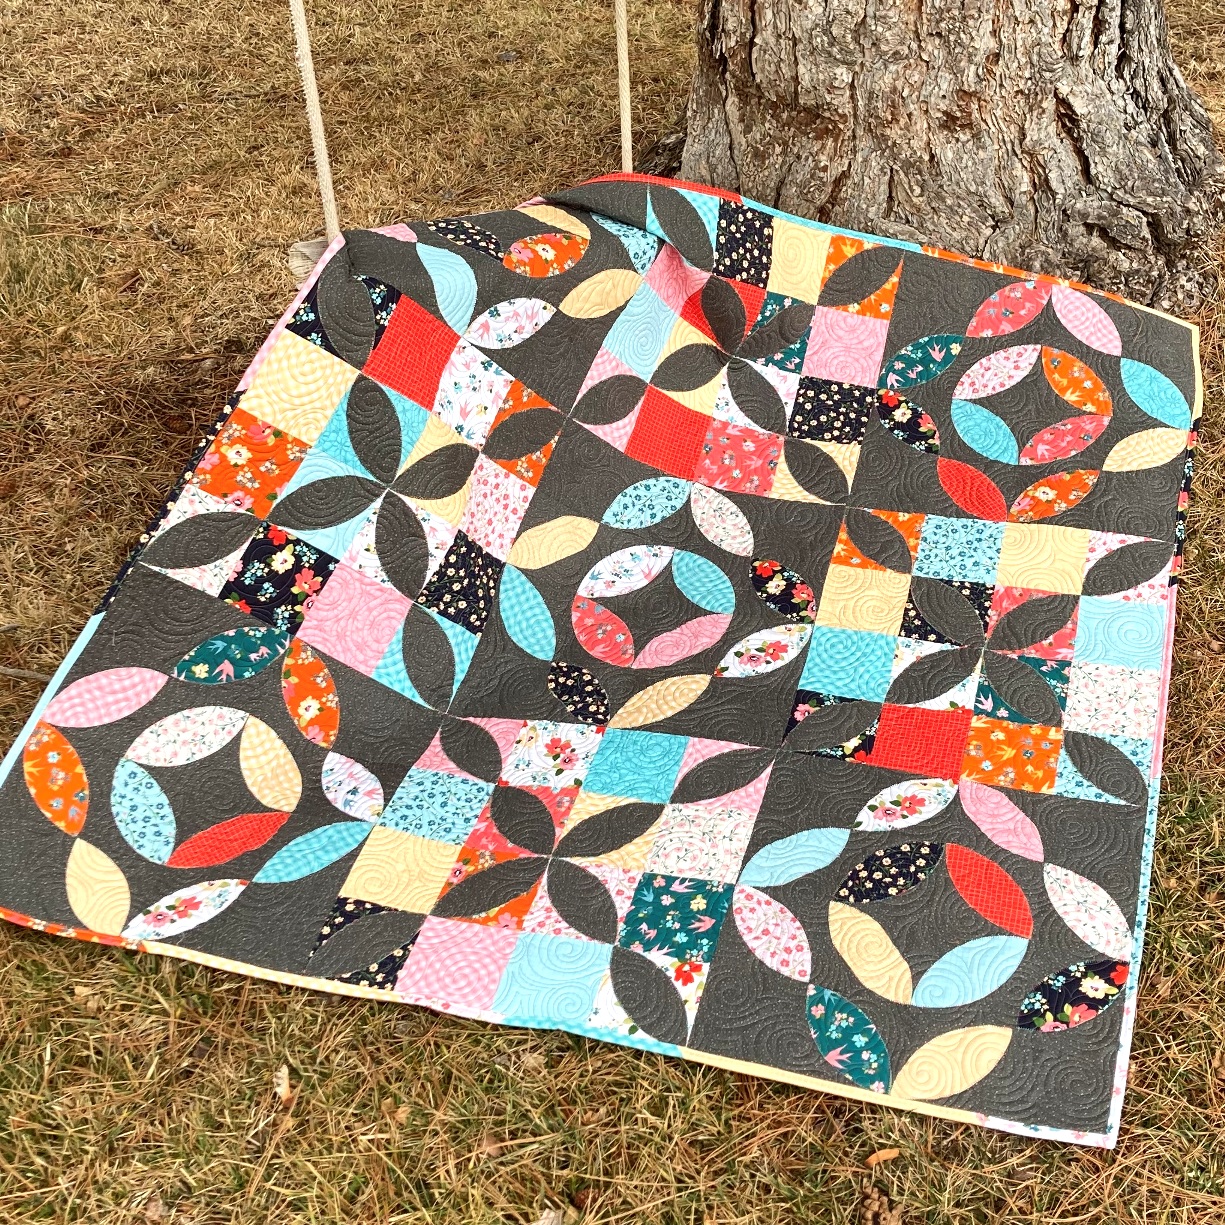
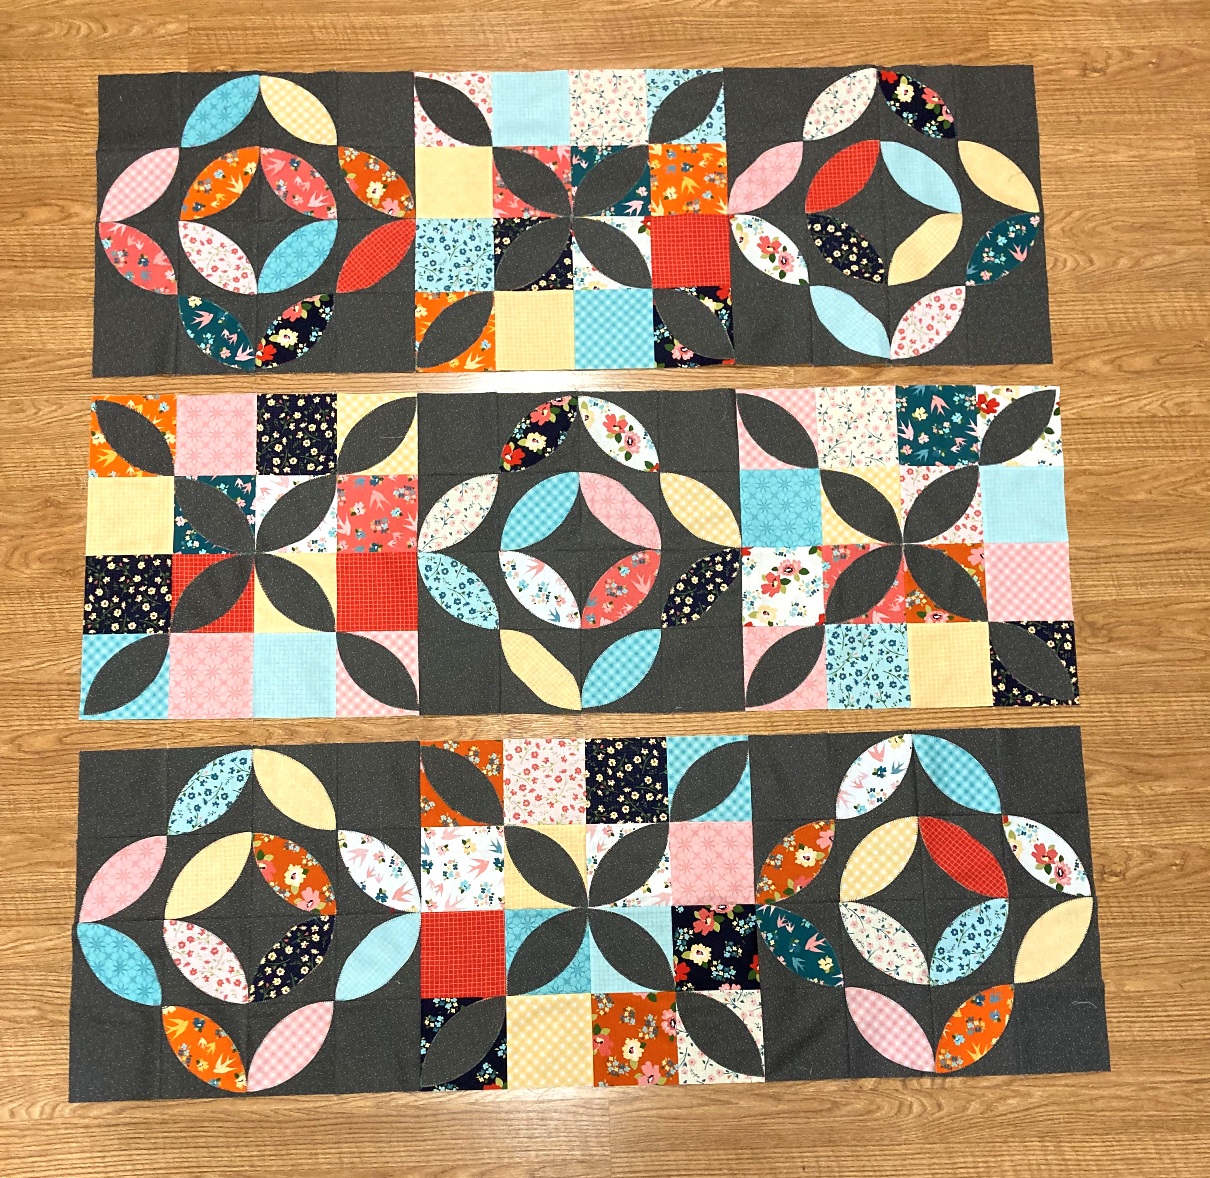
Today I am thrilled to be bringing you a new quilt and a tutorial to go along with it! I just love simple applique, and simple applique added to simple patchwork . . . well that is just the best!!! And so, without further ado . . . here is the Petal Patch Quilt!!!
Petal Patch is Charm Pack Friendly, making it really easy to grab some packs and get going. The quilt finishes at 54" x 54" so it makes for a great lap size quilt. It is a wonderful way to practice simple applique, and makes a gorgeous finish. So, let's get to making your own!!!
3 Background Charm Packsor2 Yards of Background Fabric cut into (14) 5" x WOF Strips and sub cut into (112) 5" Squares
1/2 Yard of Binding Fabric cut into (6) 2 1/2" x WOF Strips
3 1/4 Yards of Background Fabric cut into (2) 58 1/2" x WOF Pieces
STEP 1 - CUTTING THE APPLIQUES
To cut out my "Petal" (also known as Orange Peel) Appliques, I used the AccuQuilt GO! Orange Peel 4 1/2" die. It makes quick work of cutting out applique, and because this die is so small, it even works in my GO! Me Cutter.
If you don't have an AccuQuilt System, there are lots of Orange Peel Templates you can purchase, just make sure to get a 4 1/2" template. Or, if you are using a different size template, be sure your squares are all 1/2" larger than your template.)
And of course, you can always make your own Template!! Here is a 4 1/2" Orange Peel Template, that you can print and use to make your own template from cardboard or template plastic.
Any way you choose to cut your Petals is great! You will need to cut:
60 Petals from the Assorted Print 5" squares &
32 Petals from the Background 5" squares.
When you are finished cutting all your applique Petals you will now have:
32 Background Petals and 80 remaining Background 5" Squares
STEP 2 - SEWING THE APPLIQUE BLOCKS
Because this applique shape is so basic, you don't need to really bother with Heat N Bond for adhering. You can simple Glue or Pin baste your appliques. To Glue Baste, simply place small dots of Applique Glue on the wrong side of your Petal Template. Then center it diagonally on a 5" square. Print Fabric Petals are placed on Background 5" squares and Background Fabric Petals are placed on Print 5" squares. You should have 1/4" extra along the 2 corner edges.
If you are Pin Basting, take care to keep the pins in the center of your Petal Applique and away from the edges. That way when you are secure stitching your applique you don't have to remove the pins.
With your Petal Applique basted to your 5" square, you can now secure stitch around your applique. You can do machine, hand, or needle turn applique and choose any color thread. Stitch around the entire Applique using your desired secure stitch. I like to backstitch 1-2 stitches at the end of my stitching just to hold it. I used a fun variegatedthread with a machine Blanket stitch :)
If you are new to applique, you can see my Applique Basics video's that will help walk you through the previous steps in more detail :)
Continue stitching the Petal Appliques until you have secure stitched them all to a 5" square. You should now have:
60 Print Petal Units and 32 remaining Assorted Print 5" Squares &
32 Background Petal Units and 20 remaining Background 5" Squares
STEP 3 - SEWING THE PETAL BLOCKS
Layout 3 Print Petal Units and 1 Background 5" Square as shown, taking note of the fabric placement. Place the right hand squares in each row onto the left hand squares with right sides together and align the raw edges. Stitch a 1/4" seam along both edges. Press the seams Open.
Now, place the Top Row onto the Bottom Row with right sides together and align and pin the center seam and raw edges. Stitch a 1/4" seam along the pinned edge. Press the seam open. Repeat this process to make a total of 20 Petal Block Corner Units.
And now, with the units made, we can make the block! Layout 4 Petal Block Corner Units as shown, taking note of the fabric placement.
Place the right hand Units in each row onto the left hand Units with right sides together and pin and align the center seams and raw edges. Stitch a 1/4" seam along both edges.
Press the seams Open.
Now, place the Top Row onto the Bottom Row with right sides together and align and pin the seams and raw edges. Stitch a 1/4" seam along the pinned edge. Press the seam open.
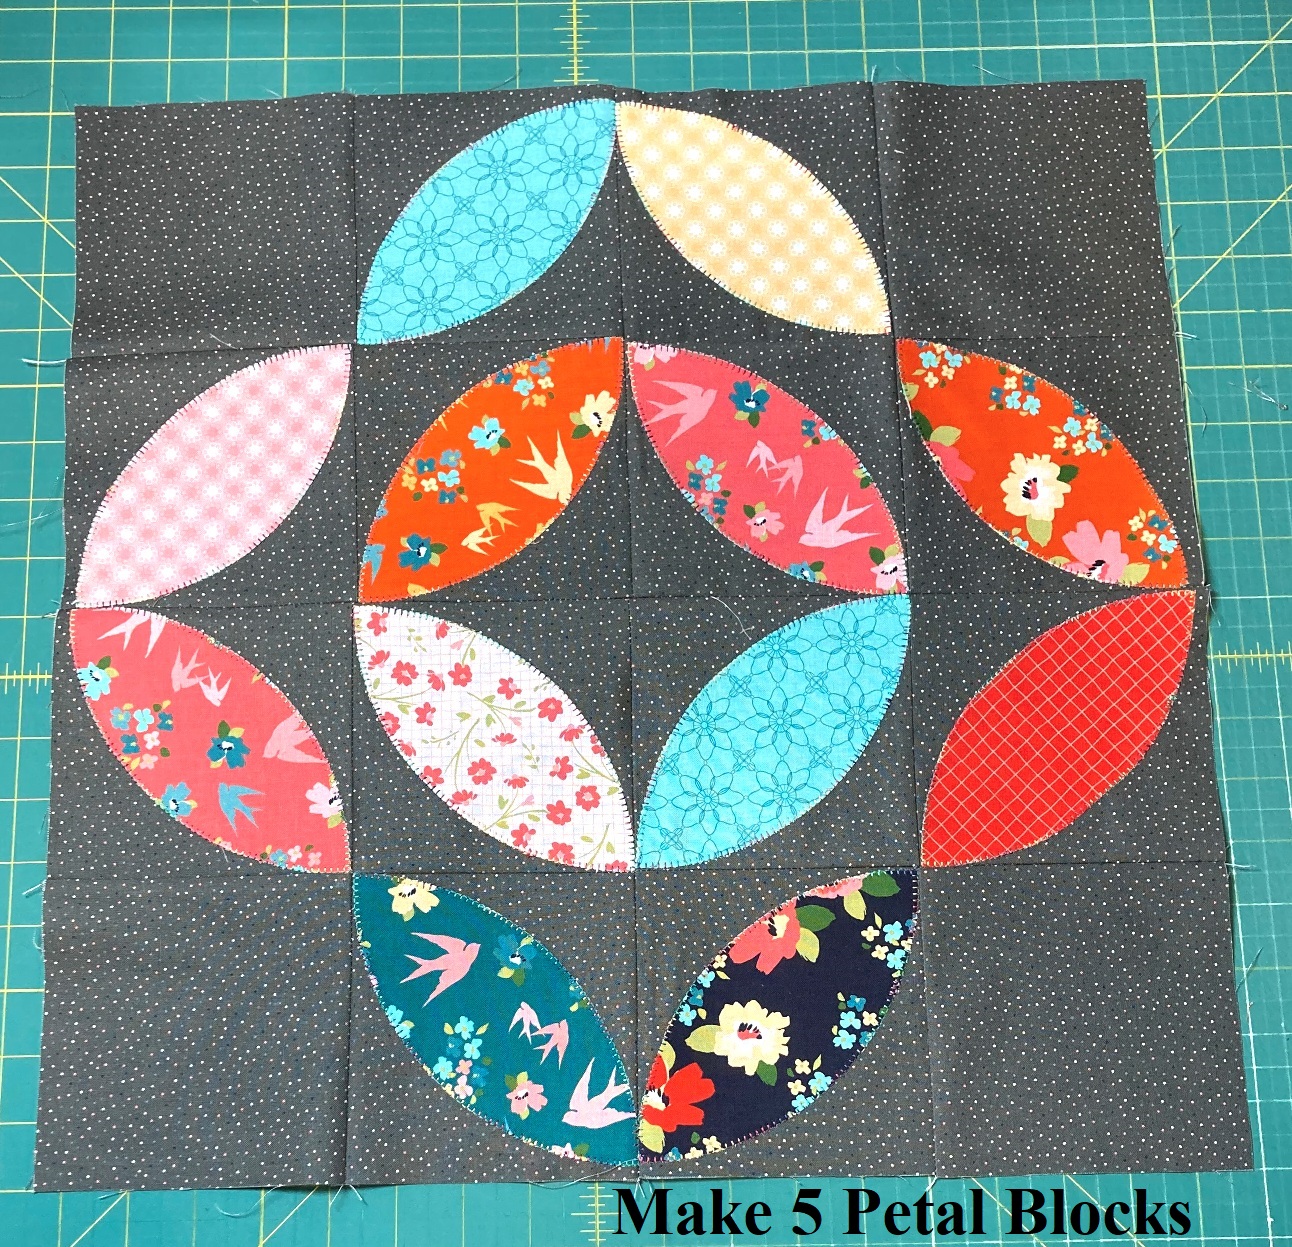
And you have a beautiful 18" unfinished Petal Block. Repeat this process to make a total of 5 Petal Blocks.
STEP 4 - SEWING THE CRISS CROSS BLOCKS
Layout 2 Background Petal Units and 2 Assorted Print 5" Square as shown, taking note of the fabric placement. Place the right hand squares in each row onto the left hand squares with right sides together and align the raw edges. Stitch a 1/4" seam along both edges. Press the seams to opposite sides towards the 5" Print Square.
Now, place the Top Row onto the Bottom Row with right sides together and align and pin/nest the center seam and raw edges. Stitch a 1/4" seam along the pinned edge. Press the seam open. Repeat this process to make a total of 16 Criss Cross Block Corner Units.
And once again, with the units made, we can make the block! Layout 4 Criss Cross Block Corner Units as shown, taking note of the fabric placement.
Place the right hand Units in each row onto the left hand Units with right sides together and pin and align the center seams and raw edges. Stitch a 1/4" seam along both edges.
Press the seams Open.
Now, place the Top Row onto the Bottom Row with right sides together and align and pin the seams and raw edges. Stitch a 1/4" seam along the pinned edge. Press the seam open.
And you have a beautiful 18" unfinished Criss Cross Block. Repeat this process to make a total of 4 Criss Cross Blocks.
STEP 5 - MAKING THE QUILT TOP
And with your Blocks complete, you are ready to sew your quilt top. Layout your 5 Petal Blocks and 4 Criss Cross blocks as shown below. You can rotate them as much as you like until you get a color layout that is pleasing to the eye.
Now, it's time to sew the blocks into rows. Place the second block onto the first block in each row with right sides together. Align and pin the seams and then stitch a 1/4" seam along the edge. (shown in the first row, chain stitch all 3 rows). Then, place the third block onto the now sewn together first and second blocks with right sides together. (shown in the second row). Align and pin the seams and then stitch a 1/4" seam along the edge, chain stitch all 3 rows.
Once all of the blocks are sewn into rows press the seams in each row open. Then layout your rows again.
Now, stitching the rows together is the same, just in a longer fashion. Place the second row onto the first row with right sides together. Align and Pin all of your seams. Sew a 1/4" seam along the edge.
Then, place the third row onto the now sewn together first and second row, with right sides together. Align and pin all of the seams. Sew a 1/4" seam along the edge. Press the seams open.
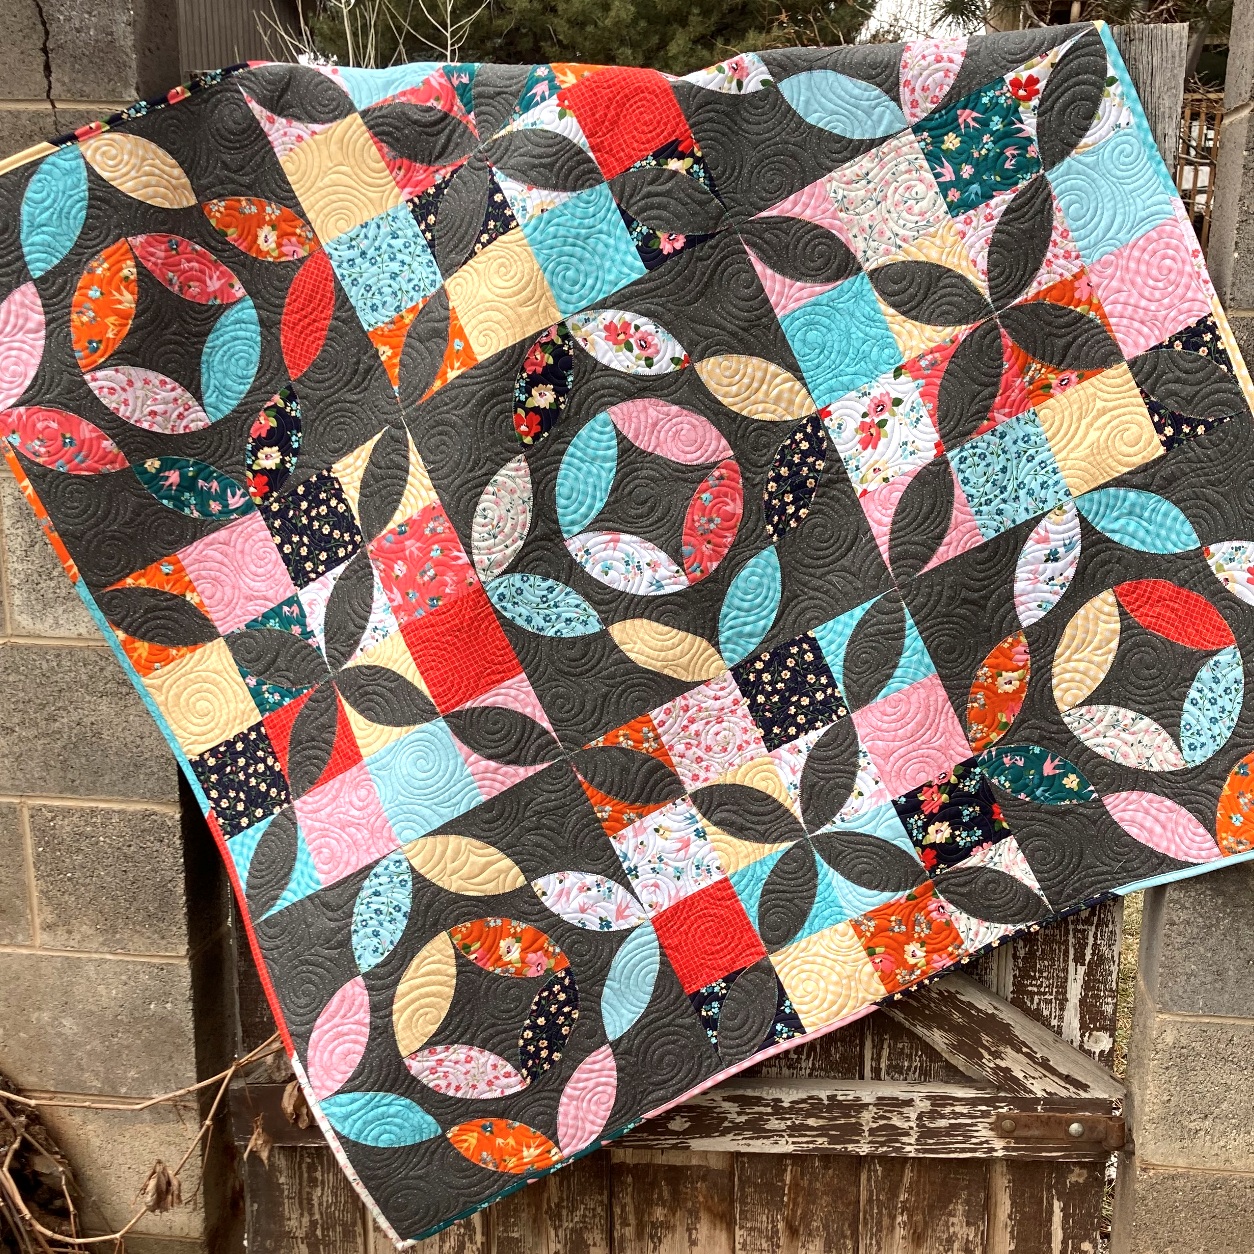
And just like that, you have a beautiful 54 1/2" x 54 1/2" finished Petal Patch Quilt Top!!!! So fun!!!!
STEP 6 - FINISHING THE QUILT
And now let's get this quilt top!! All that is left is to just Baste It, Quilt It, and Bind it!!!! Yup, three big things in one little sentence. If you are new to quilting and need some tips on how to Baste It, Quilt It, and Bind It, you can check out myFinishing Your Quilt Video Series. It will walk you through it all in step by step detail.
I quilted mine with an all over swirl design that I just love to stitch. It is so relaxing and fun, and also it adds lots and lots of texture to the quilt!!! It also will help keep all of that applique super secure stitched ;)
And that is my Petal Patch Quilt!!! I hope you have enjoyed this tutorial and if you make your own Petal Patch Quilt I would love to see it!! You can email me a picture at happyquiltingmelissa@gmail.com, or post it to social media with #happyquiltingwithmc :) I can't wait to see your Petal Patch Quilts!!!
Thanks so much for sharing this new quilt finish and tutorial with me.