Friday, June 8, 2012

Double Dresden Delight - EZ Dresden Challenge

Welcome!!!  It's Day 7 of the EZ Dresden Challenge Blog Hop and I don't know about you, but there has been lots to inspire so far!!  I love this little ruler, it is just so easy to be so creative with it :)  So do you have some ideas percolating for your Challenge Entry??  There are some amazing prizes up for grabs!!  You can check out all of the entry and prize information here :)  


And now let's get to a little Dresden Inspiration via my little creation which I like to call Double Dresden Delight!!  I really love the look of a traditional Dresden so I wanted to create something that still maintained that traditional look but also spice it up a little bit.  This is what I came up with!!


Can you tell why I call it Double Dresden Delight??  You make the Dresden point on the inside as well as the outside. Don't they just look like beautiful spinning flowers :)


So, you want to make your own??  Here's how to do it . . .

Note - For a free Printable PDF pattern please go here :)

You will need 6 - 9 fat quarters.  (Or if you want a completely scrappy version you can do that as well.)  My Fat Quarters are mostly from Amanda Murphy's Veranda collection with a few additions from my stash.     You will also need 1 1/4 yards of a solid white or other neutral color and of course an EZ Dresden Ruler.


Start by cutting strips from the fat quarters.  Now you will notice that each of my "flowers" are different sizes.  That is because I cut each Dresden plate set a little different.  There is no set way of cutting these and your ruler does not have to be aligned along the top or the bottom.  Just make sure that all of the plates in each set (5, 10, or 20) are cut the same and I recommend not cutting any smaller than 1 1/2" and not doing a strip width smaller than 4" (it makes it hard to turn both ends otherwise).


Once you have your strip cut align your EZ Dresden ruler along the strip at whatever set measurements you decided on.  Cut along the side of the ruler.  Then just rotate the ruler to cut your next dresden plate. I cut 2 -3 dresden plates out of each fabric in each designated size.  (You need 20 dresden plates for a full circle, 10 for a half, and 5 for a quarter).


Now you are ready to start making your Double Dresden plates.  Fold each plate with right sides together and stitch a 1/4" seam along the widest edge.  (I found it best to only work on one plate at a time as it is easy to confuse the sizes and mix them up :)


Chain stitch all 5, 10, or 20 plates along the widest edge.  Now, don't bother to cut them.  Just flip them over and chain stitch a 1/4" seam along the thinnest edge as well.


Now clip the threads between both ends of all of your dresden plates.


Finger press both of the seams open.  If you desire, you can clip away a little of the excess fabric at the point to help it lay flat, but just be very cautions not to clip your seam.


Turn the wedge right side out so that the seams are now hidden on the inside.  You can use a sharp ended tool to help press out your points so they are nice and crisp.


No press your turned edges being careful to keep the seams nice and centered.  They may want to shift on you a bit.  Try to make sure the seams are lined up :)


And now that the plates are all sewn you are ready to start sewing them together.  You always want to sew your plates in groups of 5.  So lay out your first five dresden plates.


Sewing them together is easy.  Just lay the second plate onto the first plate with right sides together.  Be sure to line up your folded edges along the top and bottom.  Sew a 1/4" seam along the edge.  (You don't have to pin but you can if you like :)  Continue in this fashion adding the third plate onto the first and second, and then the fourth, and fifth :)


Now if you are making a Corner piece you are done.  If you want to do a side piece, just go ahead and sew 2 sets of 5 together in the same fashion to make a half circle.


And of course to make a whole, you just take 2 sets of 10 and sew them together.  When you make a complete circle you will often get bubbles.  Don't stress, those are adjustable.  Just unpick the seam where the bubble is being formed and make the adjustment needed.  Larger seam if there is a bubble, smaller seam if there is a pucker :)  Adjust as many seams as necessary to get it to lie nice and flat :)


Now make as many corners, half's, and full circles as you like for your quilt.  I went with the ruler of 3's and did 3 of each.  Press your Neutral fabric yardage so there are no creases in it and trim the selvages and square it up.  (Appx. 42" x 42")  Then go ahead and lay your dresden pieces out shifting them around until you get a layout that is pleasing to you.  (I played with mine for quite some time :)  Once you have them all in place you need to secure them.  Do this by either pinning the top and bottom of each plate (Yes, it is a lot of pins but worth it to keep everything nice and flat) or use Steam a Seam 2 Tape to secure the top and bottom of each plate.


Now you are ready to secure stitch your plates to your background yardage.  I like to do an 1/8" seam so I use the edge of my presser foot as a guide and move my needle over as far right as it will go.  Then just stitch along the edge of the plates.  Go all the way around the inside first, and then repeat going all the way around the outside.


And once you have secure stitched all of your dresden plates you are ready to finish the quilt up.  I used a water soluble pen and a 1" ruler to mark on my quilting design.  It took a little while but I love the look of it :)  After quilting, you are ready to bind.  I used the remaining pieces of my fat quarters to make a fun scrappy binding that matched the Dresden Plates :)

Now just sit back and enjoy your beautiful Double Dresden Delight!!


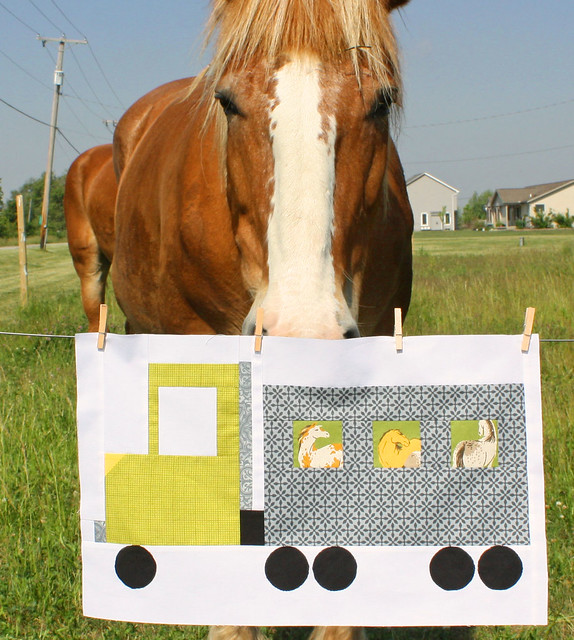
As you can see, this little one is sure enjoying it :)


And here is a close-up of the quilting.  I alternated the colors in stitching just to all a little pop :)  I am thrilled with how the quilting turned out and really think it ended up adding to the overall effect :)


So that's it :)  I hope you enjoyed the tutorial and that it got your creative juices flowing for your own EZ Dresden ruler creation :)  Thank you so much for stopping by!! If you make your own version of the Double Dresden Delight I would love to see it.  You can add it to my  Inspired by Happy Quilting Flickr page.

And  be sure to check out all of the great Dresden Projects!!  So much inspiration, so little time :)
June 1 - The Sat Lake Modern Quilt Guild: www.slmqg.com/
June 2 - Lee: 
 freshlypieced.blogspot.com/
June 3 - Katie 
 www.fromthebluechair.com/
June 4 - Victoria: 
 bumblebeansinc.blogspot.com/ and Tanya: www.squaresandtriangles.com
June 5 - Val: 
 howaboutpinkplease.blogspot.com/ and Leigh: leedledeedlequilts.blogspot.com/
June 6 - Amy: 
 amyscreativeside.com/ and Elisa www.stitchoutsidetheditch.com/
June 7 - Katie: 
 www.swimbikequilt.com/ and Emily: emsscrapbag.blogspot.com/
June 8 - Melissa: 
 happyquiltingmelissa.blogspot.com/ and Brooke: pitterputterstitch.blogspot.com/
June 9 - Nicole:  
 mamalovequilts.blogspot.com/ and Amy sukie.mt-wudan.com/
June 10 - Elizabeth: 
 www.dontcallmebetsy.com/ and Colleen: www.thebusybean.com/
June 11 - Faith: 
 www.freshlemonsquilts.com/ and Deonn: quiltscapesquilting.blogspot.com/
June 12 - Angela: 
 angelaflicker.com/ and Barbie: thequiltingmill.blogspot.com
June 13 - Amy: 
 www.diaryofaquilter.com/ 
June 14 - Jessica: 
 sewcraftyjess.blogspot.com/
June 15 - Salt Lake MQG: Wrap-up 
 www.slmqg.com/  
 A huge thank you goes out to the wonderful sponsors of the EZ Dresden Challenge.  Without you this wouldn't be possible :)
EZDresden_Logos


Pin It!

Thursday, June 7, 2012

Kids Craft Containers - A MBS Tutorial

I have another bake shop tutorial today but this one is quite a change up from my original type of project.  This one is for Kids Camp and it is totally kid friendly :)  Introducing Kids Craft Containers :)


These little guys are super for keeping those crayons, markers, colored pencils, and whatever else neat and tidy.  And since they are so cute they can just be left out on the desk until the next time they are ready to be used :)

All you need are some scraps and some Mod Podge (love that stuff!!)  And you are on your way :)

Oh, and these also make fabulous Teacher Gifts!!!  And it is something your kids can actually make for their teacher :)  My daughter made this one for her teacher and she loved it :)

So pop on over to the Moda Bake Shop and see how to whip up your own Kids Containers for your wee ones :)


So I bet your wondering, well what did she do new??  Well I could say I tried crafting with all of my kids and managed not to yell at them.  (That would so be something new :)  But as I knew I was posting this tutorial today I actually  posted what I tried new on Tuesday : Making a Paper Pieced Pattern :)  It was quite the saga.  If you haven't had a chance to read it you can check it out here.

So what have you tried out new??  Link on up :)
 
Pin It!

Wednesday, June 6, 2012

So Much Going On

I am just so excited for all that is going on right now.  It's funny, I thought summer was supposed to slow down but instead, it seems like things have kicked up quite a few notches.  But I am totally loving it!! 

 I have 2 tutorials in the next 2 days  and then another one next week, and one in July.  I just love participating in blog hops and the like, it is so much fun and I make so many amazing friends.  And best of all, it really helps me to get my projects done!


And I also have my non-blogger land projects in works. Yesterday I quilted the center Semi in my Dad's Father's Day quilt.  Now I just can't decide how I want to quilt the rest of it.  I am debating between the same pattern on a larger scale or wavy lines.  Any suggestions??


And I continue to work on my King and Queen size Braided Irish chains.  These 2 are a huge WIP but I just love working with these fabrics so that is nice.  Each night my husband and I watch old episodes of  Friends to unwind before bed.  It is a great time for him to surf the internet and check up on sports and I use the time to pin.  This is what I did last night.  (It's nice that we can spend time together but we both still get to do what we want, tee hee hee :)

And the nights before I pinned these 2 stacks.  The 4 patch squares are all done and the other stack has now been stitched and I just need to press them now.  It is amazing how long it takes to pin a stack over 100 pieces.  I need to teach my kids how to press :)

And I pulled some fabrics for one of those tutorials mentioned above.  I am excited to start cutting into this happy stack!  And I am just waiting on fabric to arrive for the Christmas in July tutorials.

So here is the rundown.  Not so many completions but a lot of work going on, so I am good with that :)


Designing Stage
  • King Size Serenity Quilt
  • Circle Meets Square Quilt
  • Snip and Clip Quilt - Just Waiting on Fabric to Arrive :)
Piecing Stage
  • Jessi and Me Quilt 
  • June Bee Block
  • Sew Bee Create Quilt
  • 10 Little Happy Kids
  • Braided Irish Chain - Queen and King
Quilting Stage
  • Solids Quilt for Free Motion
  • Father's Day Rolling on Out Quilt
Completed Stage
  • Kids Camp Project

Pin It!

Tuesday, June 5, 2012

A Paper Piecing Saga :)

I am thrilled to say that my large (about 20" x 34") paper pieced semi is now complete!!  Yippee Skippee!!!  And, I am happy to say that I am quite pleased with the way it turned out. (And that is always a bonus :)  So I thought this morning I would share the little saga of how this block came to be.  


This is my Dad's semi.  The last time he stopped by (My mom and I use him as our personal delivery guy :) I snapped a quick picture of his truck through our front window.  So I took this picture and brought it into my EQ 7 program.  

From there I drew the lines in with the picture as reference.  Once I had the basic outline of the truck I imported the image into excel and went to print it off and decided it needed color.  So I went back, added some color and then printed it of to use as a paper pieced pattern.  (I made it rather large so there was a lot of cutting and taping going on to make 1 large pattern.)  


Then I sat and stared at this and tried to figure out how in the world I was going to turn that drawing into a paper pieced pattern.  I started by breaking it into 4 sections and then adding some connecting lines :)  And I figured from there just go at it and make the best of it.  So I pieced the first section which went all right and then upon starting the second section I dedided that I could probally put it together just as fast doing normal piecing as it was mostly squares and such.  So I did that.  And this is what came from it.  


Ya, silly me didn't think about the fact that when you paper piece the image is reversed.  So when I regular pieced it wasn't reversed.  Needless to say, piece 1 was not matching up with piece 2 as the front of the truck was facing the rear :)  So I got frustrated, scribbled on the piece I had done wrong and wen't back to all paper piecing.

It was slow going at first but the more I practiced (this is only my second time paper piecing and my first time attempting to make a pattern:) the more the technique started to make sense and the easier it got to adjust my little "pattern" to reflect more of a standard paper pieced pattern.  (not that I am saying it is anything to write home about :)  So all in all, it was a learning process.  I can't tell you how many times I changed things but in the end, after tons of new drawn lines and lots of scribble lines, I came up with this as is the final paper pieced verision :) And I figured since I had spent so much time to put it together I might as well share it, right :)  So if you ever need a large paper pieced semi truck you can find this image in Google Documents here :)


You can download the image and then put it in any program you wish.  You can change the size to the size you need and then get paper piecing (I stretched this image quite a bit to make it longer :)  Oh, and like I said, this isn't a fabulous paper piecing pattern as you will have to add the 1/4" seam allowance around each of the sections on your own since I didn't make the sections separate.  (Also, I found out that you have to piece the frame of the door regular as I couldn't figure out how to paper piece it once you had cut out the center, but it is symmetrical so you don't have to worry about piecing it regular because it won't mess it up :) Basically, if you ever use this and have questions just email me, I would be happy to explain my crazy way of doing it :)

And so after all was said and done, I had one pretty awesome Semi, if I do say my self ;)  It was a rather large challenge, but I learned so much along the way and that makes me so happy!!

 I actually sewed all of the blocks together yesterday and basted the quilt.  So now I just have to get it quilted and then I will share the full reveal :)  I am just so excited, it is going to be such an awesome Father's Day gift :)


And since it is Tuesday and I actually posted a finish (well part of the finish) I might as well link on up :)


Fresh Poppy Design
Pin It!

Monday, June 4, 2012

The Last of the Blocks Rolled On In!!

I am so excited to have the last of my Semi Bee Block arrive.  Don't you just love when you get squishy packages in the mail!!!  It is just so much fun :)

Lisa made this amazing Car Carrier block.  Can you believe she pieced in those cars!!  So amazing :)  I just love how creative and fun it is.  (And I want a purple polka-dot car!)


Ursula  made this super fun Horse Trailer Semi.  I love that one of the horses has turned his back on the camera.  Apparently, he is not a fan of the Paparazzi.  And isn't it fun that Ursula took the picture by her own horse :)  Such a clever girl!


Once I had all of the blocks, I went back and added a bit of detail to some of the blocks.  You know, doors, ladders, just a few little basics.  Except for this block.  When Danny originally made it she intended to add the transformer logo to the carrier.  But she was having printer issues and ended up bagging the idea.  So, when it arrived looking all Optimus like in the navy and red I couldn't help but finish her plan.  Didn't it turn out cool!!! (It was super easy too, I just laid the paper print out on the wrong side of the fabric and zig-zag stitched over the lines, when I was done, I just tore away the paper :)


Last, but not least on the Semi Truck news, I finished paper piecing the big semi in the middle.  Yipppee Skippee!!!  However, I will save that story for tomorrow.  It is a whole saga and I have to get the kids ready for swim lessons.  (My 3 year old is in a tots and mom class so I suppose I better be getting ready as well :)  Until tomorrow, Happy Quilting!!
Pin It!