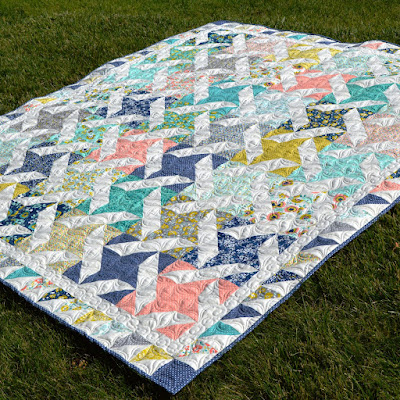
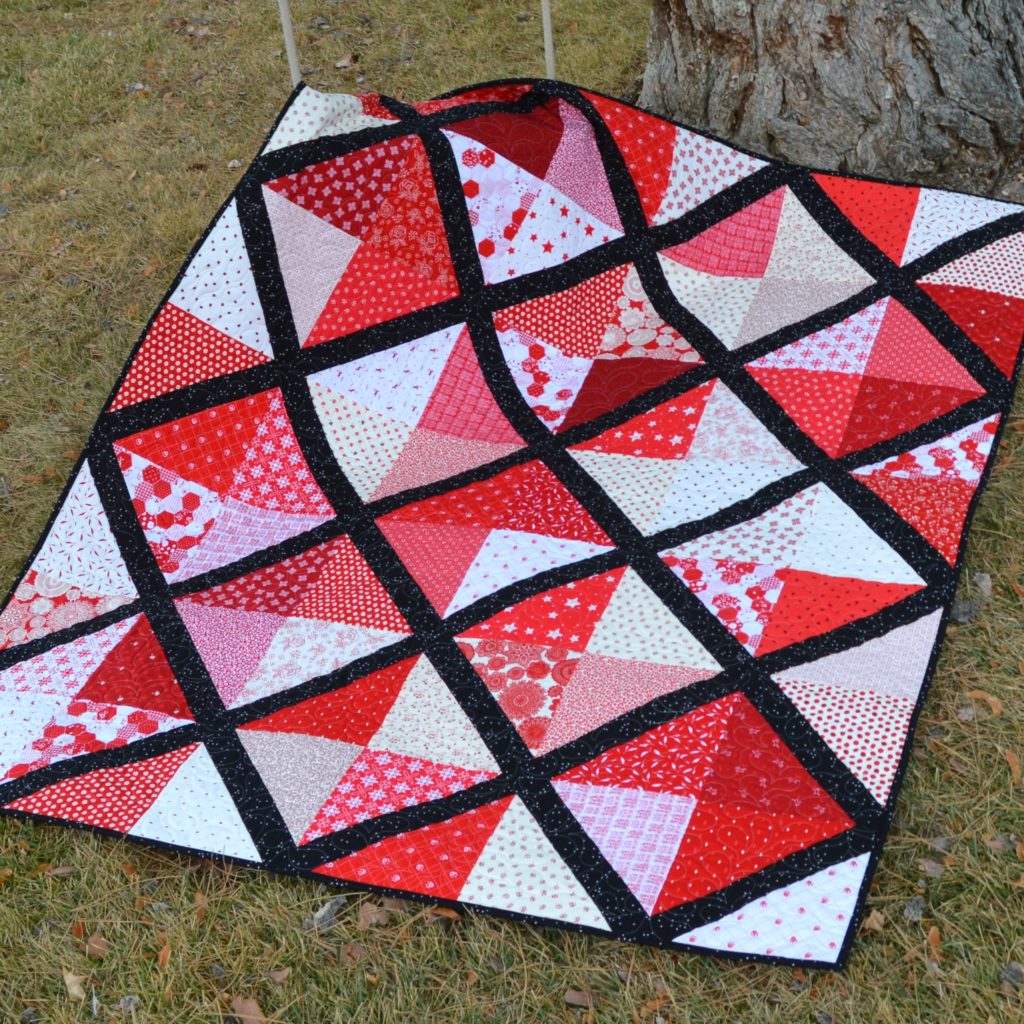
Today I am thrilled to be bringing you a new quilt and a tutorial to go along with it! I just love simple patchwork and so I wanted to share my favorite way to make Simple Lattice Blocks. No stitch and flip with lots of drawing lines today. These are made with very little waste and go together so quick and come out perfect every time with a quick trim!! And the best thing is, once you learn the technique for making the Simple Lattice Block, you can use it for any size block you like.
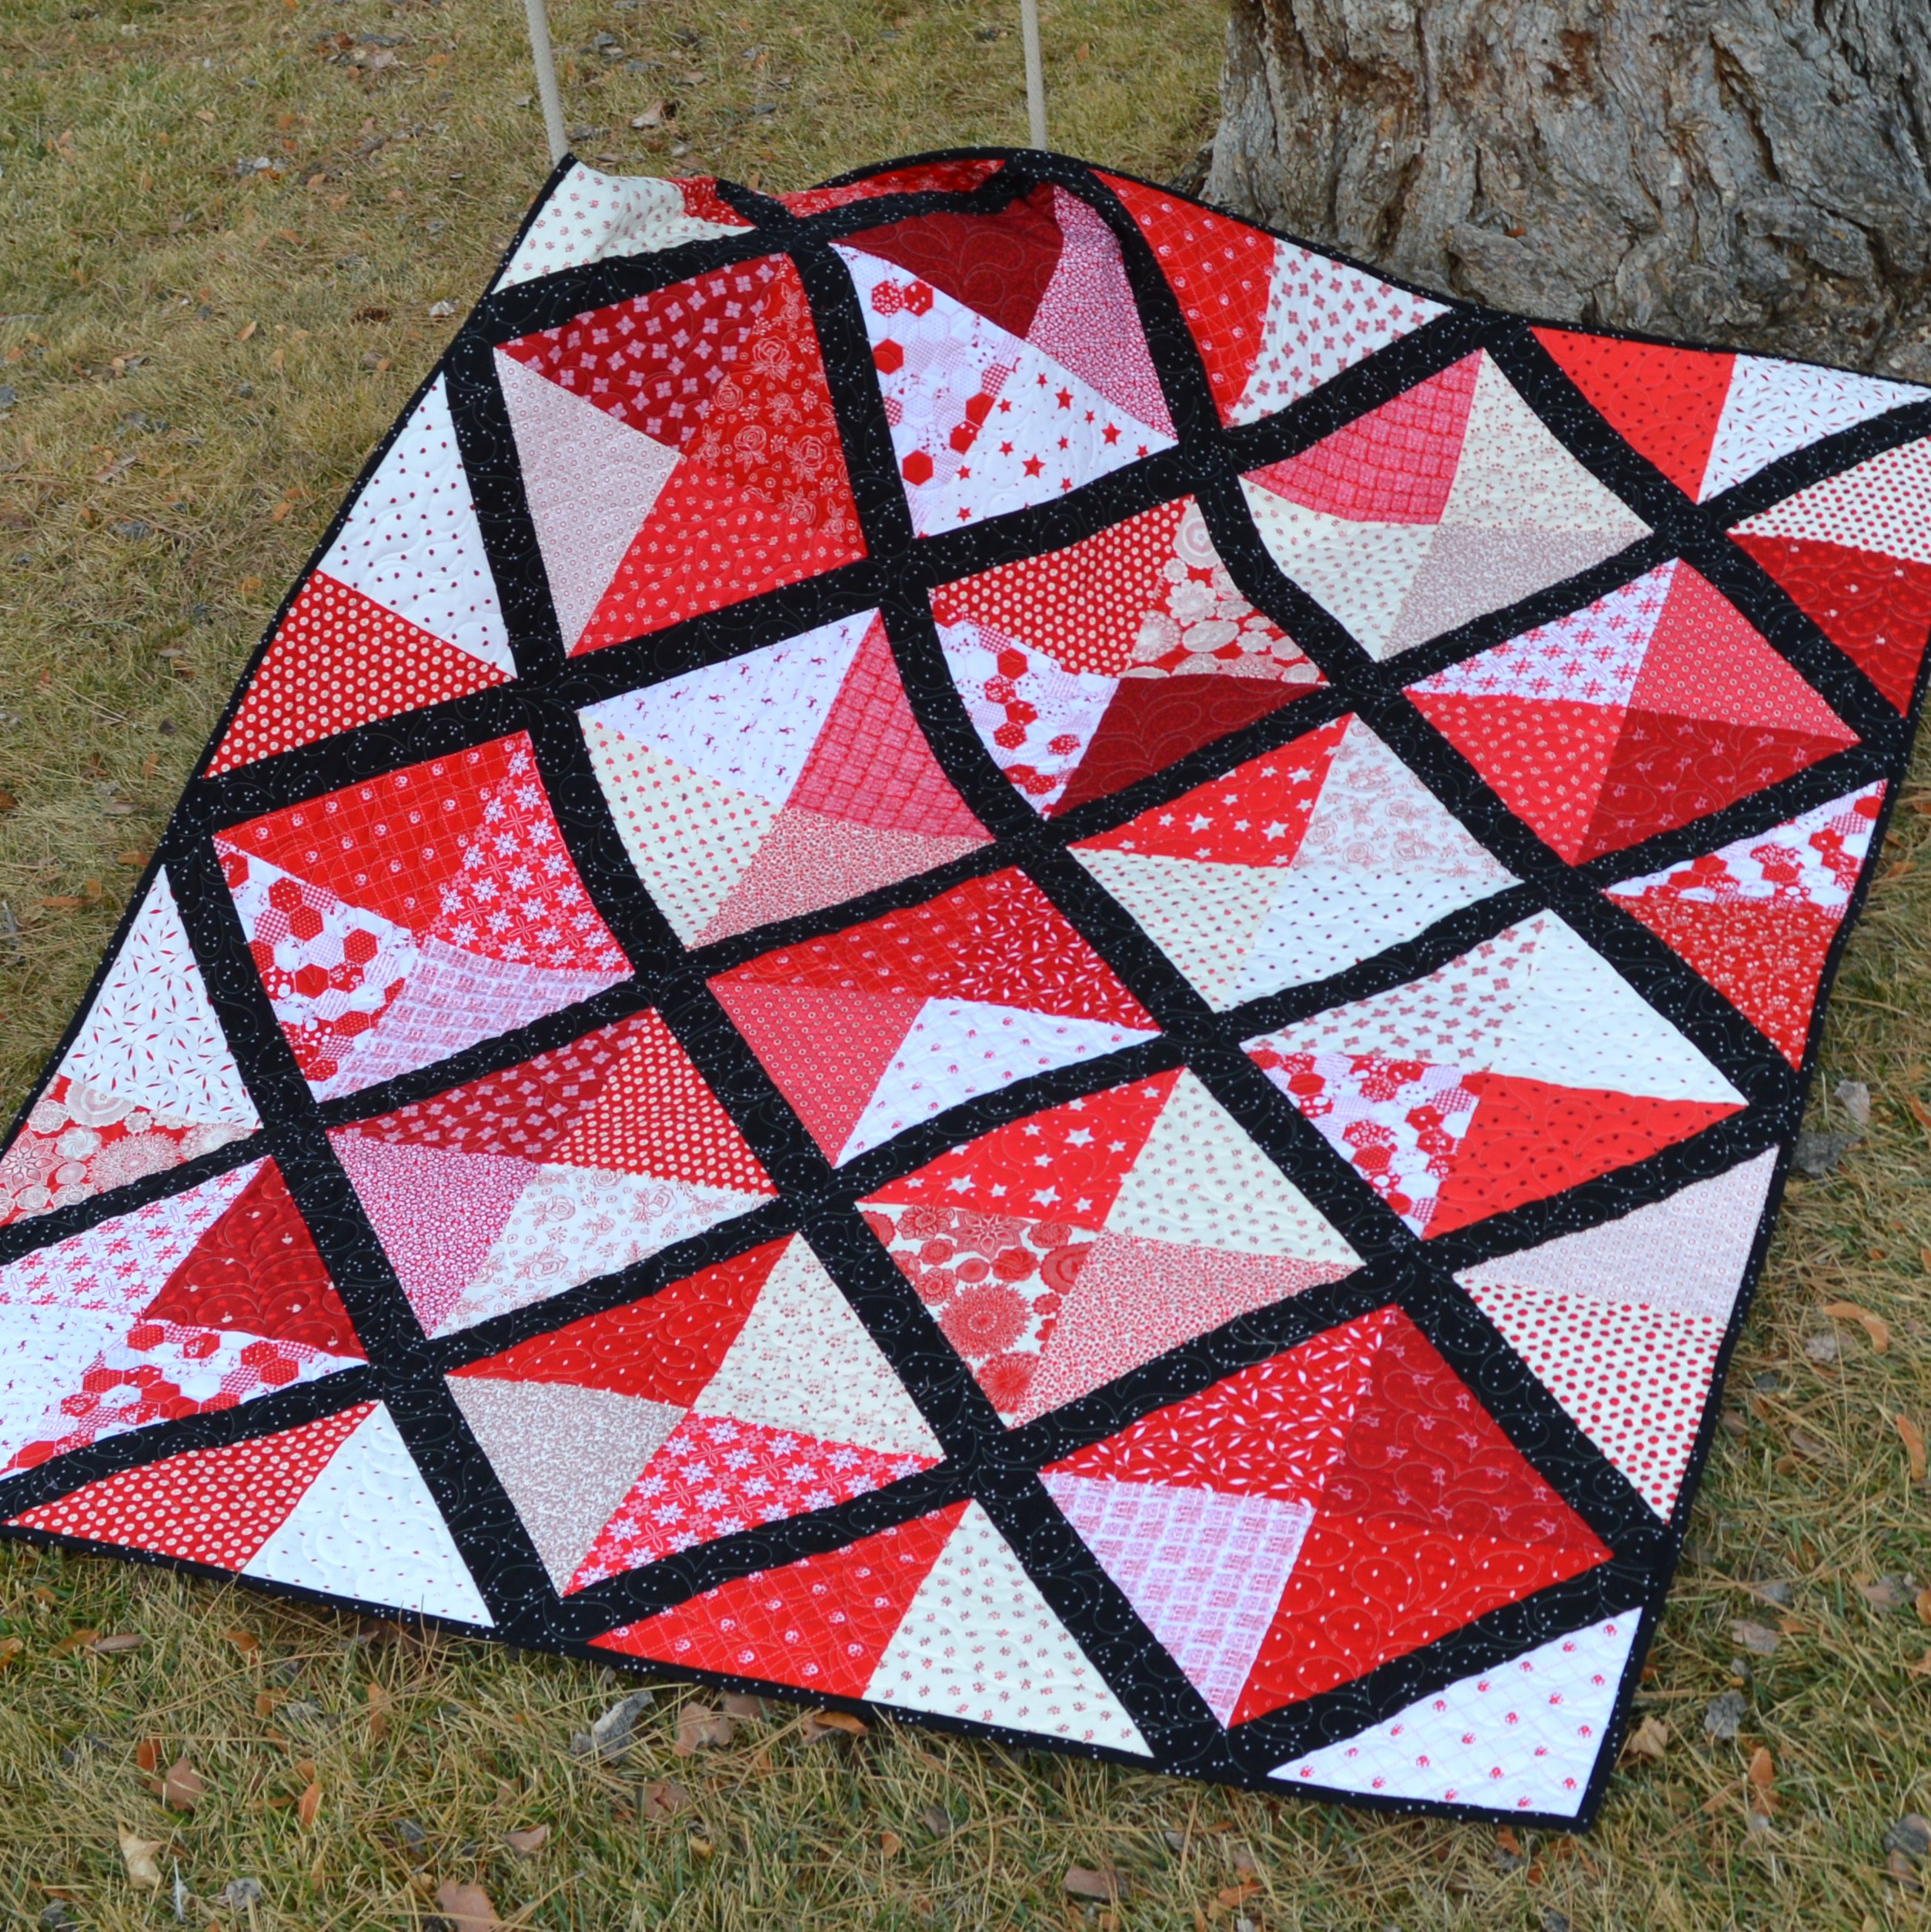
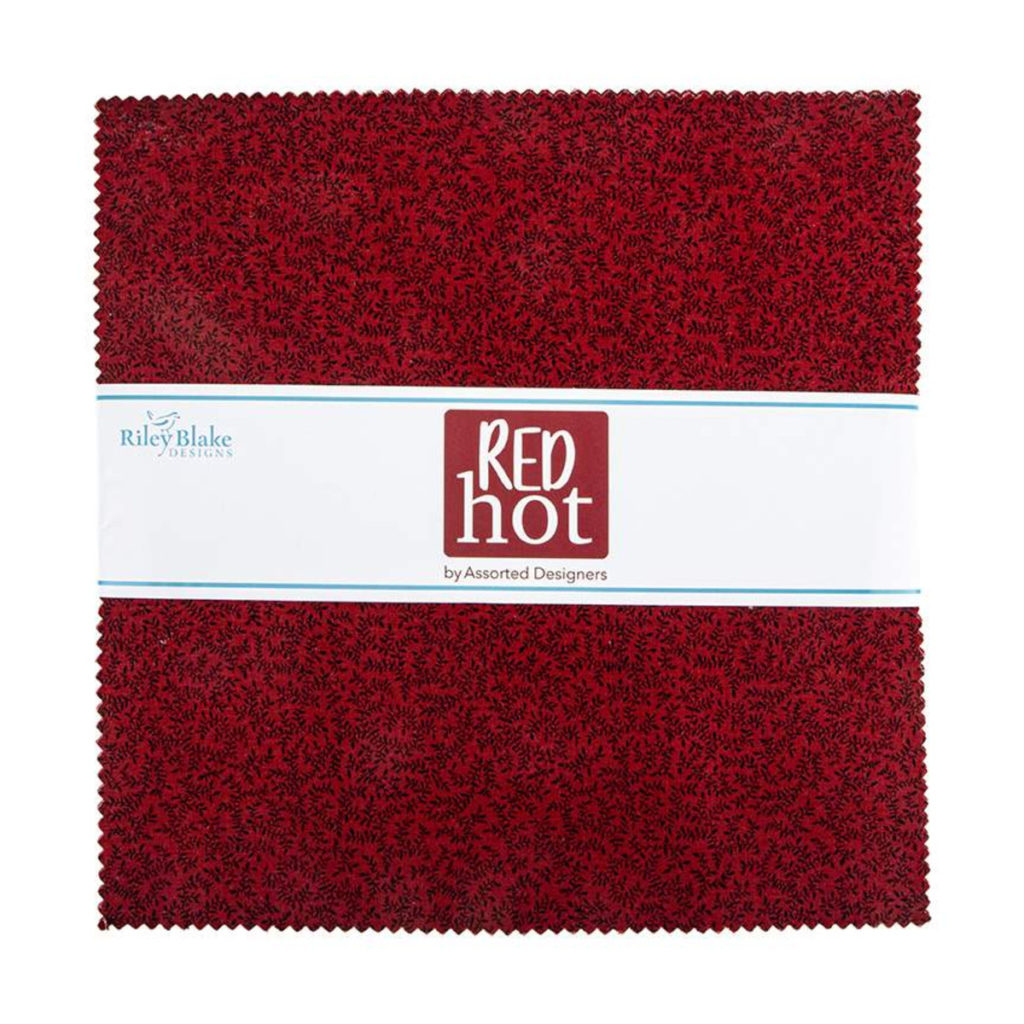
For our tutorial today, we are using a 10"Stacker of Red Hot! I make a lot of red, white, and black quilts to be donated to my Alma Mater, Southern Utah University, and this collection was just the perfect fit for another fun Alumni quilt. And I love that this fabric line has a print from 21 different Riley Blake Designers making it super scrappy and happy in all it's designed goodness. This quilt is pre-cut friendly, so just grab a Stacker and some Sashing fabric (I used Blossom Black) and you are ready to make up your quilt!
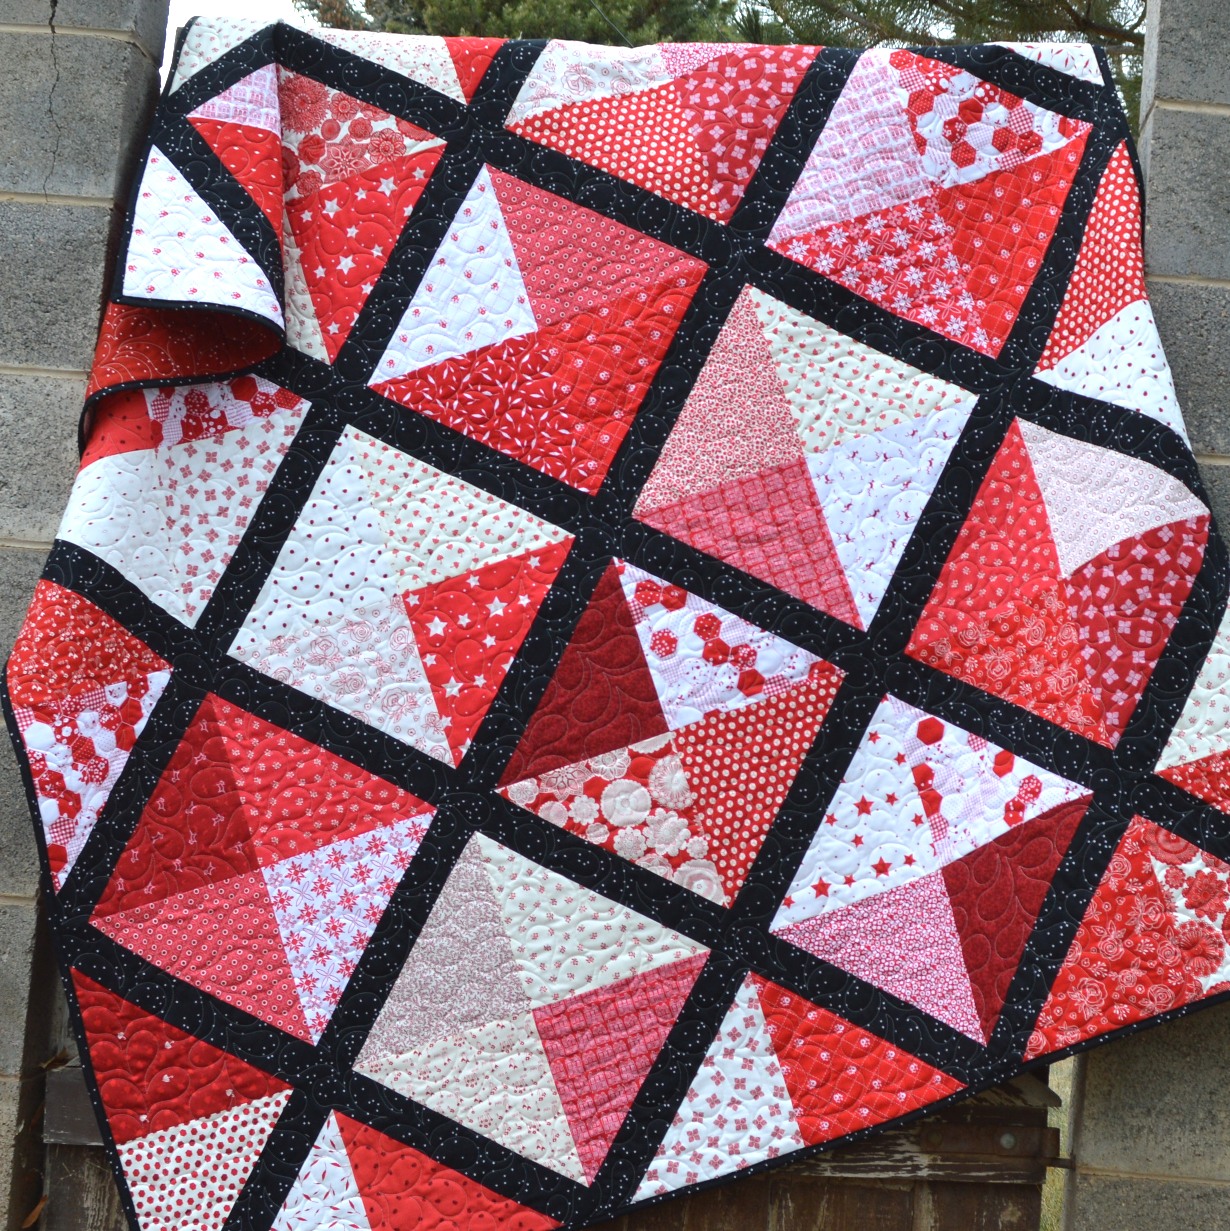
The quilt finishes at 60" x 70" so it makes for a perfect lap size quilt. It is a wonderful go-to gift when you need to whip up something quick and looks amazing in any prints!! So, let's get to making your own!!!

MATERIALS NEEDED:
To make your own Simple Lattice Quilt you will need
2 Yards of Sashing/Binding Fabric
4 Yards of Backing Fabric
STEP 1 - CUTTING
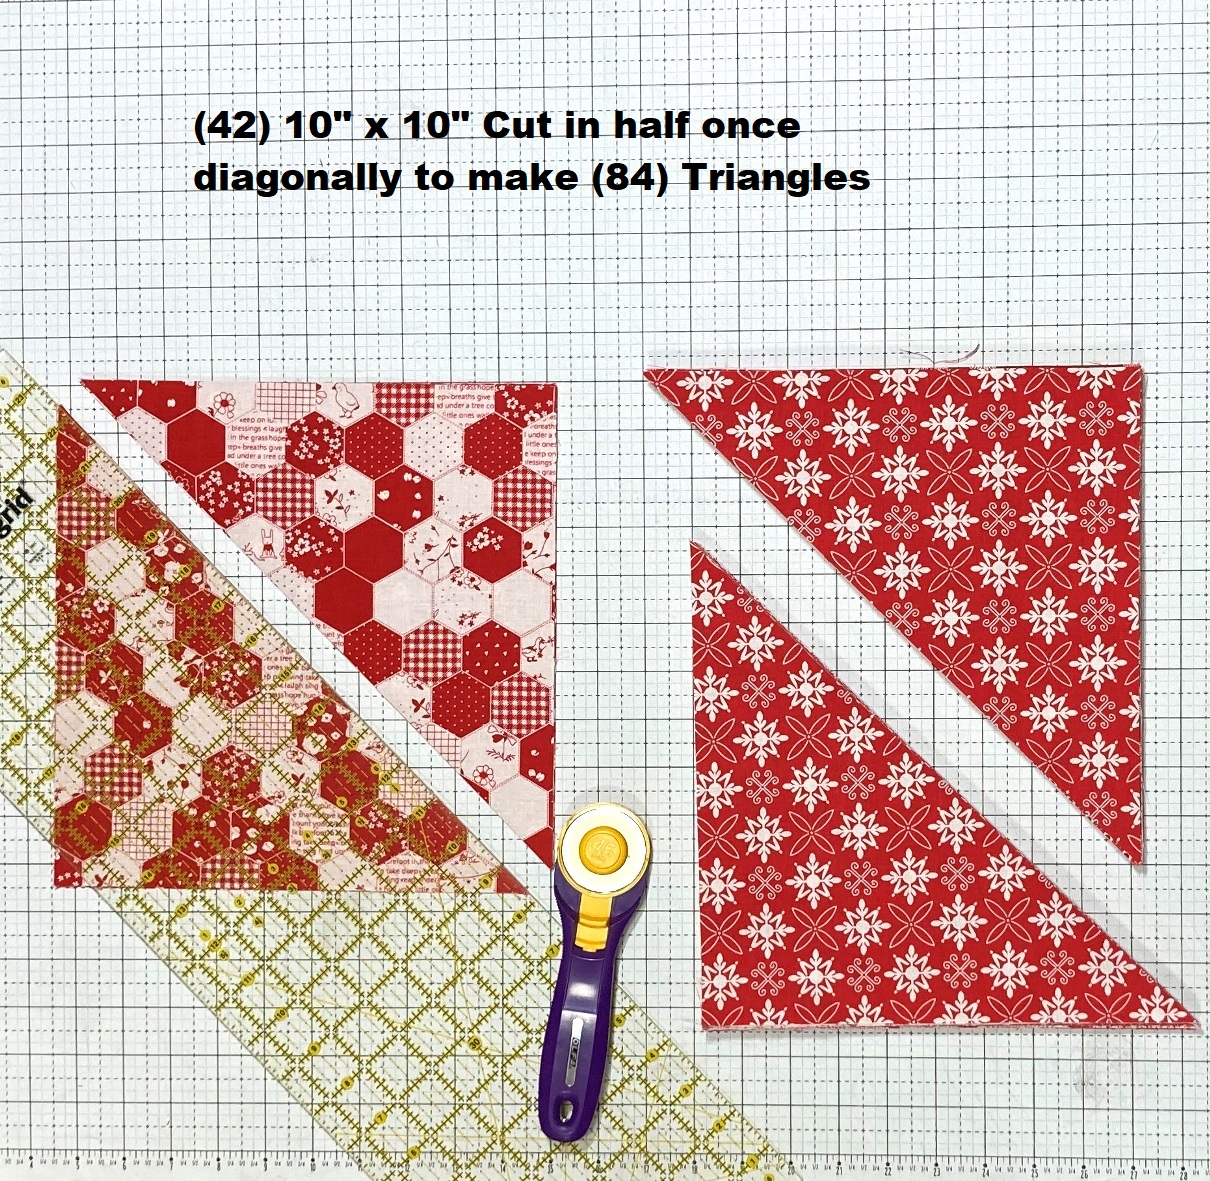
Cut each of the (42) 10" x 10" squares in your 10" Stacker in half once diagonally to make 84 triangles. Set these aside.
From your Sashing/Binding Fabric cut the following:
(7) 2 1/2" x WOF Strips for Binding
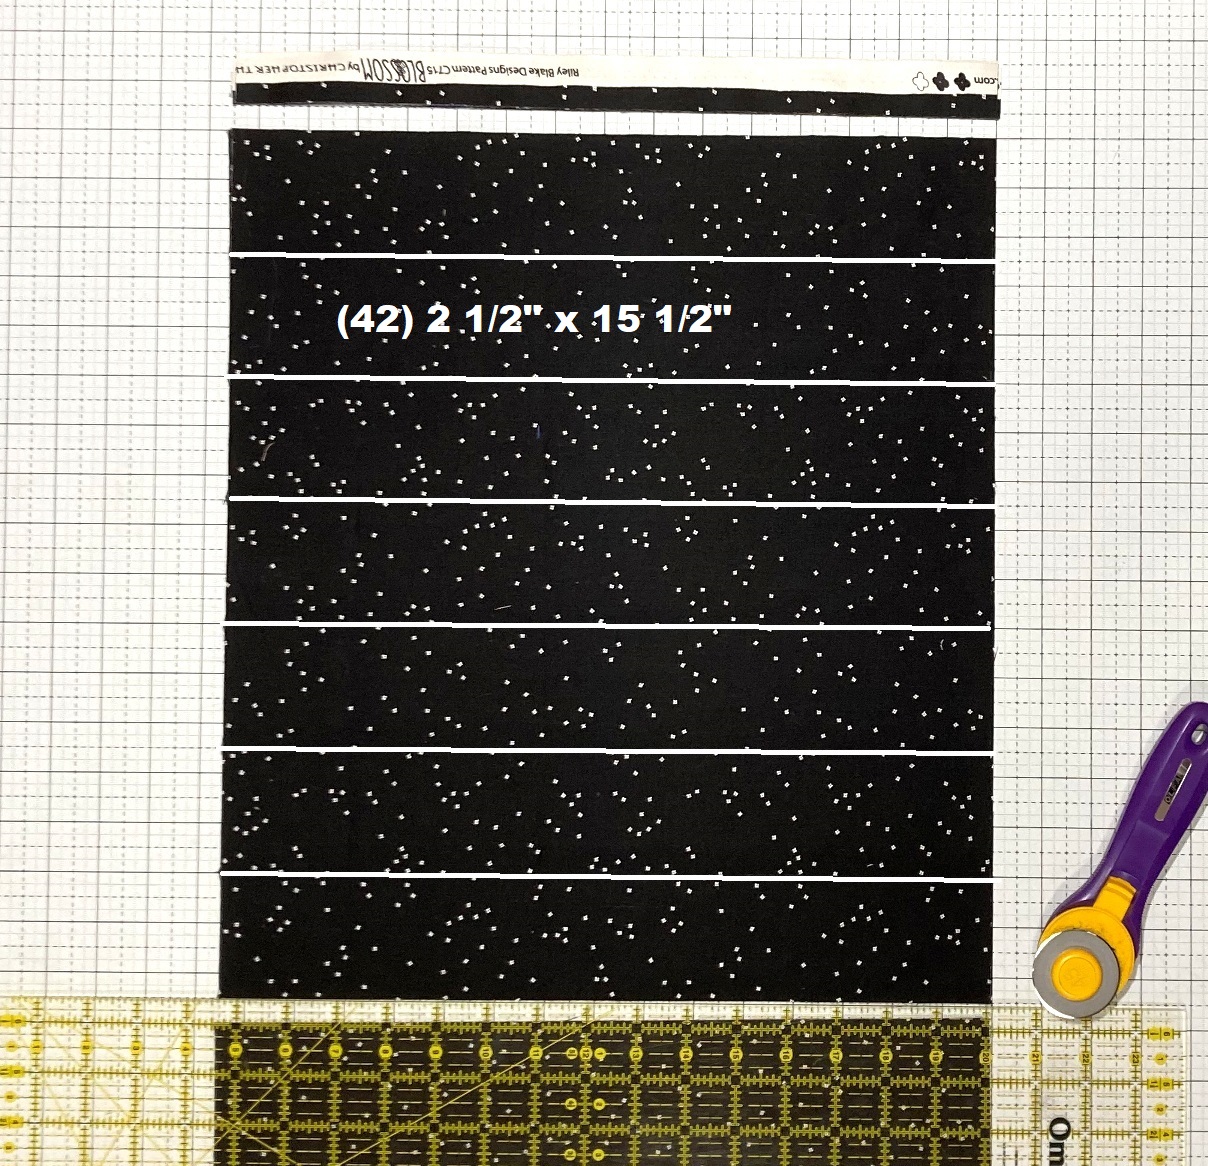
(3) 15 1/2" x WOF Strips and from each strip sub-cut
(14) 2 1/2" x 15 1/2" sashing strips for a total of (42) 2 1/2" x 15 1/2" sashing strips
STEP 2 - MAKING THE LATTICE BLOCK
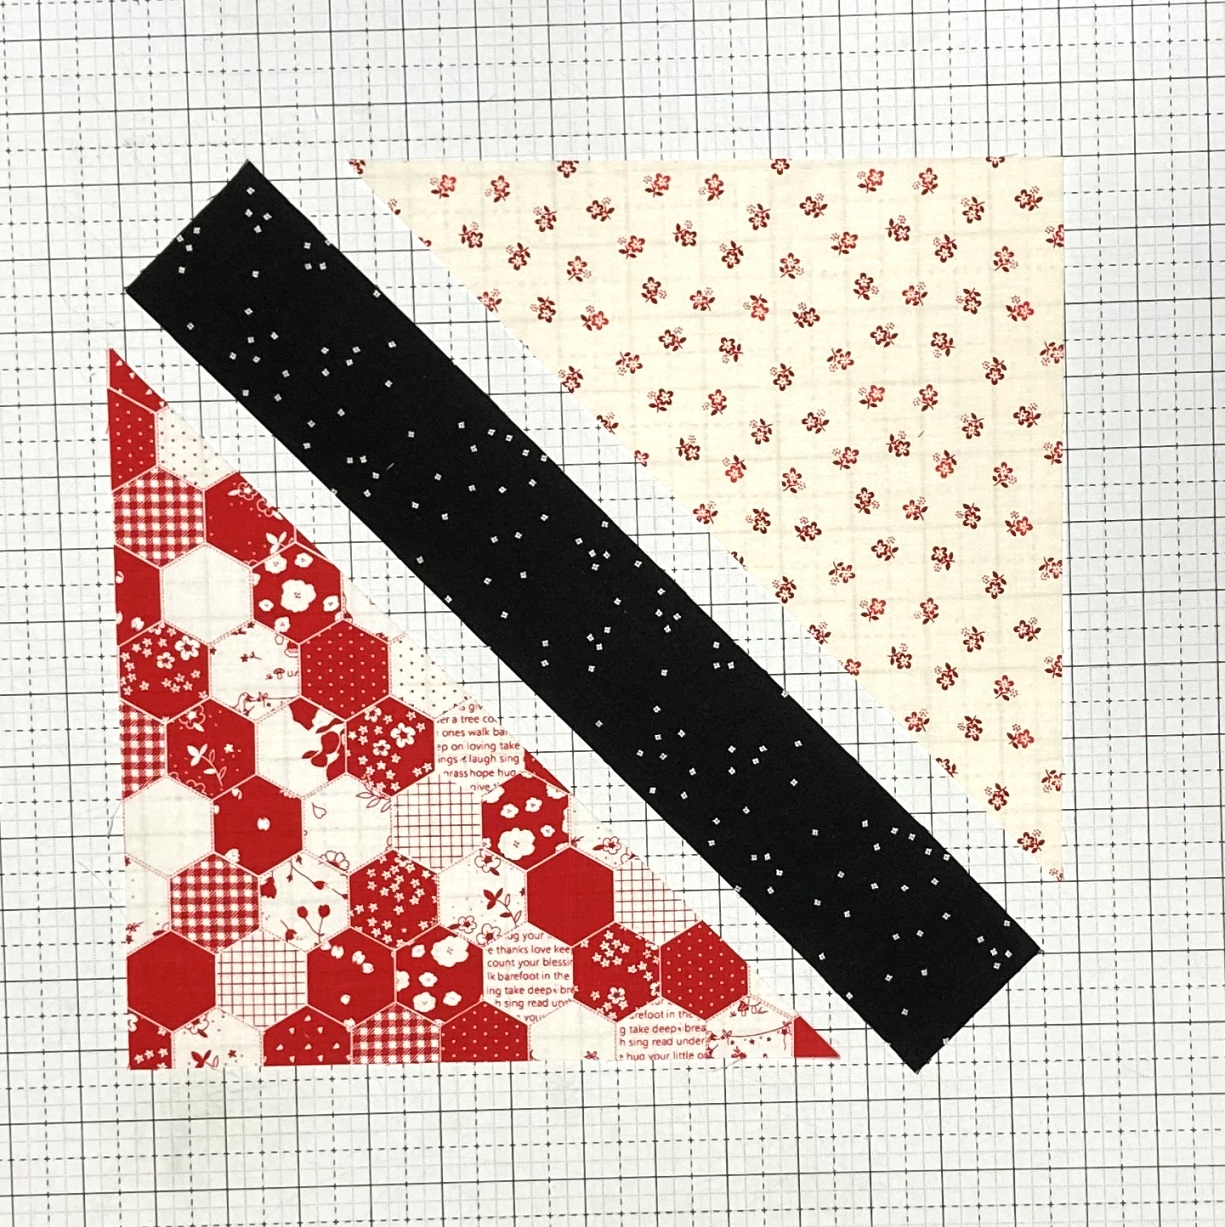
And with the cutting done, we are ready to do some stitching. To make a block you will need 2 triangles of different fabrics, and 1 2 1/2" x 15 1/2" sashing strip. Lay them out as as shown below.
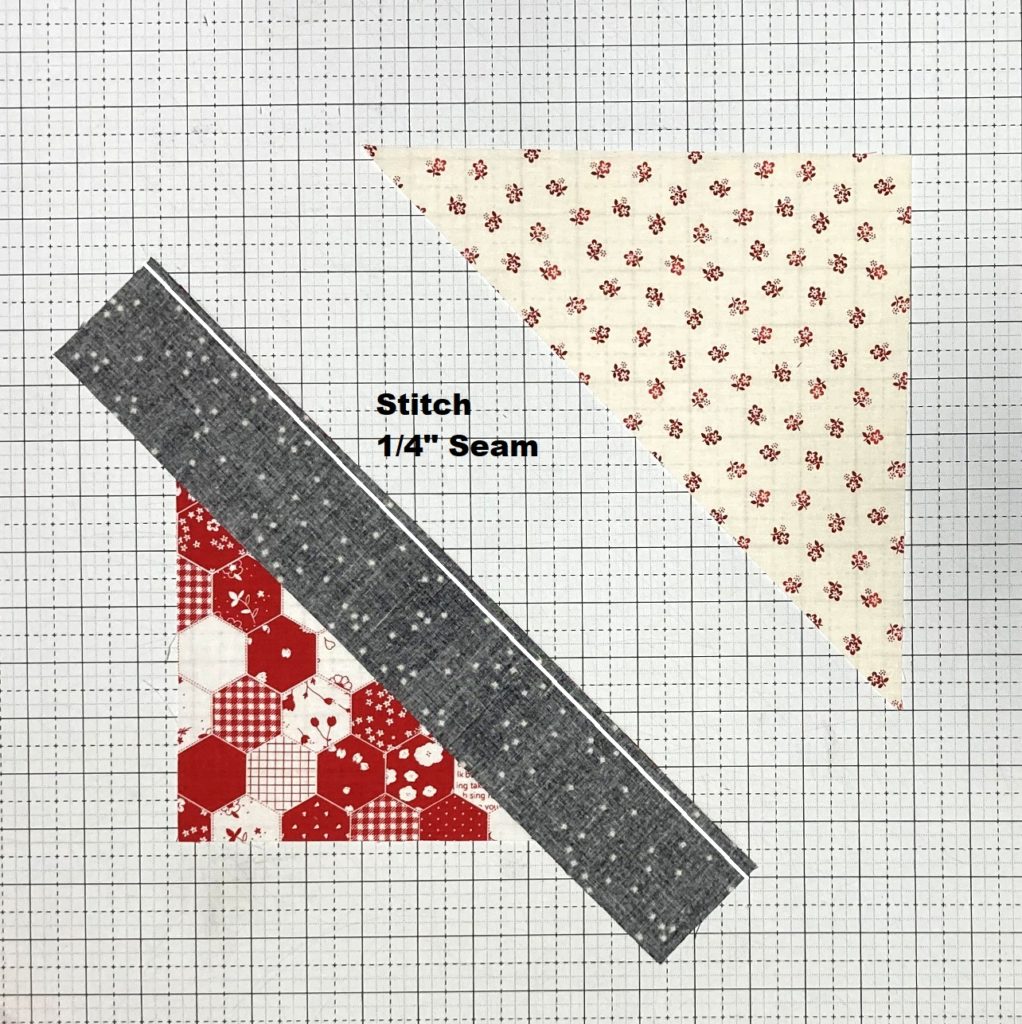
Place the sashing strip onto the left hand side triangle with right sides together. Align the edge, and center the sashing strip on the triangle. You don't have to measure that perfectly, just eyeball it. Stitch a 1/4" seam along the side.
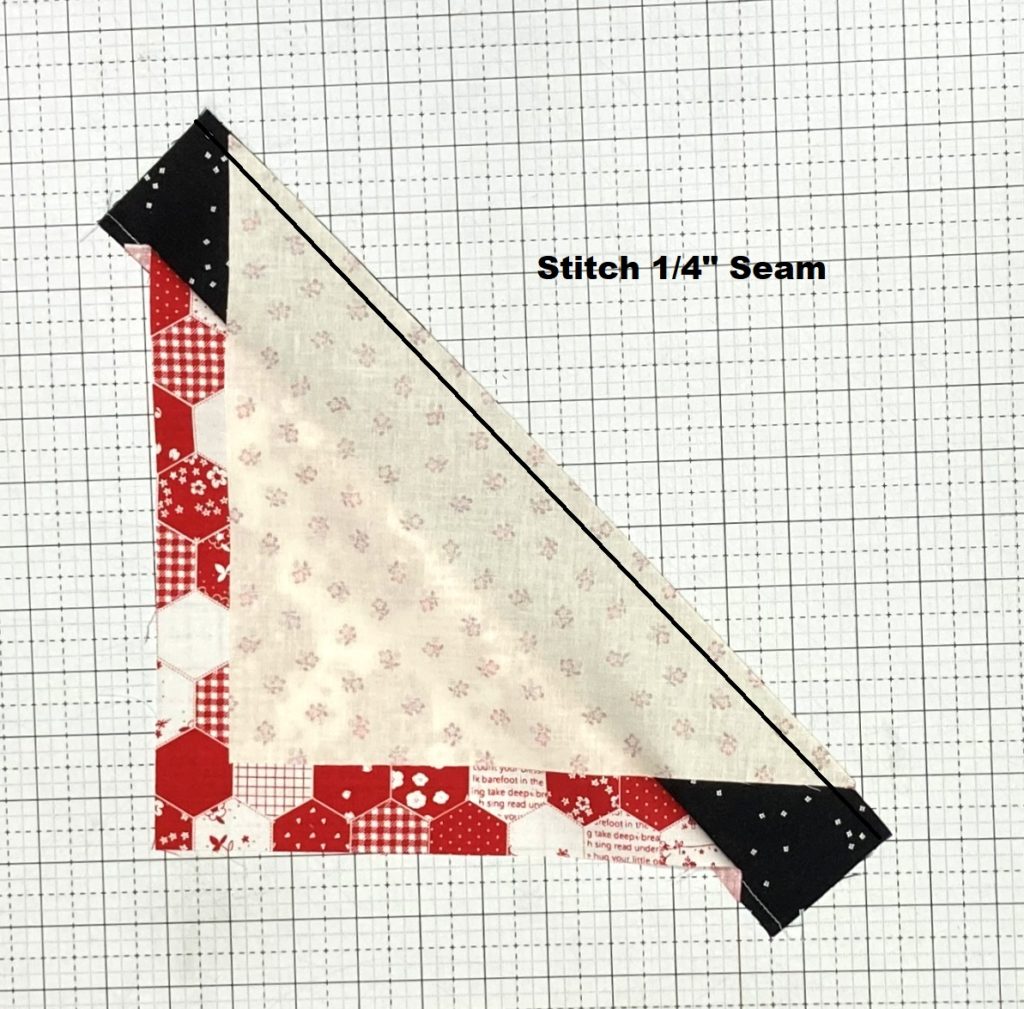
Lay the stitched pieces back out again, and place the right hand side triangle onto the sashing strip with right sides together. Align the edge, and again, eyeball to center the sashing strip on the triangle. Stitch a 1/4" seam along the side. Making the block is as simple as that. You need to make 42 Simple Lattice Blocks for this quilt.
So, to save time and thread, we will chain stitch! If you have never chain stitched before, it is just simply not cutting threads between each unit, but sewing a long string of each unit one after the other. So, even though that means you will be stitching along the edge of your strip set where there is no triangle on the top and bottom of each unit, it is still faster than stopping and starting each unit, and uses about the same amount of thread.
Stitch a 1/4" seam on the right hand side of each sashing strip . When you are finished, clip the threads between each Strip Set Unit.
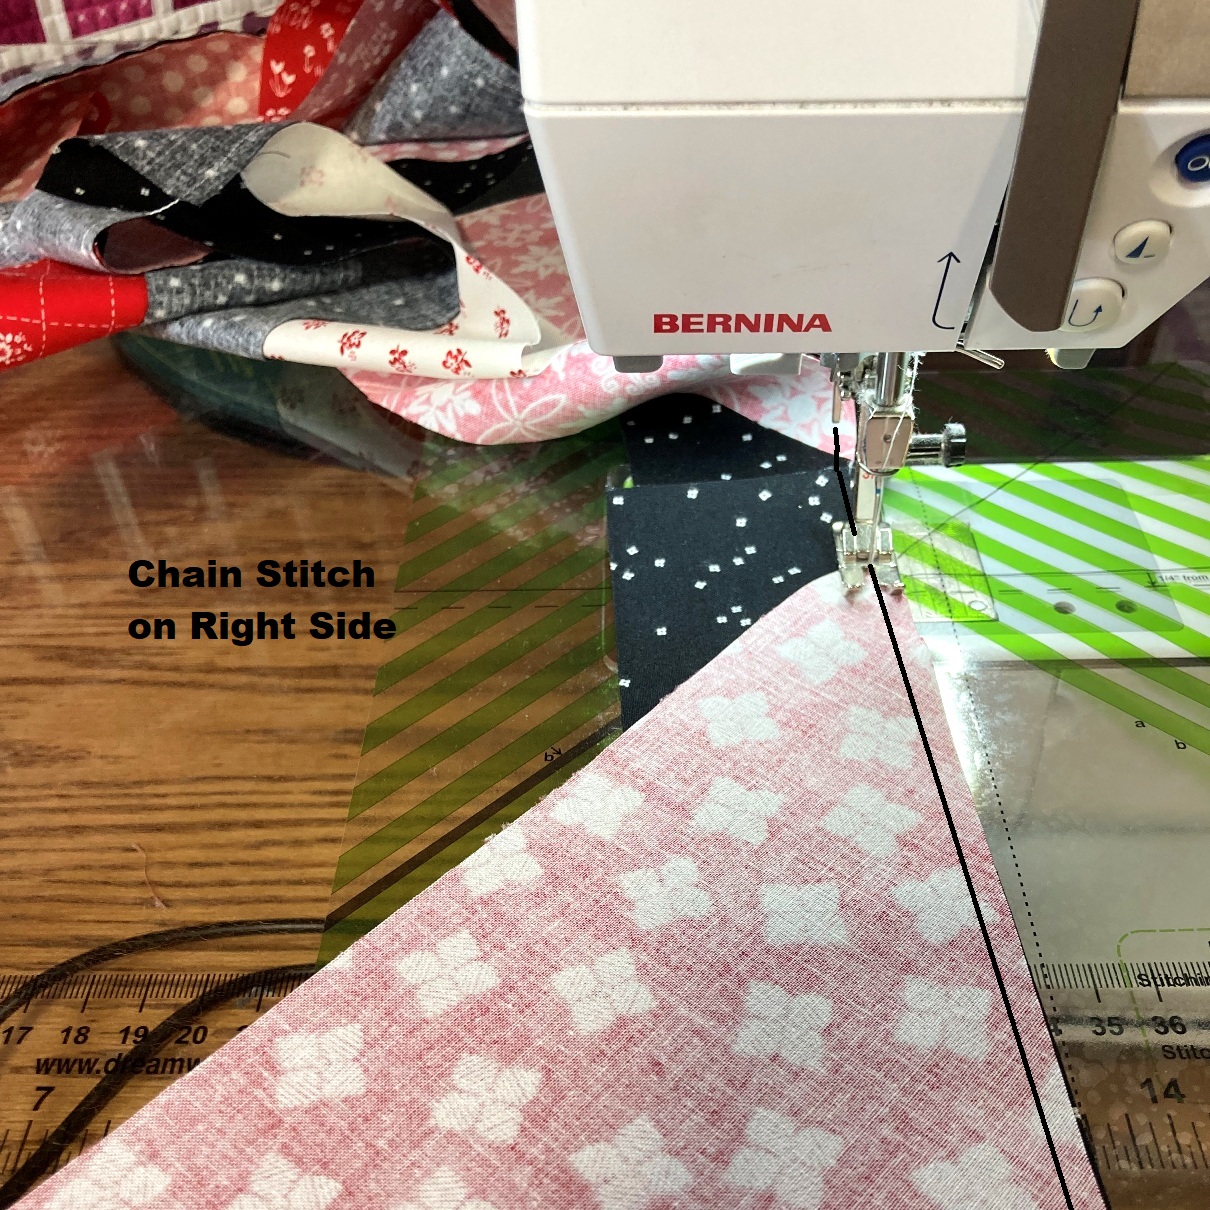
Then, Stitch a 1/4" seam on the left hand side of each sashing strip . When you are finished, clip the threads between each Strip Set Unit.
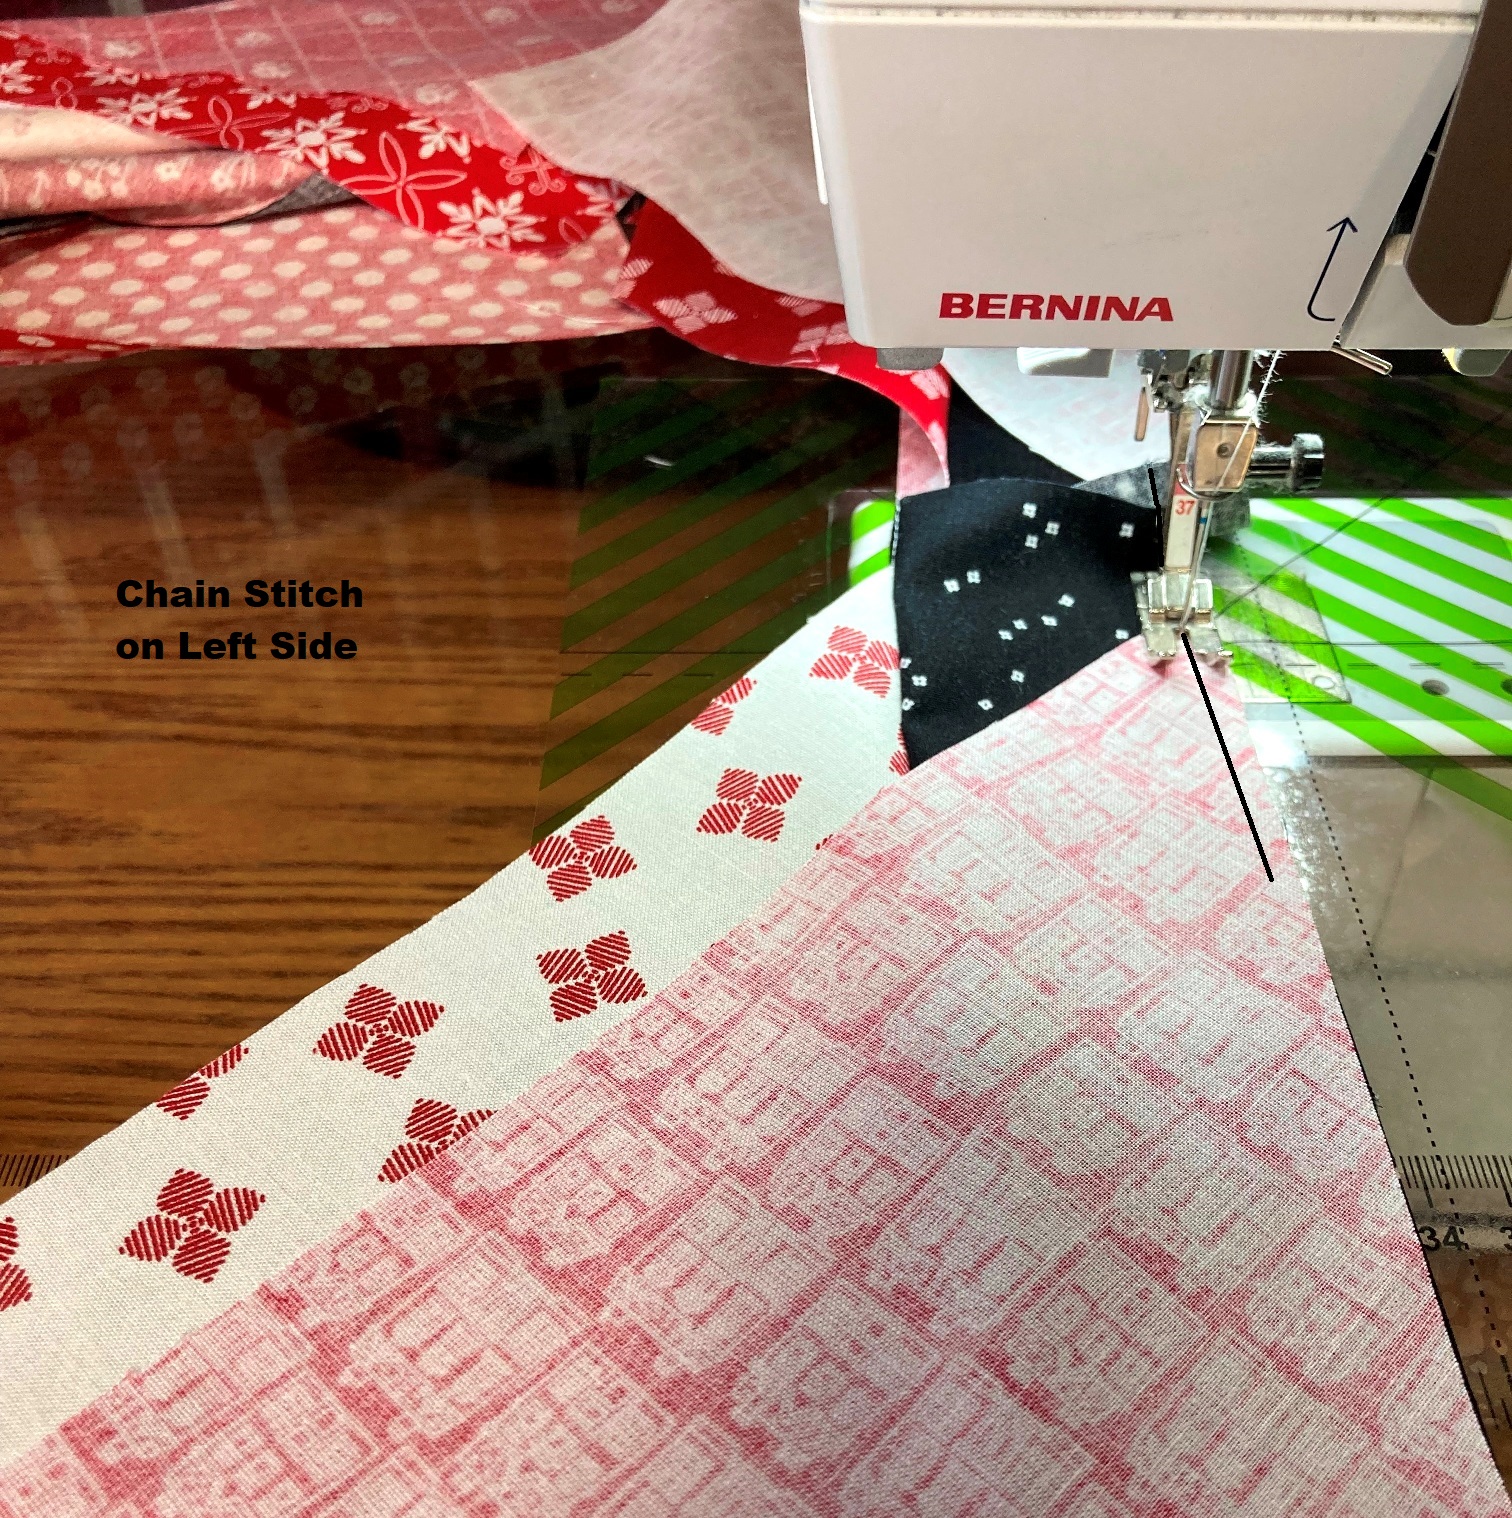
And just like that, you have 42 Simple Lattice blocks all ready for pressing and trimming!
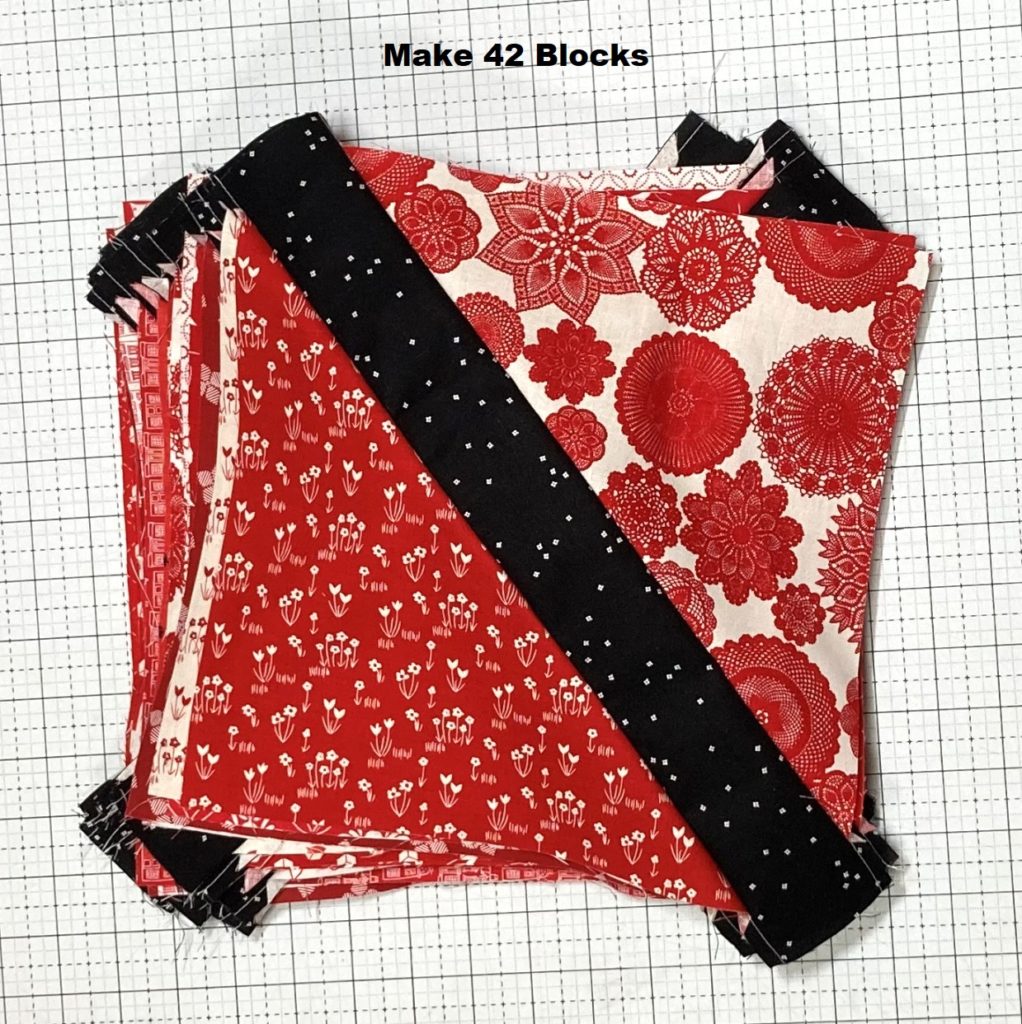
STEP 3 - TRIMMING THE LATTICE BLOCK
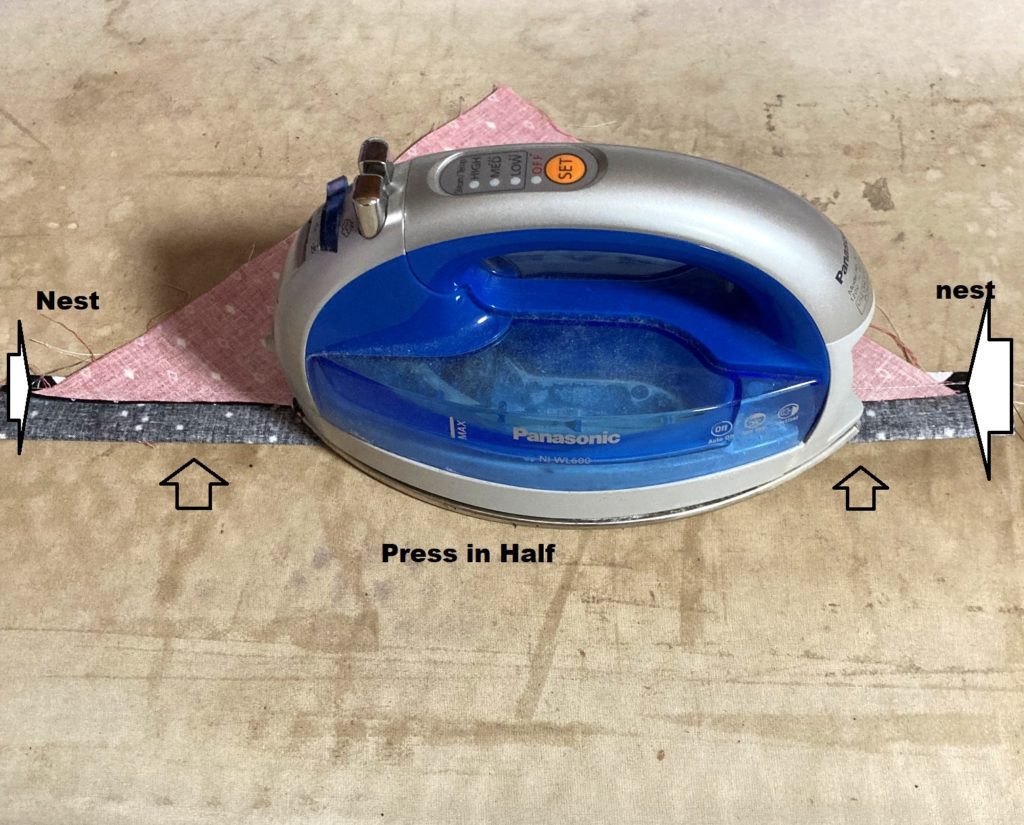
So let's get to pressing. You want to press both of your seams in the same direction so as to allow you to nest your blocks when sewing the quilt top together. I find the easiest way to do that is to place a triangle on my ironing board face up, and then press the first seam towards the sashing strip from the front. I use my finger in front of the iron to flatten the seam and ensure it is pressing upwards.
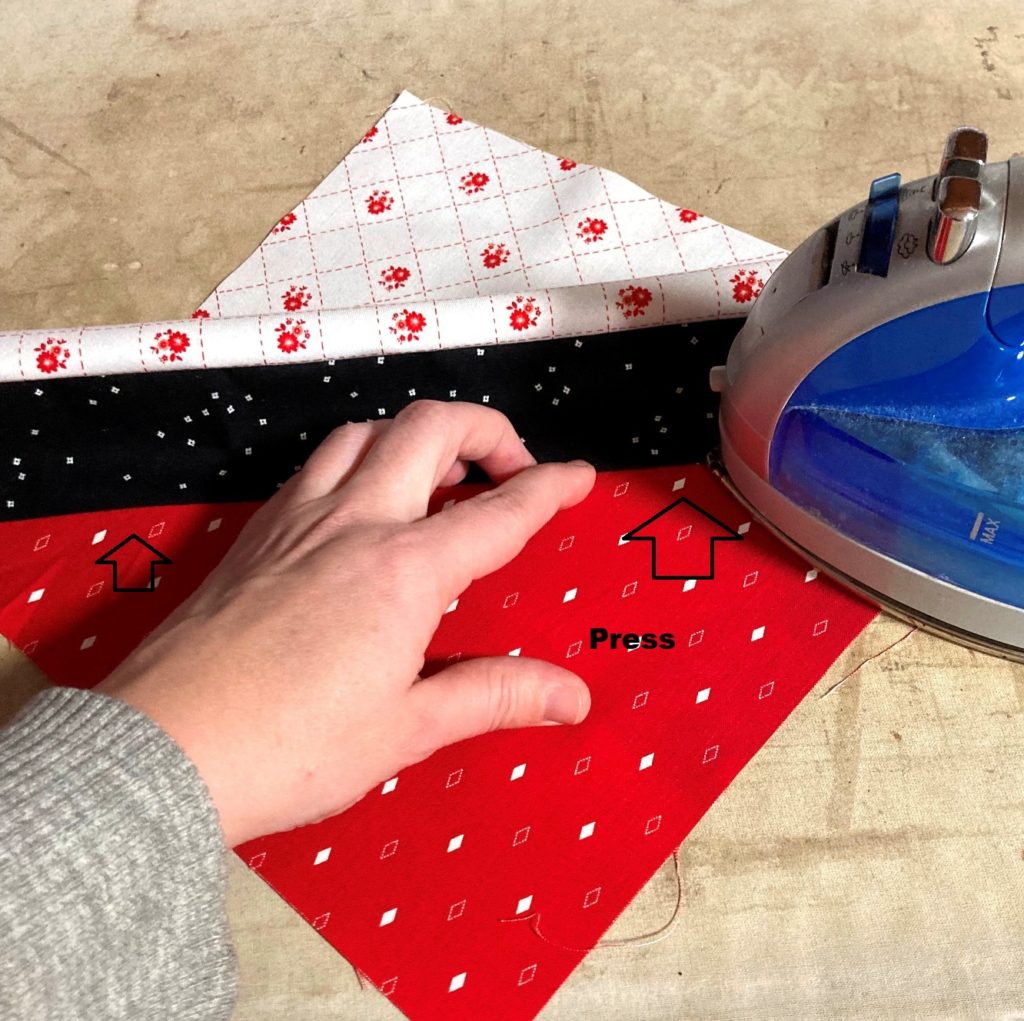
Then, I continue pressing upwards, pressing the second seam towards the triangle. Now both seams are pressed in the same direction.
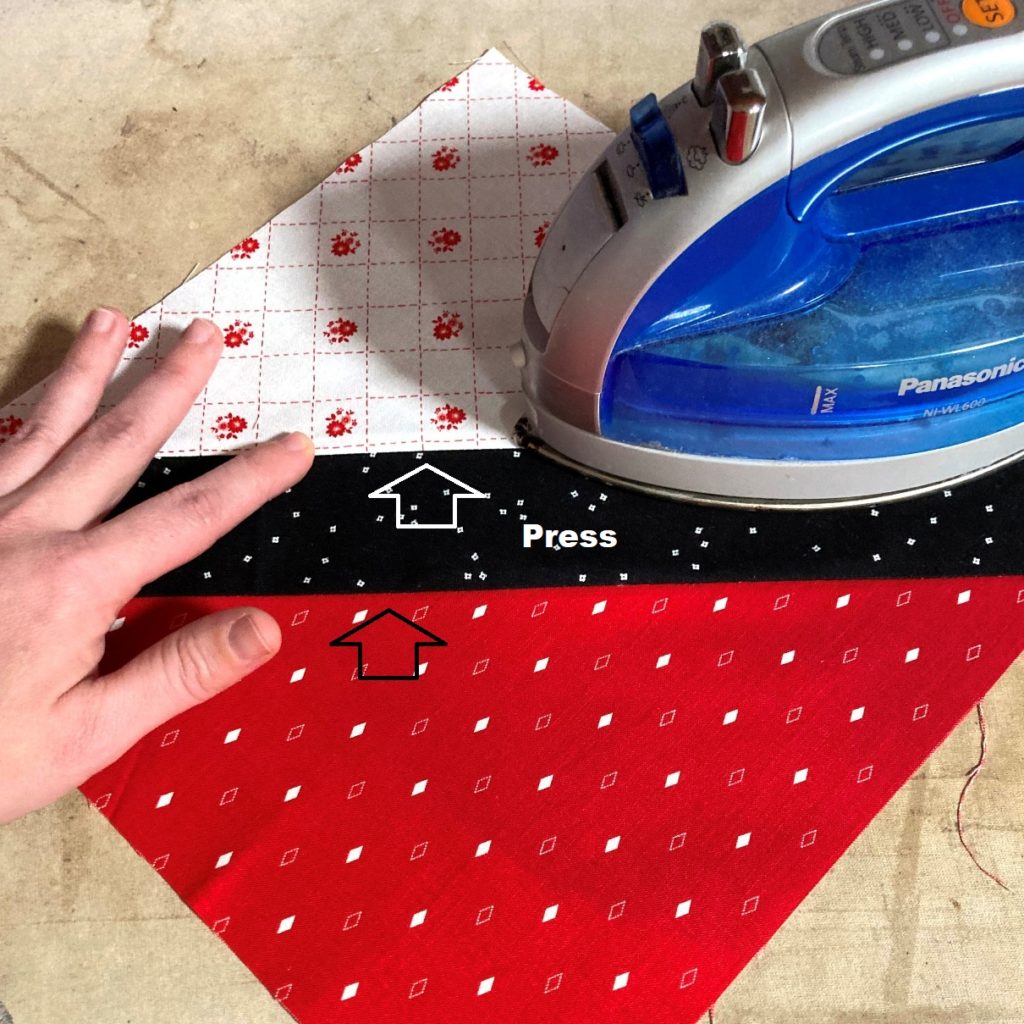
And now we need to add one more press for a trimming reference. Fold the Simple Lattice Block in half exactly, you know it will be exact if the seams of the sashing nest together. Press a fold into the exact middle of the sashing strip.
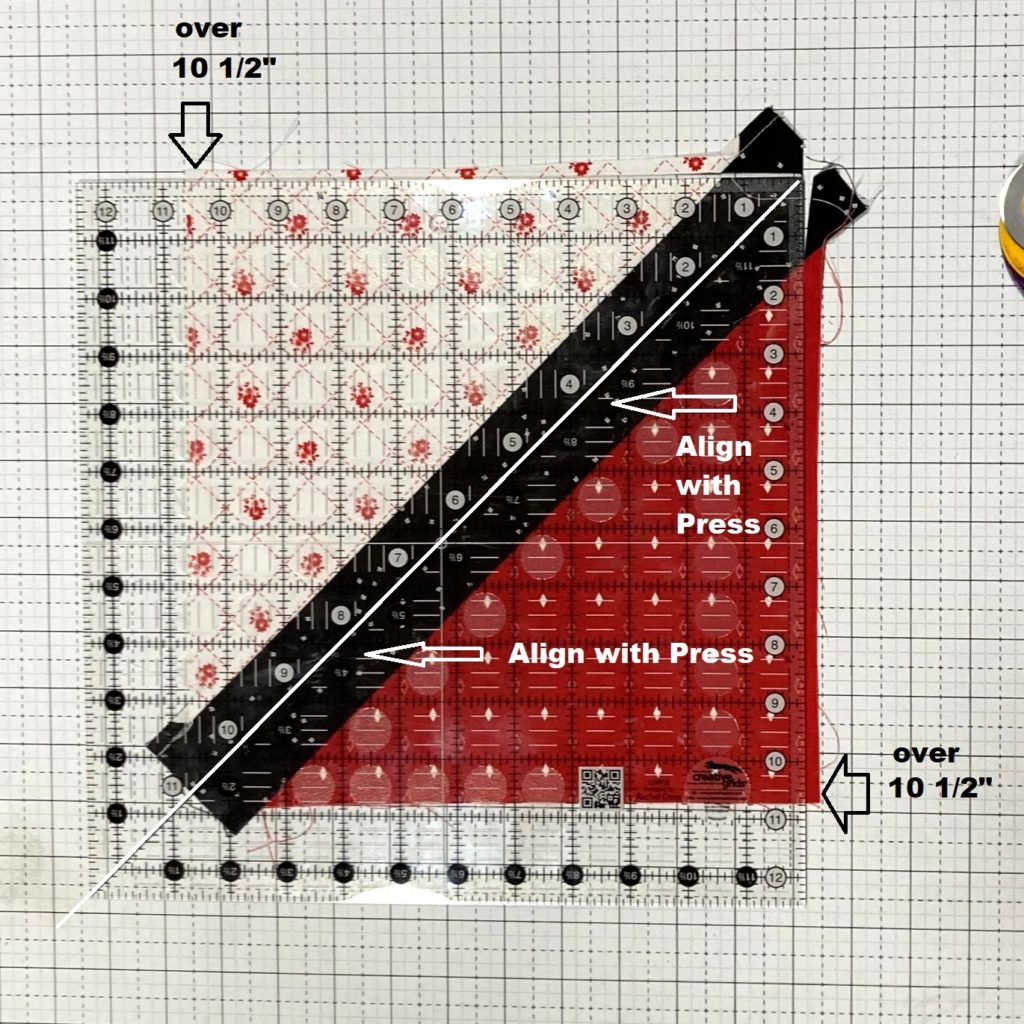
And now you are ready to trim. We will be trimming our Simple Lattice Blocks to 10 1/2" square. So to do this, place a large square ruler over your block. Ensure that the fabric on the left hand side and bottom is over the 10 1/2" markings on your ruler and that the diagonal center line on your square ruler is matched up with the pressed line in the center of the sashing strip. That is the most important! Once you are lined up, trim the left hand side and top along the edge of the ruler.
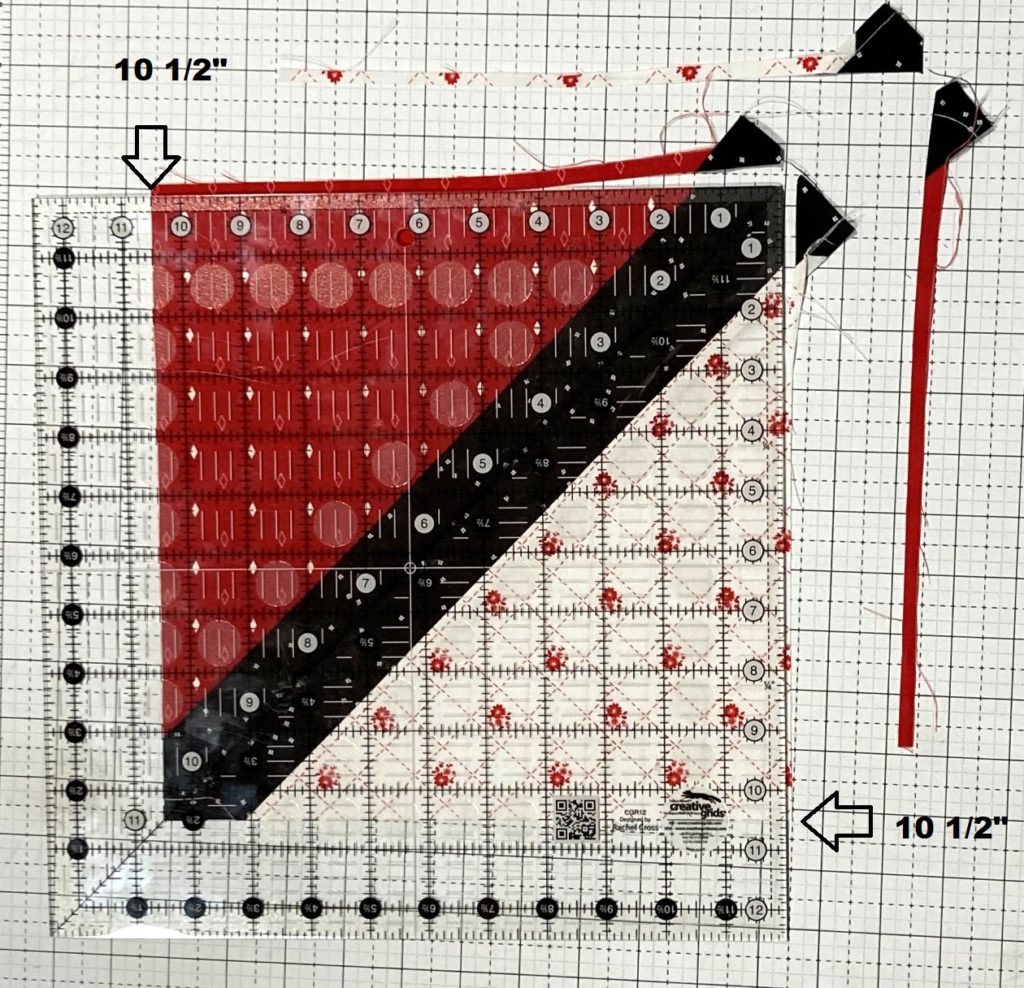
Now, simply rotate the block 180 degrees and line up the trimmed edges with the 10 1/2" marks on your ruler. The diagonal center line on your ruler will once again align with the pressed center line. Once you are lined up, trim the side and top along the edge of the ruler.
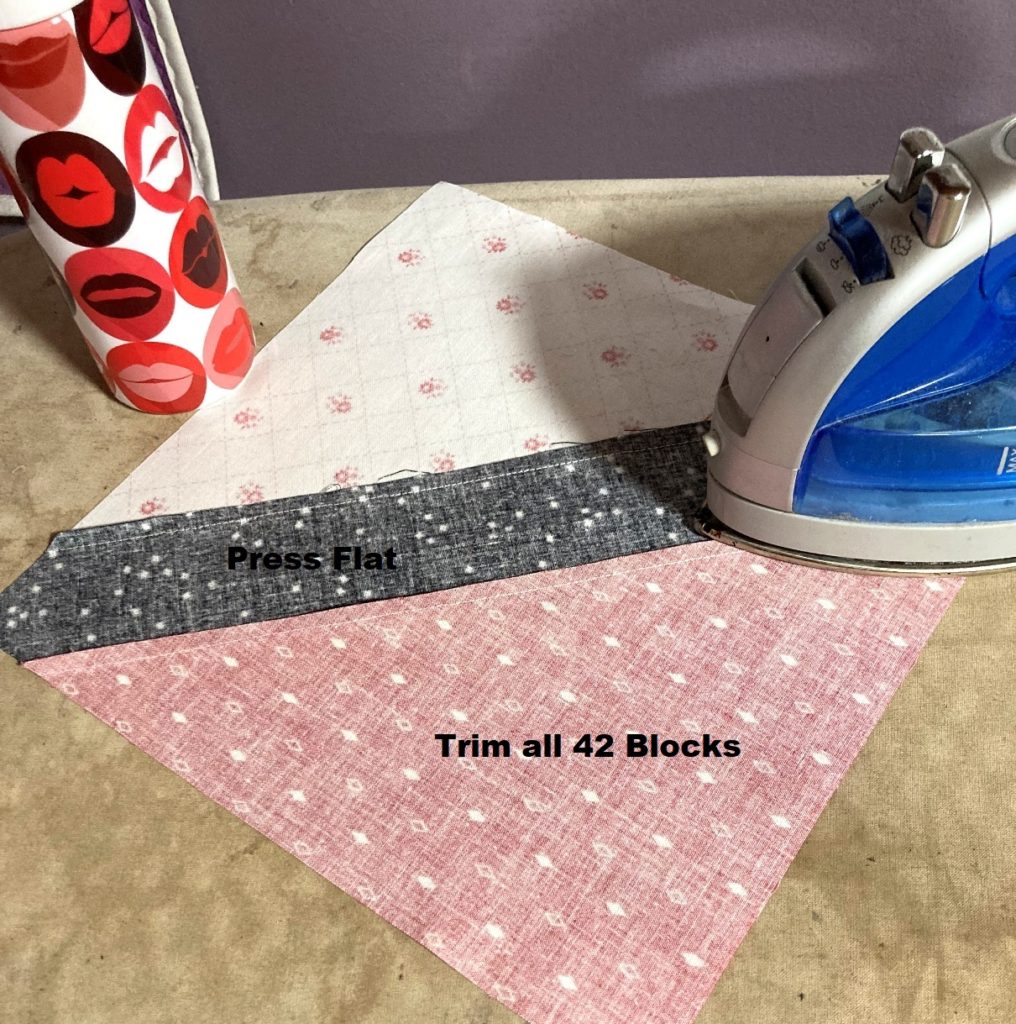
And last but not least, you no longer need that pressed line in your sashing for reference, so I like to spray it with a little water and steam it out. Trim all 42 of your Simple Lattice Blocks.
STEP 4 - SEWING THE QUILT TOP
And with your trimmed Simple Lattice Blocks, you are ready to sew your quilt top. There are endless layout options with a Simple Lattice Block, and you are welcome to try them all out, or just follow this simple layout I used. The most important thing though, when laying out your blocks is to ensure that your pressed seams go in opposite directions as shown. That will allow you to nest them when sewing the blocks together and ensure nice perfect points. Once you get a layout you like, I find it helpful to mark my rows or take a picture of the layout so you can refer back to it once you have sewn and pressed.
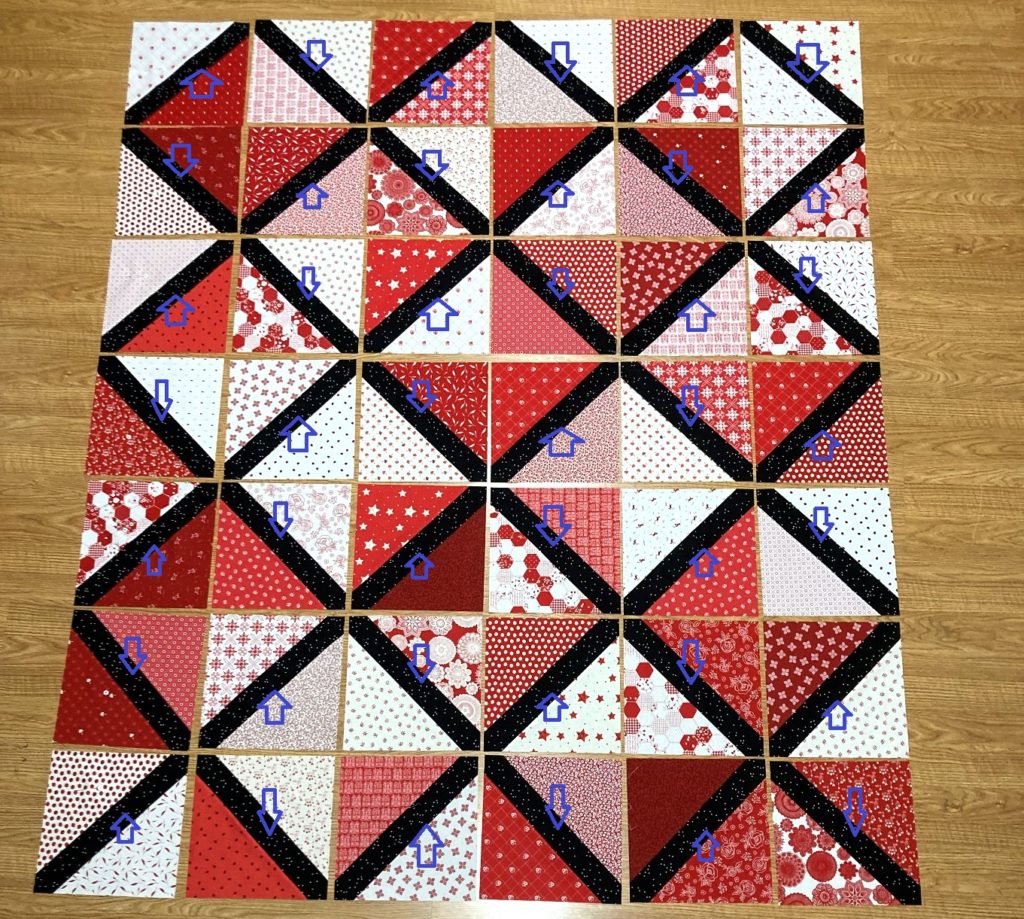
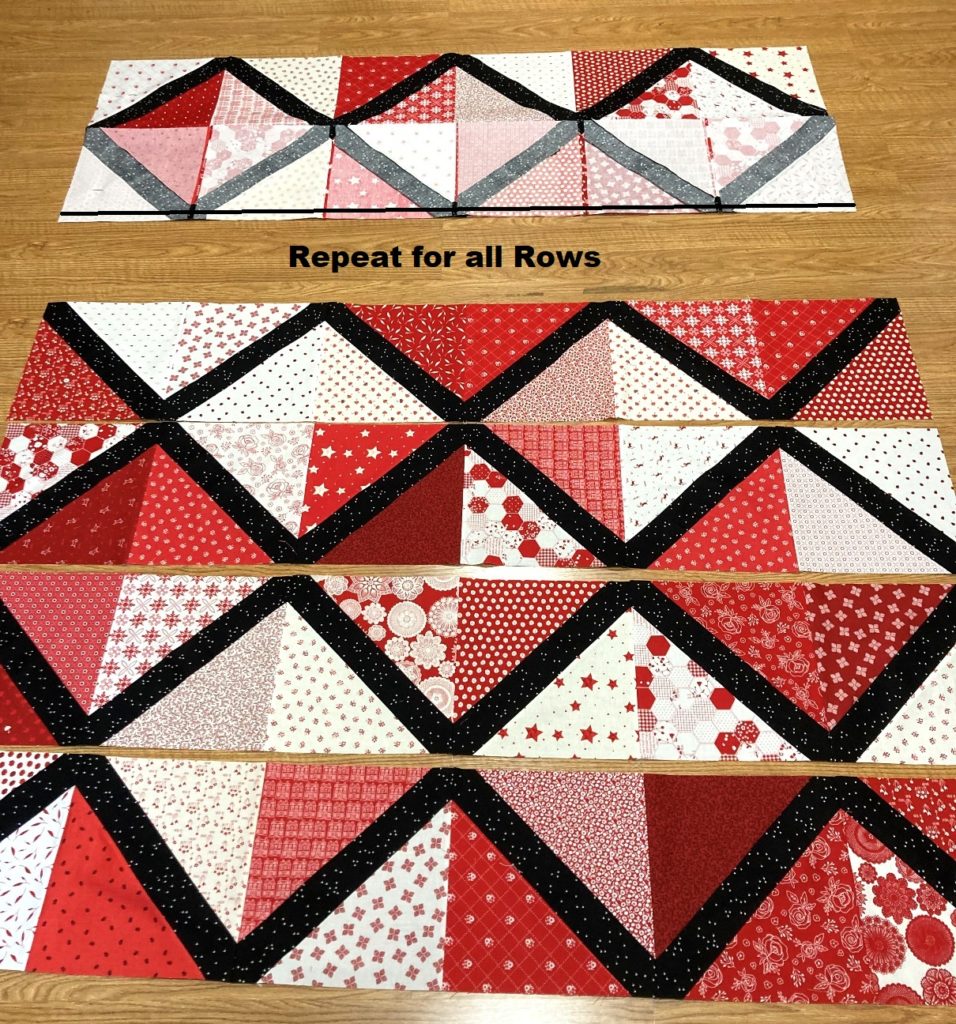
Now, it's time to sew the rows together. Place the second block onto the first block in each row with right sides together. Align and pin the seams and then stitch a 1/4" seam along the edge. (shown in the first row, chain stitch all 5 rows). Then, place the third block onto the now sewn together first and second blocks with right sides together. (shown in the second row). Align and pin the seams and then stitch a 1/4" seam along the edge. Continue in this fashion until all 6 blocks have been stitched together in a row in all 7 rows.
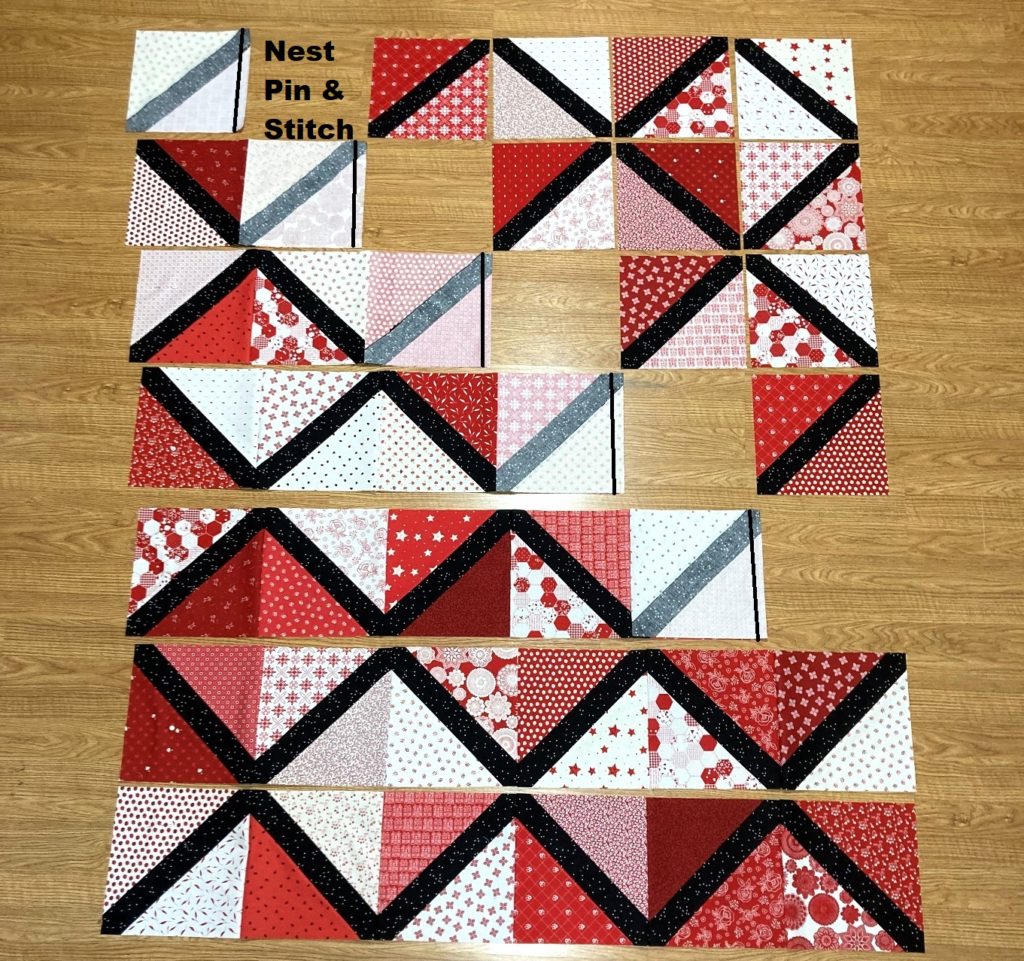
Once all of the blocks are sewn into rows press the seams in each row open. Then layout your rows again.
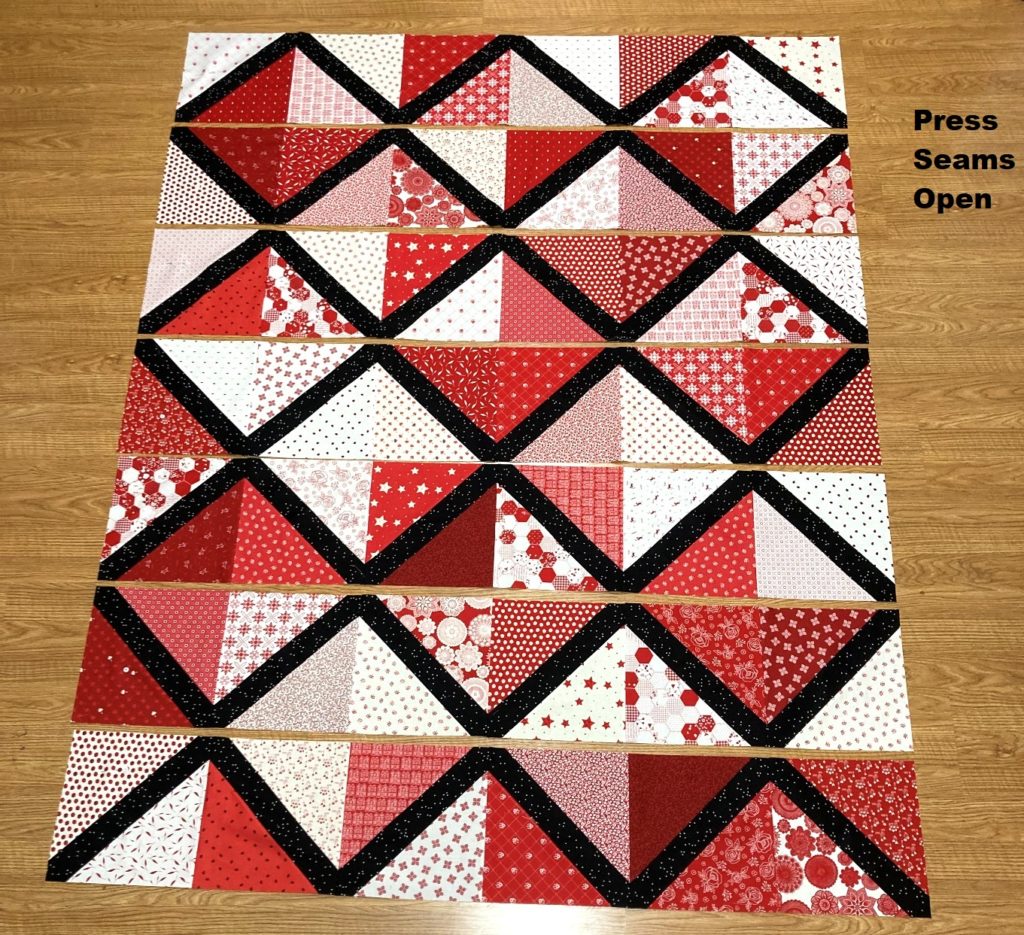
Now, stitching the rows together is the same, just in a longer fashion. Place the second row onto the first row with right sides together. Align and Pin all of your seams. Sew a 1/4" seam along the edge.
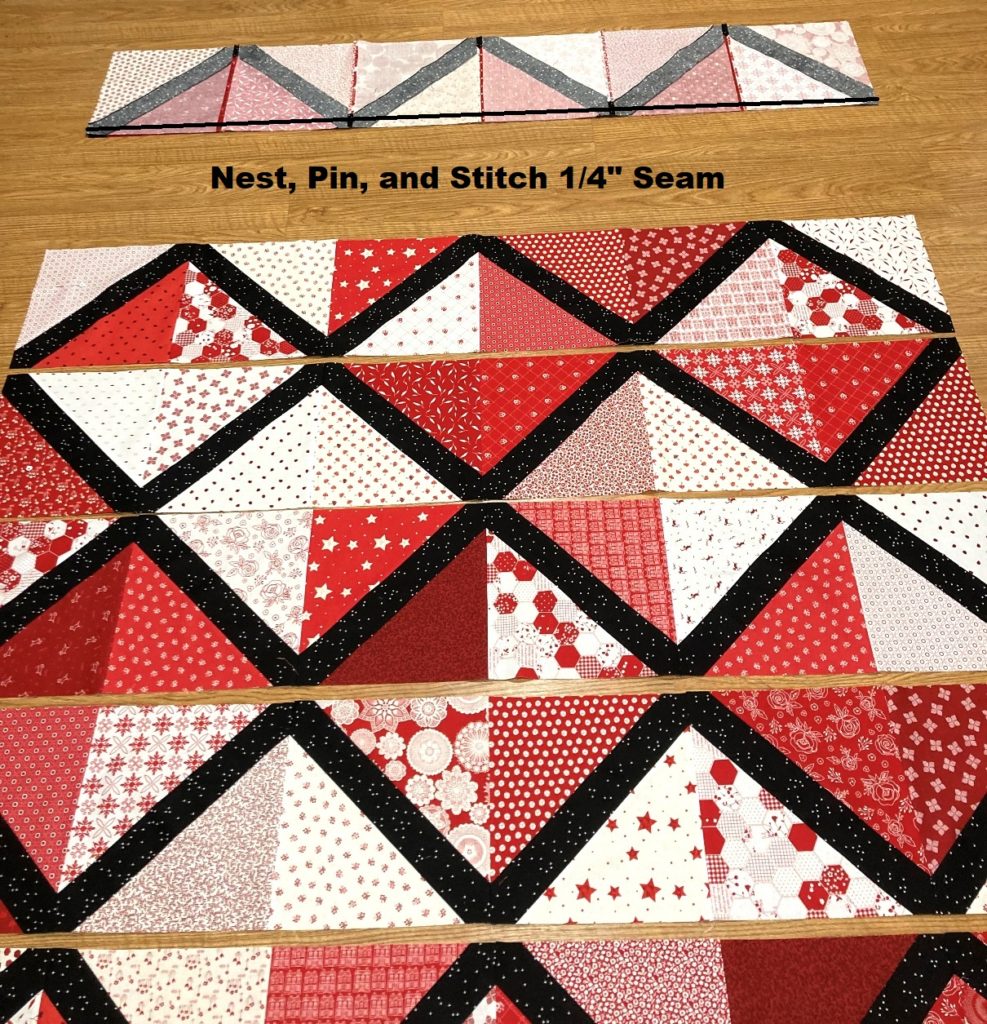
Then, place the third row onto the now sewn together first and second row, with right sides together. Align and pin all of the seams. Sew a 1/4" seam along the edge. Continue in this fashion until all of your rows are sewn together. Press the seams open.
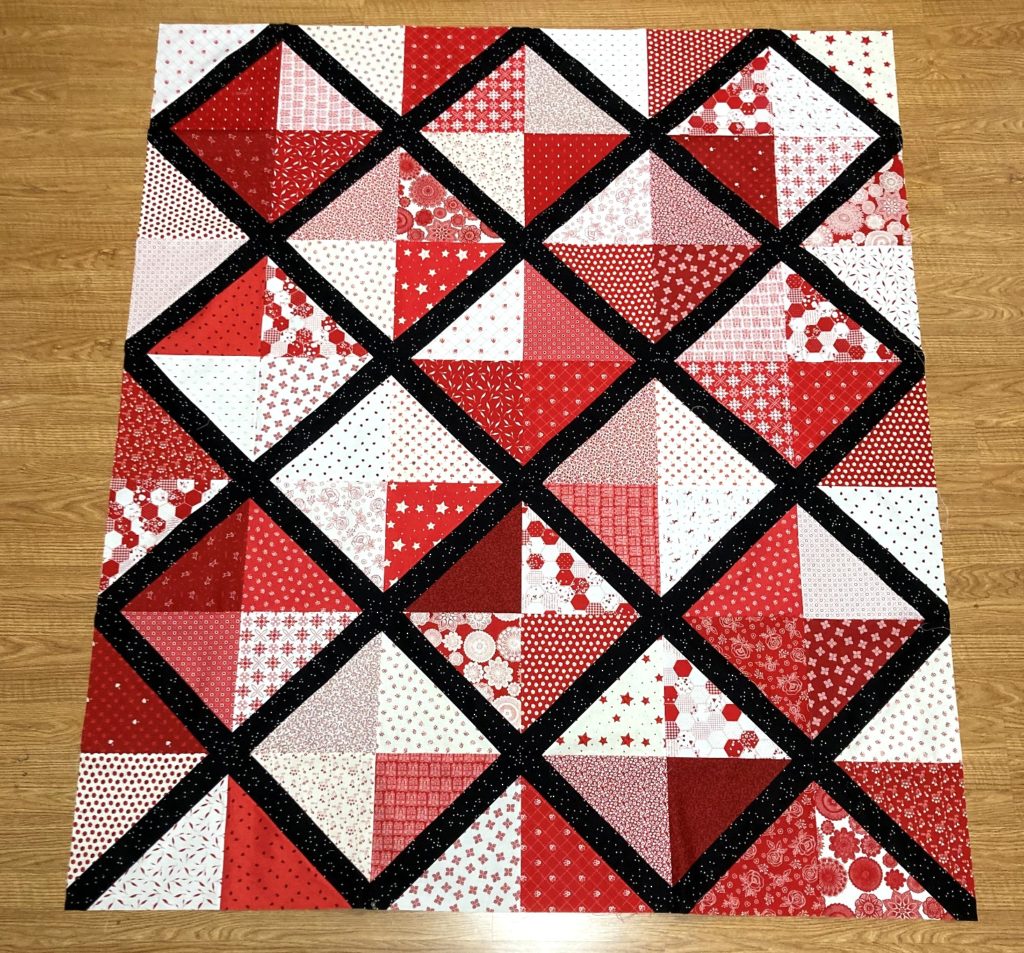
And just like that, you have a beautiful 60 1/2" x 80 1/2" finished Simple Lattice Quilt Top!!!! So fun!!!!
And again, the great thing is the technique is the same regardless of what size square you start with or what width of sashing you add. Just ensure your sashing is longer than the long triangle length and when you trim up your block, just trim it to a slightly smaller size than the untrimmed block. And the sky is the limit!!!
STEP 5 - FINISHING THE QUILT
Before you start making all of the size Simple Lattice Blocks, let's finish up this 10" Stacker Simple Lattice Quilt first!! All that is left is to just Baste It, Quilt It, and Bind it!!!! Yup, three big things in one little sentence. If you are new to quilting and need some tips on how to Baste It, Quilt It, and Bind It, you can check out my Finishing Your Quilt Video Series. It will walk you through it all in step by step detail.
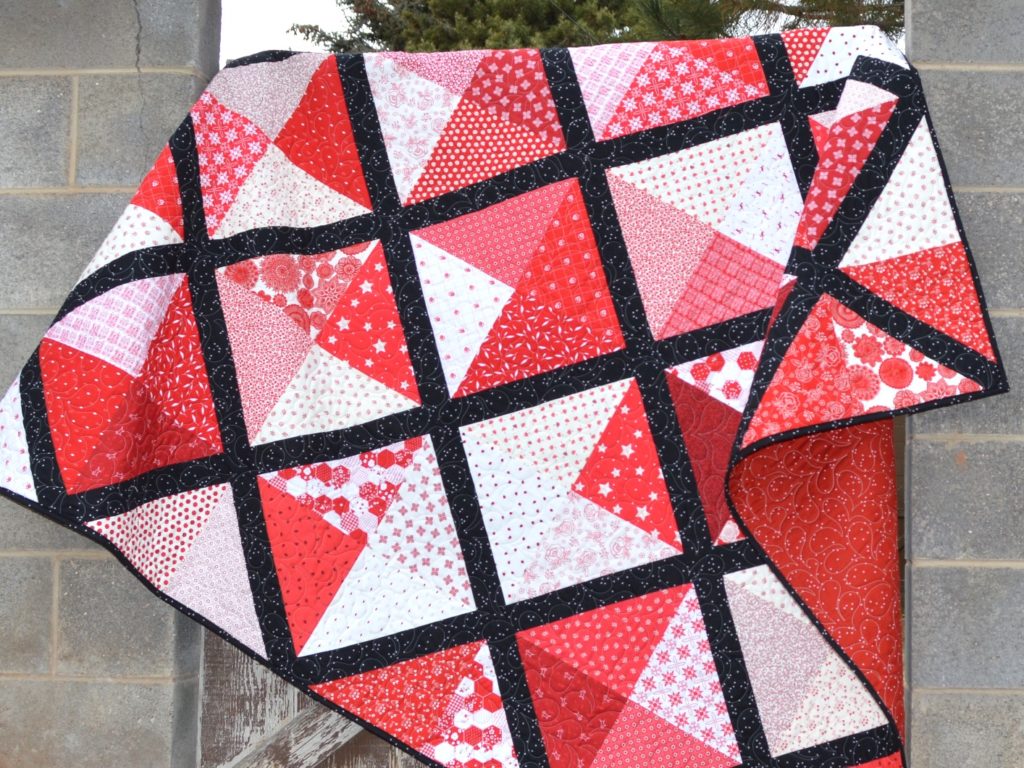
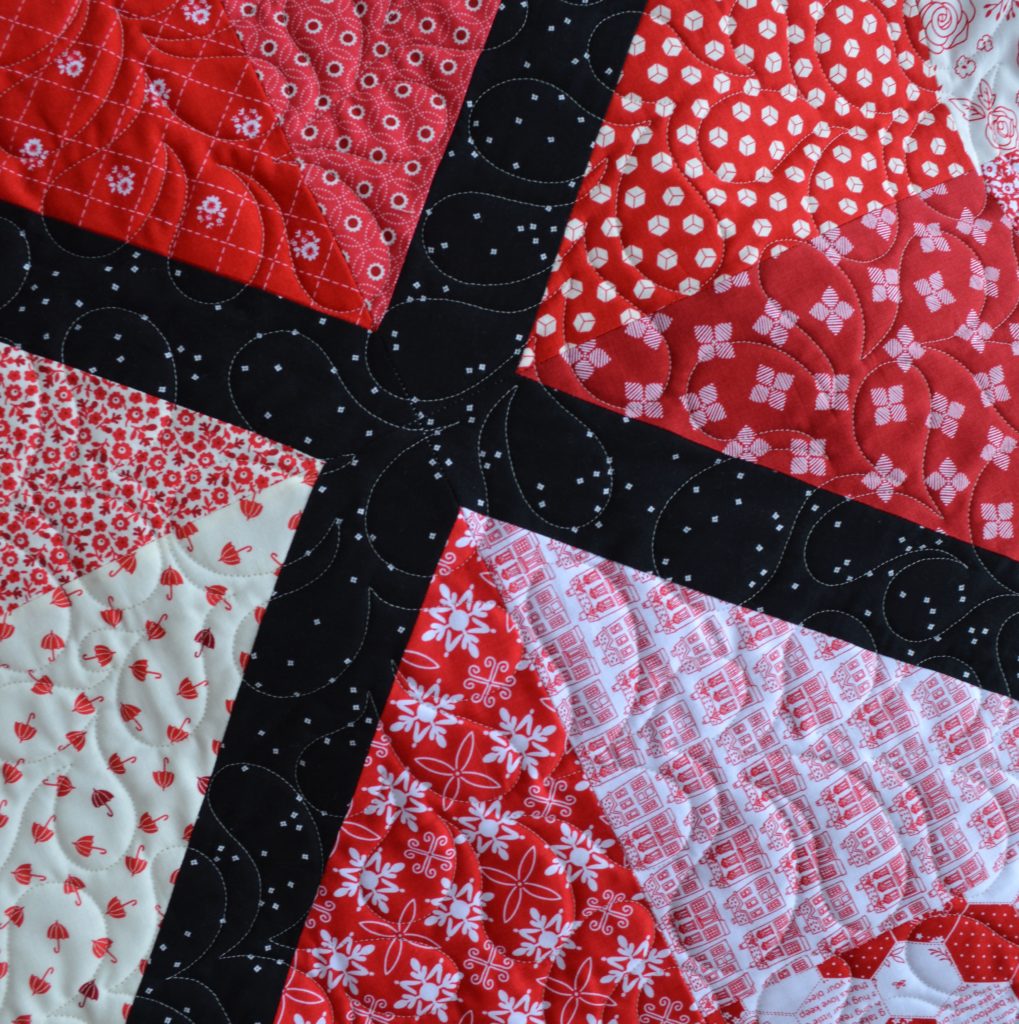
I quilted mine with an all over loose feather design that I just love to stitch. It is so relaxing and fun, and also very fast, perfect for this fast, go-to, quilt!!!
I hope you have enjoyed this tutorial and if you make your own Simple Lattice Quilt I would love to see it!! You can email me a picture at happyquiltingmelissa@gmail.com, or post it to social media with #happyquiltingwithmc :) I can't wait to see your Simple Lattice Quilts!!!
Thanks so much for sharing this new quilt finish and tutorial with me.
I hope you have a very Happy Quilting Day!!!

