Showing posts sorted by relevance for query custom binding. Sort by date Show all posts

Thursday, September 27, 2012

TNT Thursday - A Custom Binding Tutorial

So you might not have noticed, but I tried something new on my Starburst quilt.  What is it you ask??  I made a custom binding!!!


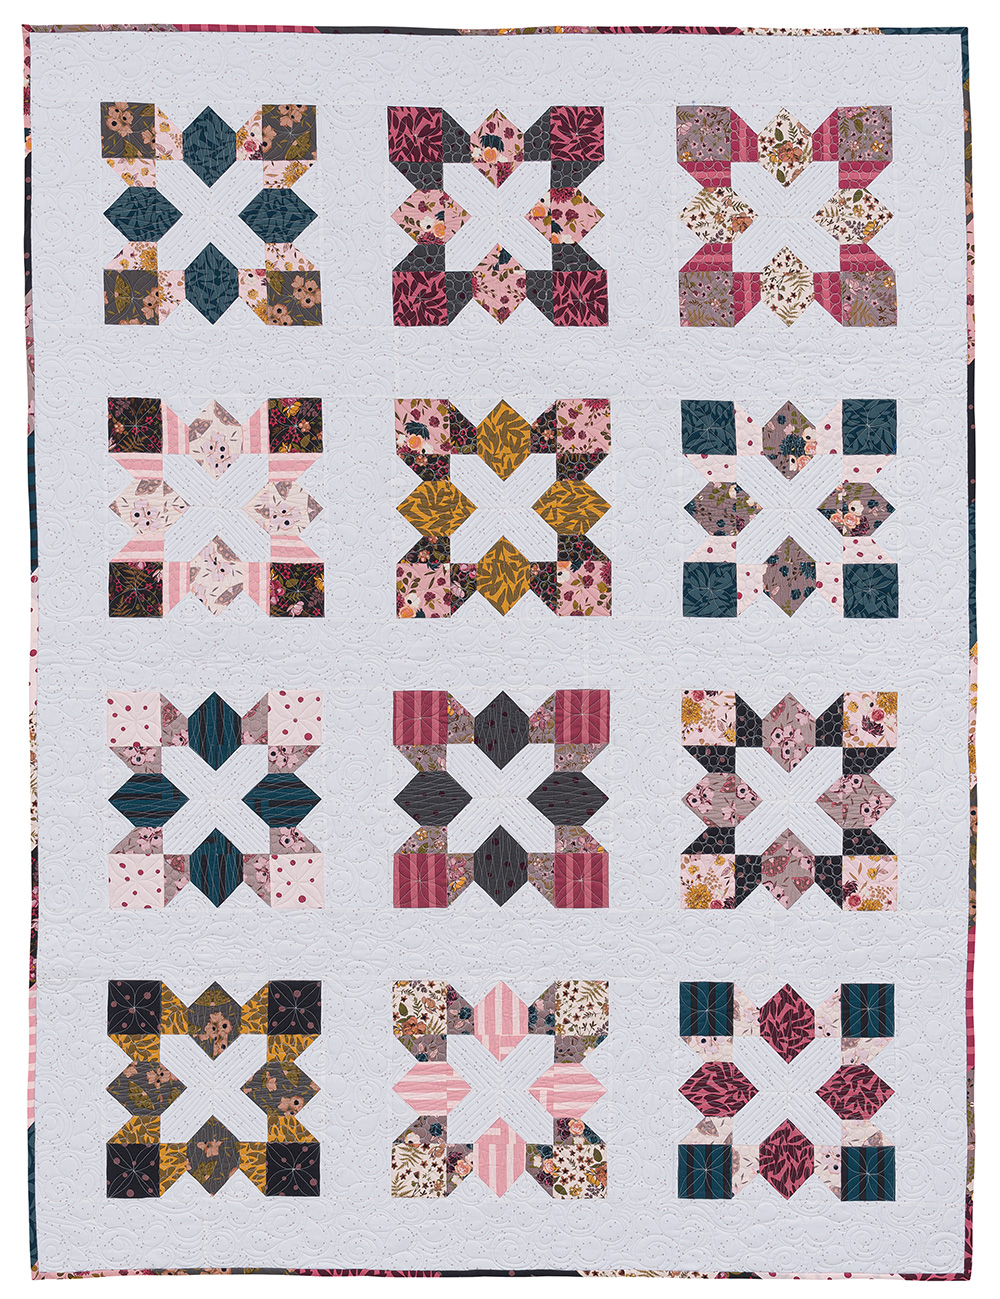
See, the points of the starburst match the binding, all the way around the quilt :)  Cool huh!!


And while I was doing it, I figured I might as well take a few pictures and whip up a little tutorial.   But, a little forewarning on this tutorial.  I only went over the details on making the binding custom.  There are no references on making a basic machine binding, so if you need you can see my video tutorial on machine binding here , then the rest of this will make a little more sense :)

Start by marking your quilt with a pin everywhere you want to change your binding.  I marked mine in the center of the sashings.

Now measure the amount of space  between the pins.  Add 4" for corners and then another 3" for wiggle room.  Make a binding strip for each measurement in the designated print.  Don't attach the strips.

Now you are ready to start attaching the binding.  Start by laying the first binding strip 1 1/4" over the first marking pin.  Begin attaching the binding another 6" away from the pin.  Remember to back-stitch at the beginning.

Stitch until you get about 7" away from your next marker pin.  (Sorry I forgot to take a picture the first time so this is actually my next binding strip.)  Back-stitch a few stitches and remove the quilt from your machine.

Measure 1 1/4" down from your marker pin and clip the excess binding.

Now it is just like making a normal binding strip. Lay your next strip onto the attached strip with right sides together at a 90 degree angle.  Sew a diagonal seam to attach the 2 strips.

Clip the excess 1/4" away from the seam.  Now put your quilt back in your machine and begin stitching once again.  Your seam change will be directly over your marker pin creating the custom binding look :)  Repeat each time you get to a marker pin.

When you get to the end of your binding measure 2 1/2" over the original strip and then trim the top strip.  Once again lay your two strips together at a 90 degree angle with right sides together and stitch a diagonal seam.  Then finish sewing the binding down.

Now simply turn your quilt over and tack down the front of the binding.

And your done!!!  One custom bound quilt!!

So that is what I have been up to this week??  Link on up!!


Pin It!

Wednesday, December 7, 2022

Fast & Fun Lap Quilts - All the Quilts - All The Details!!!

Wow, I have had so much fun on the Fast & Fun Lap Quilts Book Tour and hope you have as well!!!  Thank you so much for all of the  Fast & Fun Lap Quilts Love!!!!  You all are just the best!!!  I have loved all of your emails, comments, and kind words on my new book :)    And now,  I can't wait to see all of your Fast & Fun Lap Quilts!!  You can share them with me via email at happyquiltingmelissa@gmail.com or add them on social media with the #FastandFunLapQuilts and #happyquiltingwithmc.   I just know you are going to love making your own Fast & Fun Lap Quilts!!!!


Fast & Fun Lap Quilts is available to order a signed copy directly from me, or you can get a copy from  your local quilt shop or wherever quilting books are sold.  Just in case you haven't snagged a copy yet ;)   

So for today's post . . .  I wanted to have a place that summed up all of the quilts from the book tour, the originals as well as the alternate versions I made as well.   Also, I wanted to be able to add to these as I can continue to add to when I make more Fast & Fun Lap Quilts :)

So here it goes Fast & Fun Lap Quilts - All the Quilts and All the Details  :)   


Quilt: Thunderbird, Bonus Fast & Fun Lap Quilt Pattern
Size: 60" x 72"
Fabrics Used - 1 Persimmon Layer Cake  by Basic Grey for Moda
                        3 1/4 Yards of Grunge White Paper for the Background
                        5/8 Yard of Persimmon Floral Yellow for Binding
                        3 1/2 Yards of Persimmon Floral Yellow for Backing
Quilting: All over Echoed Paisleys by me on an HQ Infinity


Quilt: Three in a Row, Original Version
Size: 54 1/2" x 65"
Fabrics Used - 1 One Fine Day Layer Cake  by Bonnie and Camille for Moda
                        3 1/4 Yards of Bella Solids Bleached White for the Background
                        5/8 Yard of One Fine Day Navy Dot for Binding
                        3 1/2 Yards of One Fine Day Aqua Sunnyside for Backing
Quilting: Custom Quilted Swirls, Wavy Crosshatch, Pebbles, and Echoed Ovals by me on an HQ Avante
Three in a Row, Original Version - Blog Post


Quilt: Three in a Row, Wild Meadow Version
Size: 54 1/2" x 65"
Fabrics Used - 1 Wild Meadow Layer Cake by Sweetfire Road for Moda
                        3 1/4 Yards of Spotted Powder for the Background
                        5/8 Yard of Wild Meadow Sweet Pea Berry Bramble Stripe for Binding
                        3 1/2 Yards of Wild Meadow Boysenberry Wildberry Blossoms for Backing
Quilting: All Over Quilted Wavy Lines by me on an HQ Avante Long Arm.
Three in a Row, Wild Meadow Version - Blog Post


Quilt: Keystone Corners, Original Version
Size: 60 1/2" x 60 1/2"
Fabrics Used - 1 Meander Layer Cake by Aneela Hoey for Moda
                        3 1/2 Yards of Meander Cloud Field for the Background
                        5/8 Yard of Meander Navy Tiny Square Dot for Binding
                        4 Yards of Meander Denim Foxes for Backing
Quilting: Custom Quilted Swirls, Straight Lines, Loops, and Cobblestones by me on an HQ Avante.
Keystone Corners, Original Version - Blog Post


Quilt: Keystone Corners, Fleur Noire Version
Size: 60 1/2" x 60 1/2"
Fabrics Used - 1 Fleur Noire 10" Stacker by My Minds Eye for Riley Blake Designs
                        3 1/2 Yards of Poplin Beach for the Background
                        5/8 Yard of 1/4" Black Stripe for Binding
                        4 Yards of Blossom Beach for Backing
Quilting: All Over Quilted L and E by me on an HQ Avante Long Arm.
Keystone Corners, Fleur Noire Version - Blog Post


Quilt: Keystone Corners, Ciao Bella Version
Size: 60 1/2" x 60 1/2"
Fabrics Used - 1 Ciao Bella 10" Stacker by Carina Gardner for Riley Blake Designs
                        3 1/2 Yards of Confetti Cottons Riley White for the Background
                        5/8 Yard of Ciao Bella Main Midnight for Binding
                        4 Yards of Blossom Peony for Backing
Quilting: All Over Quilted Wavy Arches by me on an HQ Avante Long Arm.
Keystone Corners, Ciao Bella Version - Blog Post


Quilt: Diamond Dash, Original Version
Size: 64 1/2" x 64 1/2"
Fabrics Used - 1 Seashore Drive Layer Cake by Sherri and Chelsi for Moda
                        3 3/4 Yards of Seashore Drive Sweet Pea Ivory for the Background
                        4 Yards of Seashore Drive Sky Pebble for Backing
Quilting: Custom Quilted Curly Q's, Ribbon Candy, and Echoed Arches by me on an HQ Avante.
Diamond Dash, Original Version - Blog Post


Quilt: Diamond Dash, Nantucket Summer
Size: 64 1/2" x 64 1/2"
Fabrics Used - 2 Nantucket Summer Layer Cakes by Camille Roskelley for Moda
                        3 3/4 Yards of Indigo Chambray for the Background
                        4 Yards of Nantucket Summer Cream Mulit for Backing
Quilting: All Over Loose Feathers by me on an HQ Avante Long Arm.
Diamond Dash, Nantucket Summer Version - Blog Post


Quilt: Diamond Dash, Red, White, and True
Size: 64 1/2" x 64 1/2"
Fabrics Used - 1 Red, White, & True 10" Stacker by Dani Mogstad for Riley Blake Designs 
                        3 3/4 Yards of  Denim Bee Cross Stitch Basic for the Background
                        4 Yards of Navy Sparkler for Backing
Quilting: All Over Swirls by me on an HQ Infinity Long Arm.
Diamond Dash, Red, White, and True Version - Blog Post


Quilt: Aurora, Original Version
Size: 68" x 68"
Fabrics Used - 1 Beautiful Day Layer Cake by Corey Yoder for Moda
                        4 1/8 Yards of Beautiful Day Cloud Star Gazing for the Background
                        5/8 Yard of Beautiful Day Slate Rose Buds for Binding
                        4 1/8 Yards of Beautiful Day Cloud Wild Rose Floral for Backing
Quilting: Custom Quilted Swirls, Echoed Arches, Straight Lines, and Pebbles by me on an HQ Avante.
Aurora, Original Version - Blog Post


Quilt: Aurora, Country Rose Version
Size: 68" x 68"
Fabrics Used - 1 Country Rose Layer Cake by Lella Boutique for Moda
                        4 1/8 Yards of Country Rose Charcoal Magic Dot for the Background
                        5/8 Yard of Country Rose Charcoal Climbing Vine for Binding
                        4 1/8 Yards of Country Rose Charcoal Country Boquet for Backing
Quilting: All Over Paisleys and Swirls by me on an HQ Avante Long Arm.
Aurora, Country Rose Version - Blog Post


Quilt: Aurora, Honeycomb Hill Version
Size: 68" x 68"
Fabrics Used - 1 Honeycomb Hill 10" Stacker by Katherine Lenius for Riley Blake Designs 
                        4 1/8 Yards of  Oxford Blossom for the Background
                        5/8 Yard of Honeycomb Hill Main Navy for Binding
                        4 1/8 Yards of Oxford Blossom for Backing
Quilting: All Over loose feathers by me on an HQ Infinity Long Arm.
Aurora, Honeycomb Hill Version - Blog Post


Quilt: Dutch Days, Original Version
Size: 72" x 72"
Fabrics Used - 1 Harmony 10" Stacker by Melissa Lee for Riley Blake Designs
                        2 7/8 Yards of Texture Cream for the Background
                        5/8 Yard of Harmony Grape Bloom for Binding
                        4 3/8 Yards of Blossom Apricot Blush for Backing
Quilting: Custom Quilted Curls and Echoed Arches by me on an HQ Avante.
Dutch Days, Original Version - Blog Post


Quilt: Dutch Days, Ombre Galaxy Version
Size: 72" x 72"
Fabrics Used - 1 Ombre Galaxy Fat Quarter Bundle by V and Co.  for Moda
                        2 7/8 Yards of Ombre Galaxy Putty for the Background
                        5/8 Yard of Ombre Galaxy Onyx for Binding
                        4 3/8 Yards of Ombre Galaxy Graphite Grey for Backing
Quilting: All Over Fireworks by me on an HQ Avante Long Arm.
Dutch Days, Ombre Galaxy Version - Blog Post


Quilt: Dutch Days, Ally's Garden Version
Size: 72" x 72"
Fabrics Used - 1 Ally's Garden 10" Stacker by Dani Mogstad for Riley Blake Designs
                        2 7/8 Yards of Texture White Basics for the Background
                        5/8 Yard of Ally's Garden Cream Floral for Binding
                        4 3/8 Yards of Sparkler Boy Boue for Backing
Quilting: All Over Loose Feathers by me on an HQ Infinity Long Arm.
Dutch Days, Ally's Garden Version - Blog Post


Quilt: Merry-Go-Round, Original Version
Size: 76 1/2" x 76 1/2"
Fabrics Used - 1 Indigo Garden 10" Stacker by Heather Peterson for Riley Blake Designs
                        4 7/8 Yards of Texture Cream for the Background
                        4 3/4 Yard of Large Hashtag Teal for Backing
Quilting: Custom Quilted Echoed Paisleys, Straight Lines, and Pebbles by me on an HQ Avante.
Merry-Go-Round, Original Version - Blog Post


Quilt: Merry-Go-Round, Low Volume Version
Size: 76 1/2" x 76 1/2"
Fabrics Used - Lots and Lots of Low Volume Scraps
                        4 7/8 Yards of Linen Dark Grey Texture for the Background
                        4 3/4 Yard of All About Plaid Hounstooth Black for Backing
Quilting: All Over Open Centered Swirls by me on an HQ Avante Long Arm.
Merry-Go-Round, Low Volume Version - Blog Post


Quilt: Jacks, Original Version
Size: 62 1/2" x 77 1/2"
Fabrics Used - 1 Paisley Rose Layer Cake by Crystal Manning for Moda
                         4 71/2 Yards of Bella Solids Porcelain for the Background
                         4 3/4 Yard of Paisley Rose Golden Rose Garden for Backing
Quilting: Custom Quilted Pebbles, Wishbone, Ribbon Candy, and Loop d loop by me on an HQ Avante.
Jacks, Original Version - Blog Post


Quilt: Jacks, Scrappy Rainbow Version
Size: 62 1/2" x 77 1/2"
Fabrics Used - Lots and Lots of Rainbow Scraps
                         4 71/2 Yards of Grunge Gris Fonce for the Background
                         4 3/4 Yard of Creativity Grows Blackboard You Are Loved for Backing
Quilting: All Over Echoed Paisleys by me on an HQ Avante Long Arm.
Jacks, Scrappy Rainbow Version - Blog Post


Quilt: Puzzle Box, Original Version
Size: 62" x 62"
Fabrics Used - 1 Morning Light Layer Cake by Linzee McCray for Moda
                         2 3/4 Yards of Morning Light Cloud Downy Phlox for the Background
                         3 7/8 Yard of Morning Light Dew Pansy Yardage for Backing
Quilting: Custom Quilted Meandering in Framed Boxes and Straight Lines by me on an HQ Avante.
Puzzle Box, Original Version - Blog Post


Quilt: Puzzle Box, Blossom Basics Version
Size: 62" x 62"
Fabrics Used - 1 Blossom Basics Fat Quarter Bundle by Christopher Thompson for Riley Blake Designs
                         2 3/4 Yards of Blossom Black for the Background
                         3 7/8 Yard of Daisy Tone on Tone Black Yardage for Backing
Quilting: All Over Echoed Loop D Loops by me on an HQ Avante Long Arm.
Puzzle Box, Blossom Basics Version - Blog Post


Quilt: Treasured, Original Version
Size: 52 1/2" x 68 1/2"
Fabrics Used - 1 Sonnet Dusk 10" Stacker by Corri Sheff for Riley Blake Designs
                        3 Yards of Blossom on White Rose Gold Sparkle for the Background
                        3 3/8 All About Plaids Tartan Black for Backing
Quilting: Custom Quilted in Wishbone, Pebbles, and Feathered Swirls by me on an HQ Avante.
Treasured, Original Version - Blog Post


Quilt: Treasured, Expressions Batik Version
Size: 52 1/2" x 68 1/2"
Fabrics Used - 1 Expression Batiks Meadow 10" Stacker for Riley Blake Designs
                        3 Yards of Hand Dyed Pale Pink Batik for the Background
                        3 3/8 Multi Wideback Expressions for Backing

Quilting: All Over Curly Q's by me on an HQ Avante Long Arm.
Treasured, Expressions Batik Version - Blog Post


And that is Fast & Fun Lap Quilts - All the Quilts and All the Details

Any other information you would like to have listed on these quilts please just let me know in the comments ;)

Oh, and I made a Button on the Side of the blog that will bring you straight to this post ;)  Any time you visit my blog you can just click on this button on the right hand side of my blog to be taken right to this post to see all about Fast & Fun Lap Quilts ;) 


Happy Quilting!!!


Pin It!

Thursday, June 25, 2020

Tutorial Throwback Thursday - The Basics!!!

Can you believe it, this is the last Thursday throwback!!!  Yup, we have been celebrating throwbacks for nearly a year ;)   Next week will be my 10 Year Anniversary of writting Happy Quilting and you will want to check back in for some super fun!!!   So I figured, since today was the last Thursday throwback , it might be best to start at the beginning :)  As in the Basics!!!  Yup, today isn't one tutorial throwback, but multiple tutorials sharing some of my favorite basics tutorials!!!

So let's get started with the Half Square Triangle!!!!  This is the most basic building blocks of your quilts, and is used in oh so many quilt designs.   I have no idea how many times I have shared tutorials for HST's on my blog, but this was the first Half Square Triangle tutorial ;)   It even goes over the math of how to make multiple sizes and the trimming with both square and rectangle rulers ;)  It is so useful.   And if you are making HST's with Scraps, you can see this Scrappy HST Tutorial.


Next up, my favorite way of making Flying Geese . . .  The No Waste Flying Geese Tutorial.  I love how quick and easy it is to make flying geese this way, and the fact that you don't have to waste anything is a super bonus.   Yes, it is a bit of a pain to cut squares at 3/8" or 7/8", (and you really have to cut them at that size, they don't work if you fudge up to 1/2" or 1") but it is totally worth it.   These go together fast making 4 at a time and you are sewing them all with squares, super fun and super easy!!!  And of course, the tutorial goes over the math of how to make all your Flying Geese, regardless of size, using this method.  


And did you know that I have Video Tutorials??  This one is throwing back 8 years but it is about as basic as it gets.   Finishing your quilt is something we all do with every quilt!!!  This Finishing Your Quilt Video Tutorial Series goes over Basting, Quilting, and Binding :)   These are super helpful if you are starting out learning how to bind, and machine quilt, and there are some more Machine Quilting Tutorials on my Video Page as well, just scroll down a bit ;)  And finally, I love to do my Binding by machine, as I am a horrible hand stitcher :)  And if you want to make a Custom Scrappy Binding to match your quilt, you can see this Custom Binding tutorial.   


And while we are talking Video's, I also have an Applique Basics Video Tutorial Series!!!! (just scroll bast the beginner basics :)     I love to do applique, and wanted to share how much easier it is than we initially think it is going to be.   It is such a great way to add a pop of fun to your quilts and really is fun and fast to do.   And when you are done with the basics, you can always move up to Complex Layered Applique using this Tutorial.  Now that is a pop of fun!!! 


And finally, One of my favorite tutorials on basics is how to incorporate Leaders and Enders into you quilting.    This is such a great way to basically make free bonus quilts!!!   I always have a stack of squares next to my machine and love that I never have to worry about wasting thread or having my machine come unthreaded with this method.   And it has made some amazing Bonus Quilts like this Postage Stamp, Irish Chain, and many more!!!


And those are some of my favorite Basic Tutorials that I use all the time!!!!    I hope you have enjoyed today's Tutorial Throwback Thursday and find some helpful tools in your quilting ;)    I have so enjoyed this year of Throwback Thursday's and how you have enjoyed it as well!!!   And as I said earlier, be sure to pop back in next Thursday for my 10 Year Anniversary Celebration!!!  

Happy Quilting!!!!
Pin It!

Monday, January 7, 2013

Starburst Quilt-A-Long - Intro, Fabric, and Prizes

It's here!!  The Starburst Quilt-A-Long officially starts today!!!  Today's post is going over everything you need to know to Quilt-A-Long.   There will be a post each Monday from now until Feb 18th with weekly assignments and then there will be a Parade and Grand Prizes on March 4th.  So . . . onto a little rundown on how it's going to work!!


THE HOW TO

The Starburst Quilt-A-Long is based on my Starburst design that I did last year.  Each quilt consists of 4 large Starburst blocks.   The design is given in 3 different sizes so you can choose to make your quilt 57" x 57" (24" blocks), 76" x 76" (32" blocks), or 95" x 95" (40" blocks).  This quilt is not made by making one block at a time but rather making one complete set of quilting units (goose in the corner blocks, half square triangles, and flying geese) at a time.  Once the units are done, then the blocks will be created.   I broke down the construction of the quilt into 5 weeks and then added an additional 2 weeks to get it basted, quilted, and bound.  The schedule will be as follows

January 14 - Cutting Post
January 21 - Goose in the Corner and Half Square Triangles
January 28 - Flying Geese
February 4 - Building Blocks - At least 2
February 11 - Finish Blocks and Sashing
February 18 - Baste it, Quilt it, Bind It
March 4 - Starburst Parade and Grand Prizes

So count on checking back each Monday to see what the next week's assignment will be.  You will want to try to keep up weekly as there will be prizes along the way!!  With that said,  there is a tutorial, so if you get super excited and feel the need to work ahead, go for it!!  Just be sure to take a picture of each weekly assignment so that you can link it up for the weekly prizes :)  Oh, and if you are new to quilting, no worries, this will be super beginner friendly! I will go through each step in great detail in the Monday posts.

THE FABRIC REQUIREMENTS

Quilt Top

Regardless of what size quilt you decide to make, you will need 12 fat quarters.  You can pull these from your stash or Julie at the Intrepid Thread  has put together 7 stunning Starburst Quilt-A-Long Custom Bundles.  They are listed in Fat Quarter Bundles, which is what you need.  But, if you really love a bundle and want a little extra for a second quilt or another project, Julie has also listed them in Half Yard Bundles.

I went ahead and put each custom bundle into the quilt layout so you could get an idea of how they will look in the quilt.  These bundles are at a special Quilt-A-Long discount price, but  there is another little surprise father down, think coupon code :)

Fairy Dell
  

Figs and Plums
 

Peaches No Pits

Frosty Autumn

Key Lime Strawberry Pie

Sun and Sea


 Fruit Loops and Cocoa Puffs


Aren't these just fabulous. Julie has impeccable taste in fabric!! Good Luck choosing a favorite!! It was a super hard choice for me, but in the end I decided I am going with Fruit Loops and Cocoa Puffs.  I am so excited!!

Background Fabric (solid white in quilt sketches)
Once you have chosen your 12 fat quarters you need to get your Background Fabric.  I would suggest using a solid for this.  The background fabric needed is as follows

For the 57" x 57" (24" blocks)  size you need 2 2/3 yards background fabric
For the 76" x 76" (32" blocks)  size you need 4 yards background fabric
For the 95" x 95" (40" blocks) size you need 6 1/3 yards background fabric

Binding
If you like scrappy bindings, there will be enough left over from your fat quarters to do a lovely scrappy bindings.  If you prefer a one fabric binding you will need the following:

For the 57" x 57" (24" blocks)  size you need  1/2 yard binding fabric
For the 76" x 76" (32" blocks)  size you need  5/8 yard binding fabric
For the 95" x 95" (40" blocks) size you need 3/4 yard binding fabric

Backing
If you like scrappy backings, piece your backing together to be at least 6" larger on all sides than your quilt top.  If you prefer a one fabric backing you will need the following:

For the 57" x 57" (24" blocks)  size you need 2 3/4 yards backing fabric
For the 76" x 76" (32" blocks)  size you need 4 1/2 yards backing fabric
For the 95" x 95" (40" blocks) size you need 9 yards backing fabric

Coupon Code!!!

Julie is not only offering these beautiful bundles at a tremendous price, but she is also giving members of the Starburst Quilt-A-Long another fabulous discount.  Use the coupon code STARBURST at your checkout and receive and extra 10% off your order.  This means you can get an extra 10% off your already low priced bundle as well as getting 10% off your background fabric, and if you so choose, your binding and backing.  Score!!  Thank you to Julie for this extra little perk!!


THE PRIZES

I am so very excited about the Prizes for this Quilt-A-Long!!  I don't know about you, but I know that I am highly more motivated to keep up and finish when there are prizes at stake ;)  So how about this for a little motivation.

All those that finish their quilt top will be eligible for the Grand Prize.  The Grand Prize's are sponsored by The Intrepid Thread and huge Thank You goes out to Julie for her generosity in these prizes.  Wan't to know what they are???

A $75.00 Gift Certificate that you can spend as you like!!  There will be 3 lucky Grand Prize winners and each will get their own little shopping spree at The Intrepid Thread!!  And if that whopping amount of fabric goodness isn't motivation, then I don't know what is!!


But . . . Sometimes it is hard to keep motivated when the end is so far away.  So for that . . . We have a little Weekly Motivation.  Each week you will be able to link up (You don't have to have a blog to link up, you can link to a flickr picture :) your completed assignment for a chance to win the weekly prize.    These Weekly Prizes are sponsored by Fat Quarter Shop and a huge thank-you goes out to Kimberly and her team for their support in this Quilt-A-Long!!!


So ya,  there is lots of wonderful fabric to be won!!!  So keep up and sew on!!!

BUTTONS AND FLICKR

 Now down to the last of the nitty gritty.  First, If you are Quilting-A-Long and have a blog, It would be wonderful if you added the button to your blog :)   It really helps to spread the word and  the more that Quilt-A-Long the better!!!  If you have already added the button, thank you!!!


Second, I would love it if you joined the Happy Quilting Quilt-A-Long Flickr group.  You can post your fabric here, your progress, ask questions, ect.   And it is a super fun place to get to chat along with everyone participating :)  

LET'S GET GOING!!
So that just about wraps it up!!!  This week's assignment, round up your fabric.  Next Monday you will be getting your cutting assignments.  (And you will have a whole week to cut your fabric so if you don't have it by next Monday, it's okay, you still have some time :)

 If you have any questions at all regarding the Quilt-A-Long please do not hesitate to email me at happyquiltingmelissa@gmail.com.  I don't want anyone to not participate because they are confused by my rambling :)  I am just so excited, I can't wait for next Monday!!!
Pin It!