Wednesday, February 8, 2023

BOHO Heart Block of the Month - Month 9

  It's Month 9 with my good friends at Stitchin' Heaven  doing their BOHO Heart Monthly Block of the Month program and that means another month of fun tutorials!!

Month 1                Month 2               Month 3             Month 4            Month 5               Month 6

Month 7                Month 8               Month 9            Month 10           Month 11              Month 12

And since each month has Lots and Lots of Tutorials in them . . . Here is a list to jump right to the tutorial you need for this month 9:  

Square in a Square Block                    Four Patch Block                 Mini Circle Block        

Half Square Triangle Block                Nine Patch Block                 Wonky Flower Block

Medium Heart Block                          Flying Geese Block             Plus with a Square in a Square Block 

Fancy Log Cabin Block                      Fancy Pinwheel Block         Sewing Section 5

                                                             Sewing Group 3 


So you have your Month 9 BOHO Heart Packet . . .  Lets get started!!! 


We'll start with our first block of Month 9, the . . .


From your Month #9, Square in a Square bag, cut the fabrics according to page 2 of the supplemental cutting list. 


Using the cut pieces and the Square in a Square Block Directions from Month 1 make your block.   The Square in a Square Block should be measuring 2 1/2" x 2 1/2" unfinished.   


And with that done, we will move onto another familiar block , the . . .


From your Month #9, Four Patch Bag, cut the fabrics according to page 2 of the supplemental cutting list.   


Using the cut pieces and the Four Patch Block Directions from Month 2 make your block.    The Four Patch Block should be measuring 2 1/2" x 2 1/2" unfinished.   


And now we get to move onto some applique with the . . . 


From your Month #9, Mini Circle Bag, cut the fabrics according to page 2 of the supplemental cutting list using the Mini Circle template.     


Using the cut pieces and the Mini Circle Directions from Month 1 make your block.    The Mini Circle Block should be measuring 2 1/2" x 2 1/2" unfinished. 


And now were throwing it back to Month 6 with . . . 


From your Month #9, Half Square Triangle bag, cut the fabrics according to page 2 of the supplemental cutting list.    I cut my squares 3" instead of the 2.875" and will trim.   *** Note - You might recall in Month 6 when I asked you to save the second Half Square Triangle Block . . . today is the day we are using it.  So if you saved it, no need to cut new squares.  If not, cut the squares as directed.  


Using the cut squares and the Half Square Triangle Block Directions from Month 1 make your 2 blocks and use one or simply trim your remaining block from Month 6.   The Half Square Triangle Block will be measuring 2 1/2" x 2 1/2" unfinished.  


And with that completed, we can move onto another simple piece block, the  . . . 


From your Month #9, Nine Patch bag, cut the fabrics according to page 2 of the supplemental cutting list.    


Layout the 9 small squares as shown below.   Sew the squares into a 9 patch.  If you need a little extra help with this, you can use the 9 patch part of the  Shoo Fly Block Directions from Month 4.  


And your Nine Patch Block is done and should measure 3 1/2" x 3 1/2" unfinished.  


And now we get to move back to some more applique with the . . . 


From your Month #9, Wonky Flower Bag, cut the fabrics according to page 1 of the supplemental cutting list using the 3 Wonky Flower templates.     


Using the cut pieces and the Wonky Flower Directions from Month 1 make your block.    The Wonky Flower Block should be measuring 4 1/2" x 4 1/2" unfinished. 


And one last block with applique the . . . 


From your Month #9, Medium Heart Bag, cut the fabrics according to page 1 of the supplemental cutting list using the Medium Flower template.     


Using the cut pieces and the Mini Heart Block Directions from Month 3 make your block.   The directions are the same, only the block is made on a larger scale.     The Medium Heart Block should be measuring 4 1/2" x 4 1/2" unfinished. 


And with that done, we will move onto another familiar block , the . . .


From your Month #9, Flying Geese Bag, cut the fabrics according to page 1 of the supplemental cutting list.   


Using the cut pieces and the  Flying Geese Directions from Month 4 make your block.    The Flying Geese Block should be measuring 4 1/2" x 4 1/2" unfinished.   


And now we move onto a new block with familiar units, the  . . . 


From your Month #9, Plus with a Square in a Square Bag, cut the fabrics according to page 1 of the supplemental cutting list.   


Using the Yellow square and 4 small Green Squares and the Square in a Square Block Directions from Month 1 make your Square in a Square Unit and set it aside.    


Now, layout the remaining squares and the Square in a Square Unit as shown below.   Sew the squares into a 9 patch.  If you need a little extra help with this, you can use the 9 patch part of the  Shoo Fly Block Directions from Month 4.  


And just like that, your Plus with a Square in a Square Block is done and should measure 6 1/2" x 6 1/2" unfinished.  

And now it's time for an all new block, the . . . 


From your Month #9, Fancy Log Cabin bag, cut the fabrics according to page 1 of the supplemental cutting list. 


Pair a Cream Square with a Yellow Square.  Place the Yellow square onto the Cream square with right sides together.  Stitch a 1/4" along the edge.  Press the seams towards the Yellow Fabrics.  Repeat to make a total of 4 Two Patch units.   


Layout a Cream Rectangle, Pink Rectangle, and Two Patch Unit as shown.  Place the Pink rectangle onto the Two Patch Units with right sides together.  Stitch a 1/4" along the edge.   Place the Cream rectangle onto the Two Patch Units with right sides together.  Stitch a 1/4" along the edge. Press the seams outwards to the Rectangles.  Repeat to make a total of 4 Four Patch units.   


Layout a Four Patch Unit and a Blue Rectangle as shown.  Place the Blue Rectangle onto the Four Patch Units with right sides together.  Stitch a 1/4" along the edge.   Press the seams towards the Blue rectangle.  Repeat to make a total of 4 Log Cabin units.   


Layout the 4 Log Cabin Units as shown below.  


Place the right hand column pieces onto the left hand column pieces with right sides together.   Align and pin.   Stitch a 1/4" seam along the edge of all the units.  


Press the seams open. 


Place the top row onto the bottom row with right sides together.   Align and pin.   Stitch a 1/4" seam along the edge of the unit.  Press the seam open.


And now you have made a Fancy Log Cabin Block that should be measuring 6 1/2" x 6 1/2" unfinished. 


And now it's time for the final block which is again, a new block, the . . . 


From your Month #9, Fancy Pinwheel bag, cut the fabrics according to page 1 of the supplemental cutting list.   And please take care that these are some different size measurements than we have been used to cutting and when it says 3/8" it really means 3/8".  


Layout a Blue triangle and Red rectangle as shown below.  Place the Blue Triangle onto the Red rectangle with right sides together aligning along the left hand side.  Stitch a 1/4" along the edge, I continue stitch all the way across the red rectangle so I can chain stitch.  Press the seam towards the Blue triangle.   Align a long ruler with the edge of the Blue Triangle and trim the Red rectangle even with the Blue Triangle as shown. 


  Repeat to make a total of 4 Sashed Triangle units.   


Layout an Orange triangle and a Teal Triangle as shown below, taking care that the Orange triangle is on the left.  Place the Teal Triangle onto the Orange Triangle with right sides together .  Stitch a 1/4" along the edge.   Press the seam towards the Orange Triangle.  Clip the tail from the top of the triangle.   Repeat to make a total of 4 Double Triangle units.   


Layout a Sashed Triangle Unit and a Double Triangle Unit as shown below.  Place the Double Triangle Unit onto the Sashed Triangle Unit with right sides together .  Stitch a 1/4" along the edge.   Press the seam open.   Clip the tails from the corners of the unit.   Repeat to make a total of 4 Pinwheel units.   


Layout the 4 Pinwheel Units as shown below.  


Place the right hand column pieces onto the left hand column pieces with right sides together.   Align and pin.   Stitch a 1/4" seam along the edge of all the units.  


Press the seams open. 


Place the top row onto the bottom row with right sides together.   Align and pin, using the Pin Trick to align the center seam.   Stitch a 1/4" seam along the edge of the unit.  Press the seam open.


And now you have made a Fancy Pinwheel Block that should be measuring 10 1/2" x 10 1/2" unfinished. 


So now, with your blocks all made,  we can move onto  . . . 


We will start by sewing the Strip Sets together.   Press the seam allowances to the Larger Number fabric.   
From Fabric 35 and 36, sew a 10 1/2" Strip Set together as shown. 
From Fabric 37 and 38, sew a 12 1/2" Strip Set together as shown. 
From Fabric 39 and 40, sew a 14 1/2" Strip Set together as shown. 
From Fabric 41 and 42, sew a 16 1/2" Strip Set together as shown. 
From Fabric 43 and 44, sew a 10 1/2" Strip Set together as shown. 
From Fabric 43 and 44, sew a 4 1/2" Strip Set together as shown. 
From Fabric 43 and 44, sew a 2 1/2" Strip Set together as shown. 
From Fabric 45, 46, and 47, sew a 19 1/2" Strip Set together as shown. 
From Fabric 45 and 46, sew a 2 1/2" Strip Set together as shown. 
From Fabric 45, and 46, sew a 2 1/2" Strip Set together as shown. 
       (or cut out a 2 1/2" x 2 1/2" Gold Fabric Filler)
From Fabric 48, 49, and 50, sew a 22 1/2" Strip Set together as shown. 


Now we will sew the Blocks to the Strip Sets.   Press the Seams Open from here on out.    

Sew the Mini Circle Block and the  43/45 Strip Set together as shown.
Sew the 45/46 Strip Set and the 45/46 Strip Set OR Gold Filler together as shown.
Sew the Half Square Triangle Block and the 35/36 Strip Set together as shown.
Sew the Four Patch Block and the 39/40 Strip Set together as shown.
Sew the Square in a Square Block and the 4 1/2" 43/44 Strip Set together as shown.
Sew the Nine Patch Block and the 45/46/47 Strip Set together as shown.


Sew the Sashed Circle Unit and the Wonky Flower Block together as shown.
Sew the Pieced 45/46 Strip Set and the Flying Geese Block together as shown.
Sew the Sashed Half Square Triangle Unit and the 37/38 Strip Set together as shown.
Sew the Sashed Four Patch Unit and the 41/42 Strip Set together as shown.
Sew the Sashed Square in a Square Unit and the 10 1/2" 43/44 Strip Set together as shown. (sorry, I accidently pictured this upside down :)  
Sew the Sashed Nine Patch Unit and the 48/49/50 Strip Set together as shown.


Sew the Plus with a Square in a Square Block and the Circle Wonky Unit together as shown.
Sew the Medium Heart Block and the Side Sashed Half Square Triangle Unit together as shown.
Sew the Side Sashed Four Patch Unit and the Sashed Square Unit together as shown. (sorry, as I had pictured it upside down, I also, sewed it upside down  Sew as drawn, not as pictured.  I will continue to correct it in drawing for the remainder of the pictures as I didn't notice this until I was writting the tutorial, and now mine might permanently be upside down :)  
Sew the Sashed Flying Unit and the Fancy Log Cabin Block together as shown.


Sew the Wonky Circle Plus Unit and the Fancy Pinwheel Block together as shown.
Sew Sashed Heart Half Square Triangle Unit and the Sashed Four Square Unit together as shown.


Sew the Wonky Circle Plus Pinwheel Unit and the Heart Half Square Triangle Four Square Unit together as shown.
Sew Geese Cabin Unit and the Side Sashed Nine Unit together as shown.


Sew the Wonky Circle Plus Pinwheel Heart HST Square Unit and Geese Cabin Sashed Nine Unit together as shown.


And your Group 3 - Section 5 is complete.  It should measure 16 1/2" wide by 32 1/2" high.


And there is only one thing left . . . 


Layout Sections 1-4 that we sewed together last month and Section 5 as shown below.  


Place Section 5 onto Section 1-4 with right sides together.  Align, pin, and stitch a 1/4" seam along the edge.   Press the seam open.  


And your Group 3 is complete.  It should measure 16 1/2" wide by 83 1/2" high.


And that is it for BOHO Heart Block of the Month, Month 9 :) 

If you have any questions on this tutorial, please don't hesitate to email me at happyquiltingmelissa@gmail.com or leave a comment.  

Hope you have so much fun making all of this months blocks and then sewing them all together:)

 Looking forward to Next Month!!


Pin It!

Tuesday, February 7, 2023

Terrific Tuesday Giveaway Day!!!

 It's Terrific Tuesday Giveaway Day!! Let's have some fun :)

First, we are going to announce the winners of last week's Terrific Tuesday Giveaway!!  

The winner of the $25.00 Gift Certificate from Thousands of Bolts   is . . . # 98 . . . Congrats to nancyinwyoming!!!  I have messaged you :)


And on to today's

Today's Terrific Tuesday Giveaway is being sponsored by Fat Quarter Shop.   Fat Quarter Shop is amazing and they never cease to amaze me with everything they have going on at their shop!!!     And did you know they have a 24 Hour Flash Sale  and Precuts of the Week!!   You can also save big on the Basics of the Month!!!!     This month Bee Cross Stitch Basics   for Riley Blake Designs are on sale!!    Also, All It's Sew Emma Notions are on sale for the Notion, and all  Lori Holt, Bee in my Bonnet, Patterns are on sale for the Pattern.   Save 20% off of all of them for the whole month of January!!  So great ;)  


And for today's Terrific Tuesday Giveaway  Fat Quarter Shop is giving away this gorgeous Country Rose Layer Cake by Lella Boutique for Moda!!!  I used this fabric in my Aurora Quilt and it turned out absolutely stunning!!!   And nothing says Valentine's Day like Roses ;) 
 

You have two entry chances here on the blog, and please leave a separate comment for each.  All Entries are welcome, including International Entries.   Please just be sure to leave an email address if you are a no-reply blogger ;)  


ENTRY 1 - Simply leave a comment that tells me your favorite color of Roses?? 

 ENTRY 2 - Show your Fat Quarter Shop love.   You can follow them on   FacebookTwitterInstagramPinterestYou Tube or at their Blog.  You can Sign up for their Newsletter which will ensure you catch all of their amazing sales, or you can visit The Shop and then share a favorite item ;)   Just be sure to leave a comment of how you showed your Fat Quarter Shop Love!!!

And that's it ;)  The giveaway will be open until next Tuesday, February 14th when I will announce a winner at the beginning of next weeks Terrific Tuesday Giveaway Post :)

You can also pop over to my Instagram and/or Facebook to enter there as well :)  

Good Luck and Have a Happy Quilting Day!!!
Pin It!

Saturday, February 4, 2023

Gingham Cottage - Flora Bloom Quilt + Free PDF Pattern

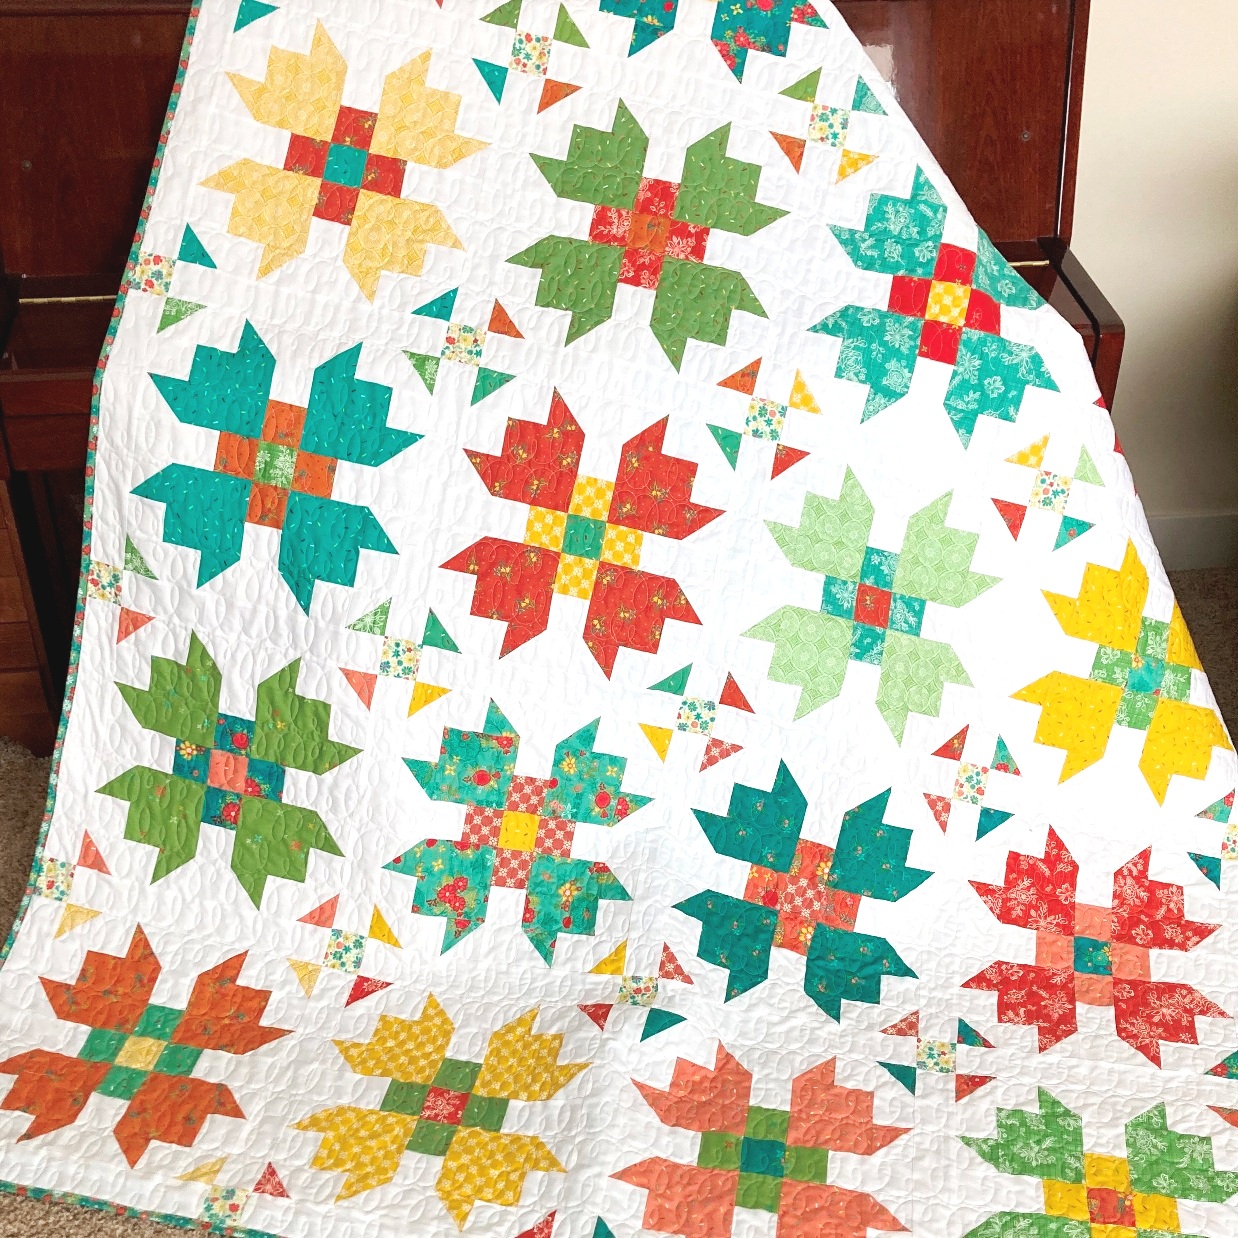
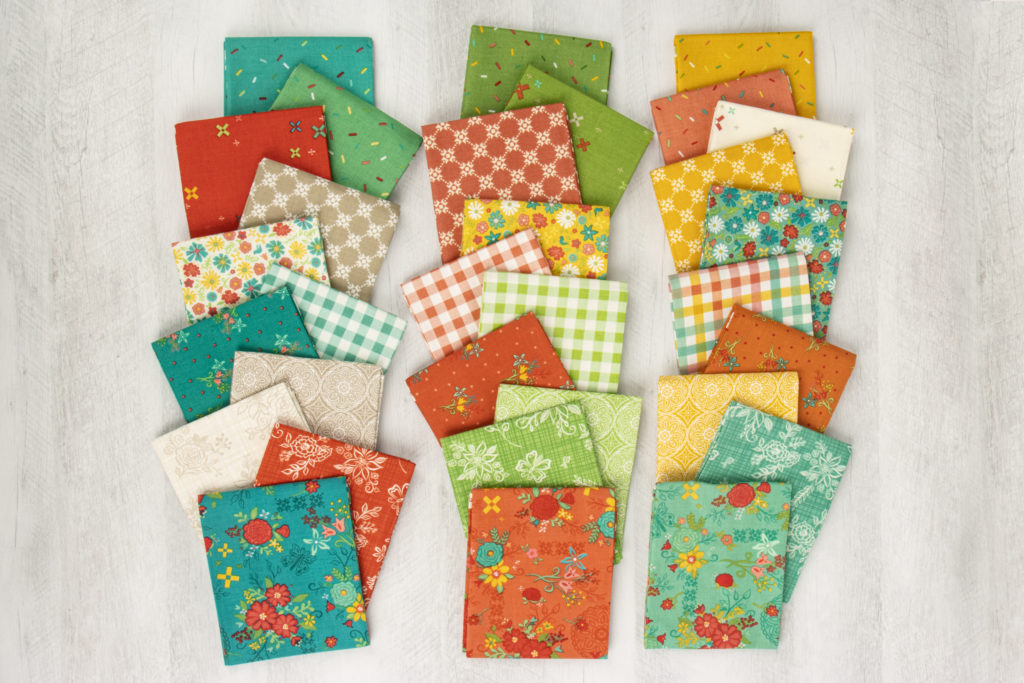
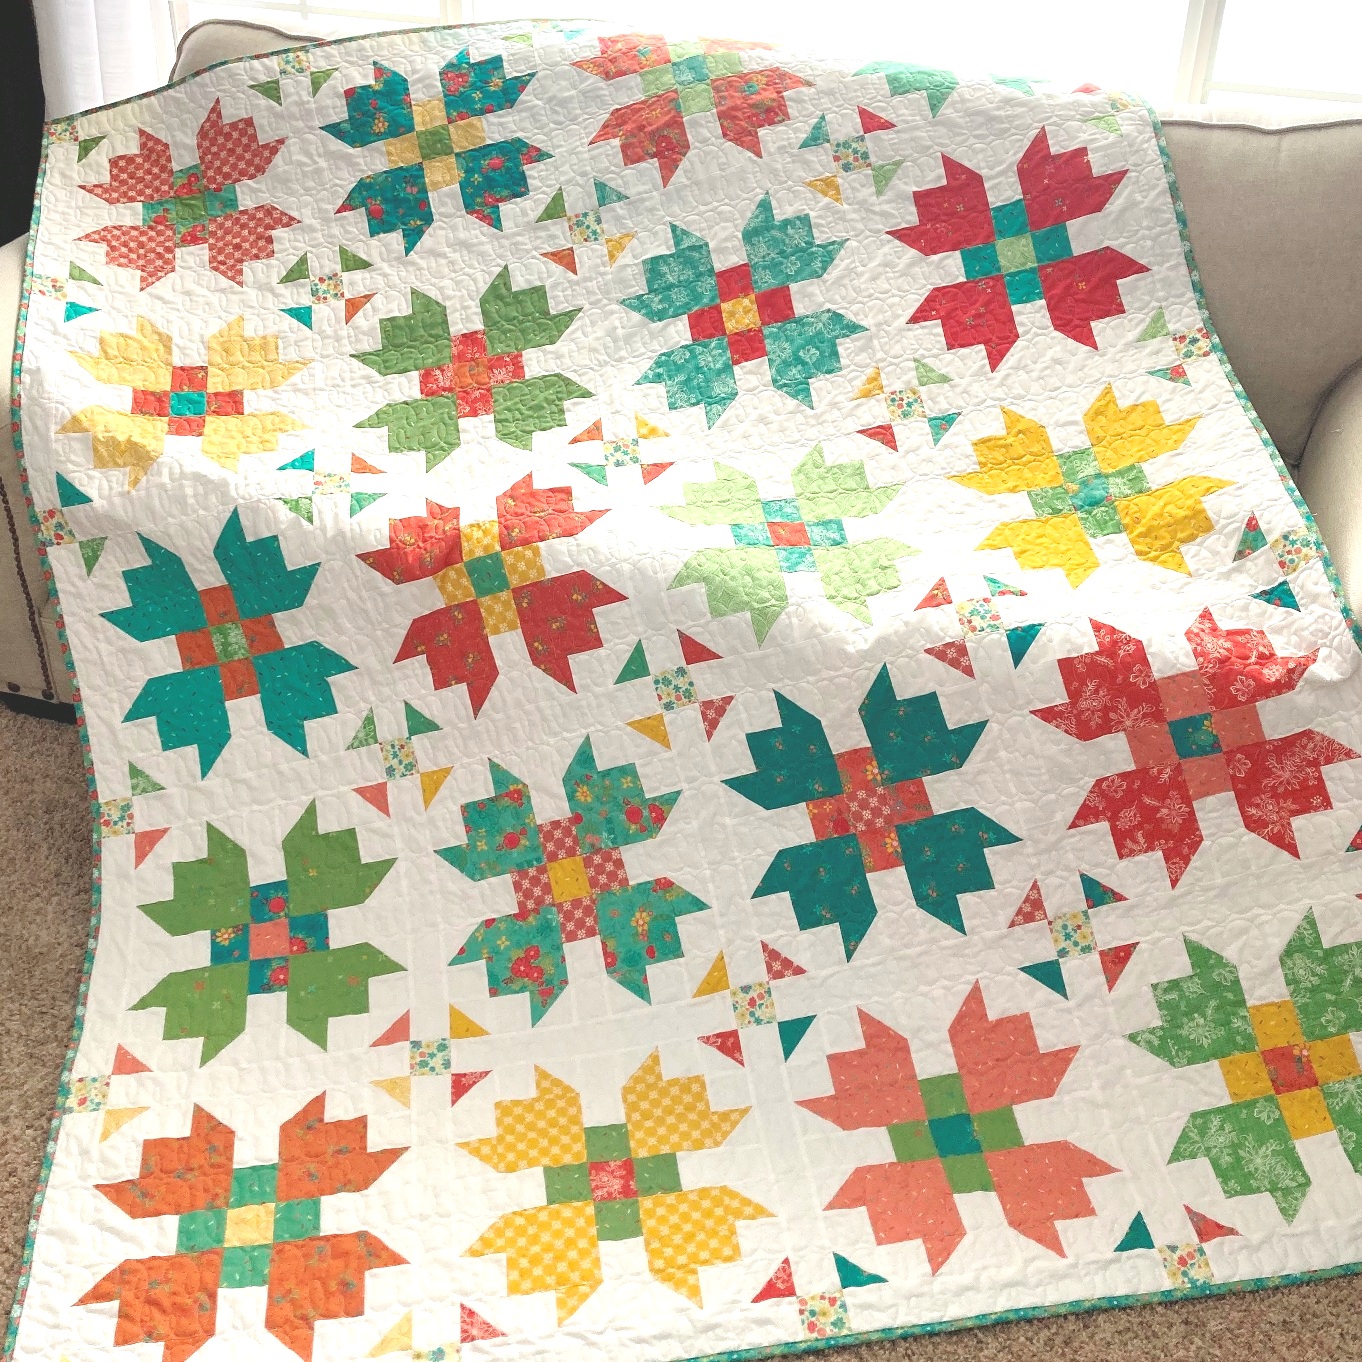
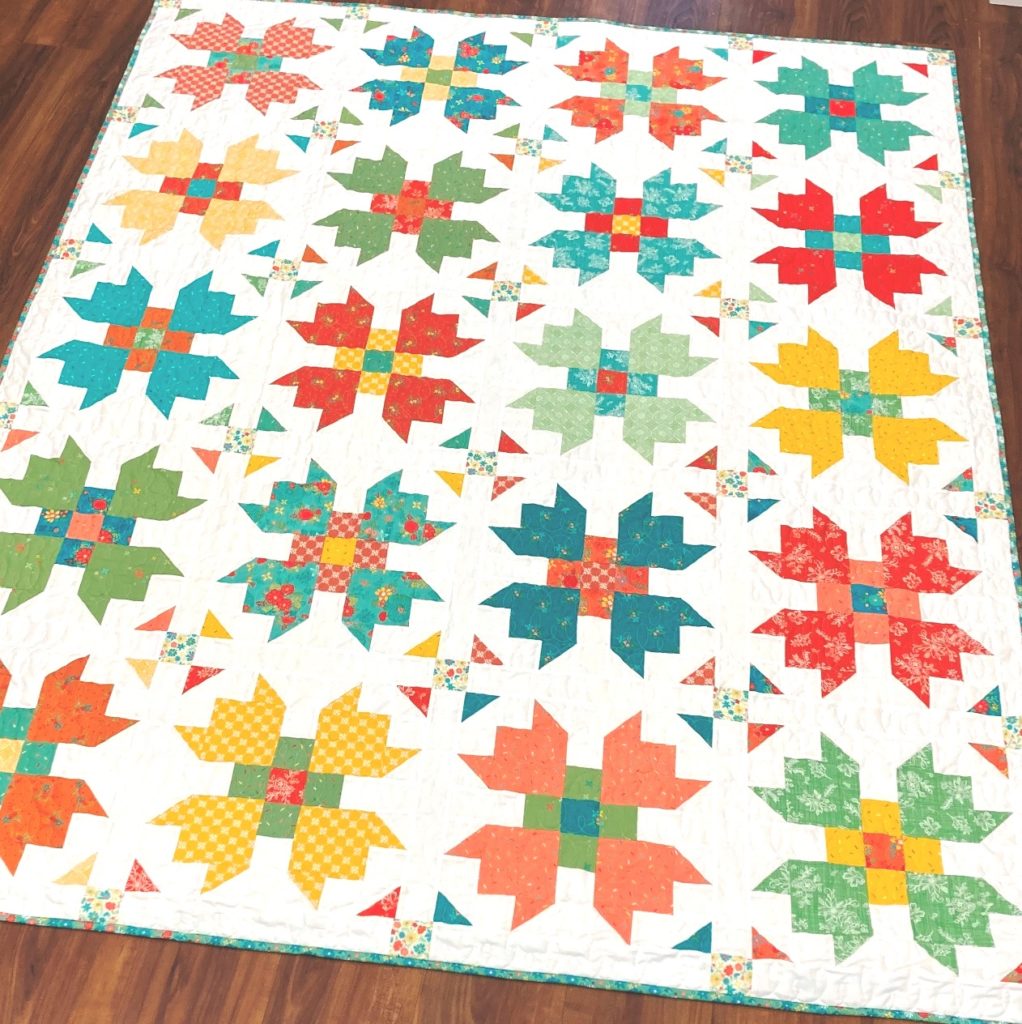
 Hello Quilting Friends!  Today, I am thrilled to be sharing this brand new Flora Bloom quilt as well as a Free PDF Pattern for it!!! This quilt features Gingham Cottage by Heather Peterson and is a Fat Quarter Friendly quilts, so you can grab a bundle and get stitching!!! And isn't it just the cutest little garden of blossoms :)

Flora Bloom was originally a tutorial I wrote years back, and I have always wanted to remake it. This quilt design works well with prints that read one color, and my original quilt fabrics didn't do that so some of the design got lost. So when I saw all of the happy and bright colors of Gingham Cottage and how each print truly read as that color, I knew it would be perfect for remaking this Flora Bloom quilt ;) And it truly shines in this happy prints!!!

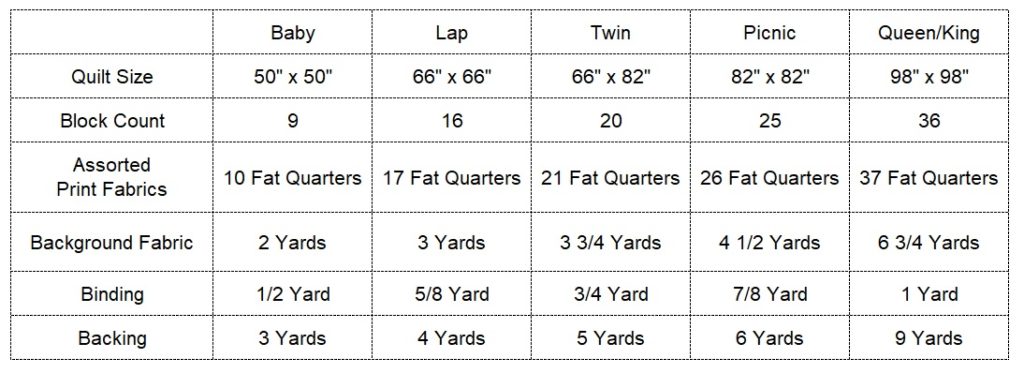
The Flora Bloom quilt is made with super basic piecing. Just some Half Square Triangles and basic squares. It goes together super fast, and you can really speed up your HST's with your favorite HST Trimming tool (I love the Bloc_Loc Rulers :) And I just love how each block allows you to use so many different prints to really make the center "bloom". I matched my corner pieces to the center square, but you can always mix that up as well and have 4 colors per block, or just go totally scrappy :) I made the same size (twin size) as the original but for the Free Flora Bloom PDF Pattern I added lots of size options so you can make from a Baby Size to a King Size.

This quilt really is a fun way to show off the prints in a happy and colorful collection of fabrics. And you will choose one print from your Fat Quarters to be your cornerstones, and wouldn't you know, the rainbow floral worked just perfect for those. And of course, the Riley White background just makes all of those happy colors pop.

And as I mentioned, there is also a free PDF Download of this pattern and I included 5 size options, without any quilt math. The quilt I showed is the Lap size, and I already have plans to make a baby and picnic size :) To get the FREE PDF Flora Bloom Pattern Download, just click here  and download it there ;)

And when it came time to quilt mine, I was thrilled that all of the piecing makes for super straight lines moving across the quilt in perfect 2" increments. That for sure meant I was doing my favorite L and E that just looks so good and adds so much texture to the quilt. And I just love looping across the quilt over and over. So fun!!! I used So Fine 402 and I love how it blends perfectly in the background as well as all the happy colors.

And that is my Flora Bloom Quilt !! I hope you have enjoyed this post. Oh, and if you make your own Flora Bloom Quilt, I would love to it!!! you can share your quilts in any size with me on social media using hashtags #happyquiltingwithmc and #rileyblakedesigns and tagging @happyquiltingmc or email me a picture at happyquiltingmelissa@gmail.com. I can't wait to see your Flora Bloom quilts!!!

Thank you so much for popping in and sharing this quilt finish and PDF Pattern with me today.

I hope you have a very Happy Quilting Day!!!

Pin It!

Friday, February 3, 2023

Cupid Box 2023!!!

 It's that time of year . . . when the Annual Cupid Box  arrives in the mail!!!    This years box is filled with so to love about this quilting goodness!!!   And sadly, the Cupid Box was sold out in pre-orders, but some of the lovely quilty goodness can still be found separately :)   And I can't wait to break open those strips and get stitching!!!  

I was so happy to find these gorgeous Clothworks XOXO Strips for making this adorable Heartstrings Quilt!!! Isn't that just to precious.  I have already started cutting it out ;)   I just love making quilted hearts :) 


And the notions that  Fat Quarter Shop sent along this month are just so fun!!!! I was just saying to a friend the other day I have not tried quilt as you go . . . and now with the Strip Mug Mats, I am totally going to give it a whirl :)    And the Pincushion slap band will be great for working on the longarm.   And my husband already tried to take the cute letter opener to work, but no way is it leaving my desk :)   And finally,  you can never have enough Aurifil thread ;)    So great!!!! 


What a super fun Cupid Box !!!  I am already looking forward to next years ;)   

Hope you all have a very Happy Quilting Day!!!
Pin It!

Tuesday, January 31, 2023

Terrific Tuesday Giveaway Day!!

   It's Terrific Tuesday Giveaway Day!! Let's have some fun :)

First, we are going to announce the winners of last week's Terrific Tuesday Giveaway!!  

The winner of the $25.00 Gift Certificate from Olie and Evie   is . . . #113  . . . Congrats to honeyquiltsandbakes!!!  I have messaged you :)


And on to today's

Today's Terrific Tuesday Giveaway is being sponsored by  Thousands of Bolts .   Thousands of Bolts has incredible prices that will have you super excited!!!  There are thousands of bolts to choose from and all at amazing prices, staring as low as $5.39 a yard!!!   And they have just introduced dozens and dozens of new fabrics to the inventory!!  Be sure to check it out :)    


And for Today's Terrific Tuesday Giveaway,  Thousands of Bolts is giving one lucky winner at $25.00 Gift Certificate!!!  You can get just what you always wanted :)   And good luck picking because there are literally thousands of bolts to choose from!!!!   


You have two entry chances here on the blog, and please leave a separate comment for each.  All Entries are welcome, including International Entries.   Please just be sure to leave an email address if you are a no-reply blogger ;)  

ENTRY 1 - Simply leave a comment that tells me What is your favorite piece of clothing you own?

 ENTRY 2 - Lets show Thousands of Bolts some Love!!!!   You can follow them on   Facebook or Instagram.  Or you can visit The Shop and then share a favorite item ;)   Just be sure to leave a comment of how you showed your Thousand of Bolts Love!!!

And that's it ;)  The giveaway will be open until next Tuesday, February 7th, when I will announce a winner at the beginning of next weeks Terrific Tuesday Giveaway Post :)

You can also pop over to my Instagram and/or Facebook to enter there as well :)  

Good Luck and Have a Happy Quilting Day!!!
Pin It!