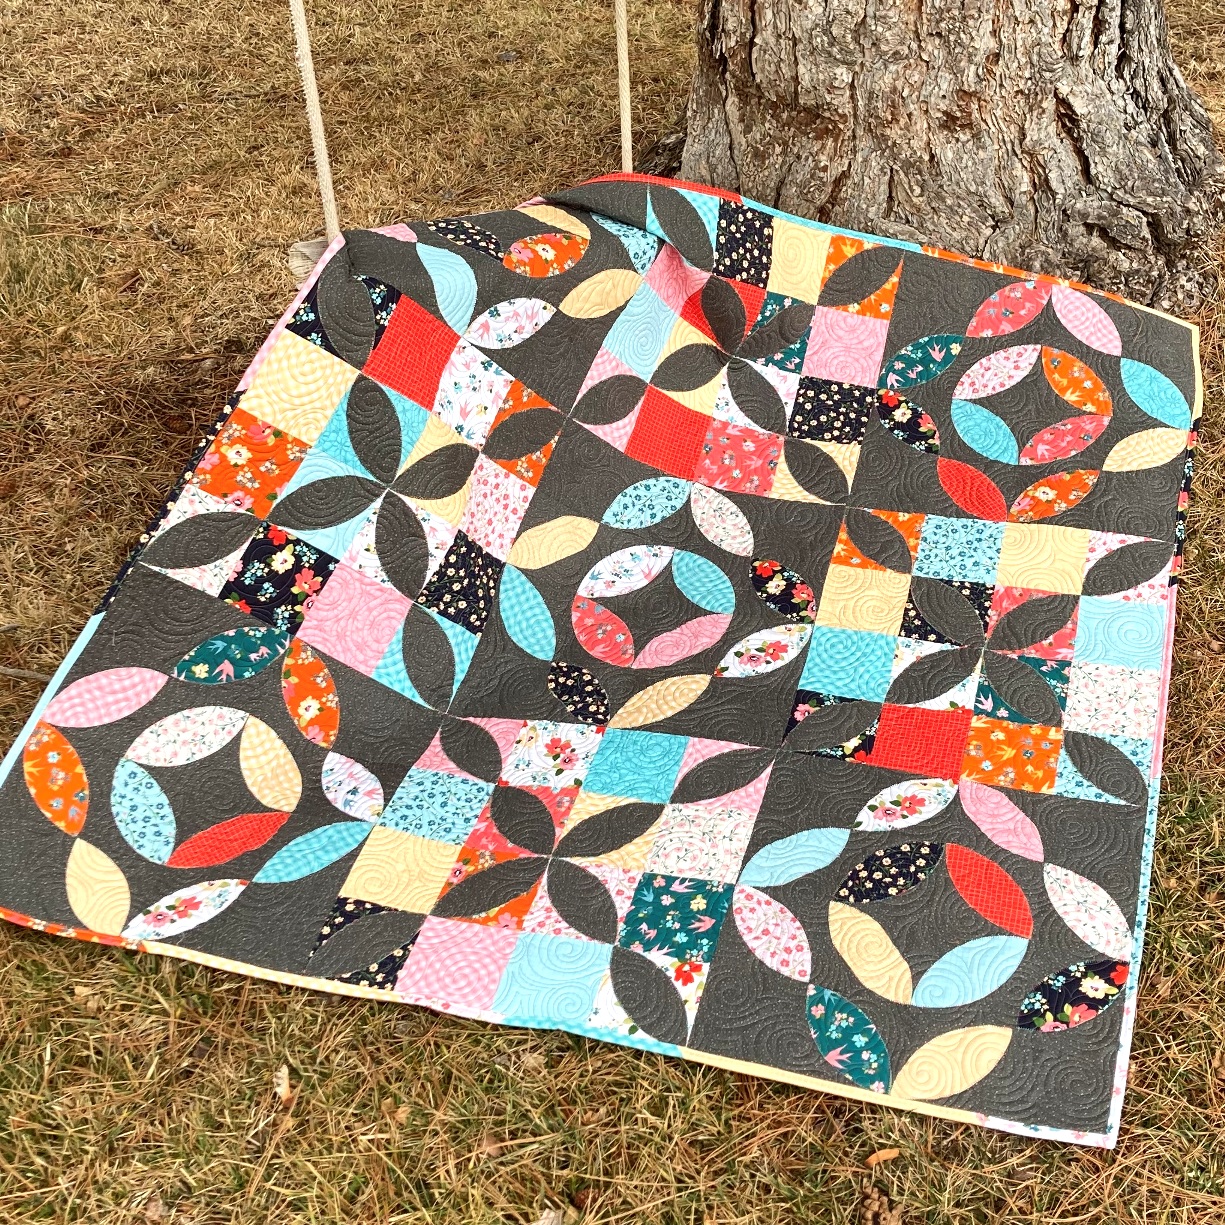
Today I am thrilled to be bringing you a new quilt and a tutorial to go along with it! I just love simple applique, and simple applique added to simple patchwork . . . well that is just the best!!! And so, without further ado . . . here is the Petal Patch Quilt!!!
Petal Patch is Charm Pack Friendly, making it really easy to grab some packs and get going. The quilt finishes at 54" x 54" so it makes for a great lap size quilt. It is a wonderful way to practice simple applique, and makes a gorgeous finish. So, let's get to making your own!!!
3 Background Charm Packsor2 Yards of Background Fabric cut into (14) 5" x WOF Strips and sub cut into (112) 5" Squares
1/2 Yard of Binding Fabric cut into (6) 2 1/2" x WOF Strips
3 1/4 Yards of Background Fabric cut into (2) 58 1/2" x WOF Pieces
STEP 1 - CUTTING THE APPLIQUES
To cut out my "Petal" (also known as Orange Peel) Appliques, I used the AccuQuilt GO! Orange Peel 4 1/2" die. It makes quick work of cutting out applique, and because this die is so small, it even works in my GO! Me Cutter.
If you don't have an AccuQuilt System, there are lots of Orange Peel Templates you can purchase, just make sure to get a 4 1/2" template. Or, if you are using a different size template, be sure your squares are all 1/2" larger than your template.)
And of course, you can always make your own Template!! Here is a 4 1/2" Orange Peel Template, that you can print and use to make your own template from cardboard or template plastic.
Any way you choose to cut your Petals is great! You will need to cut:
60 Petals from the Assorted Print 5" squares &
32 Petals from the Background 5" squares.
When you are finished cutting all your applique Petals you will now have:
32 Background Petals and 80 remaining Background 5" Squares
STEP 2 - SEWING THE APPLIQUE BLOCKS
Because this applique shape is so basic, you don't need to really bother with Heat N Bond for adhering. You can simple Glue or Pin baste your appliques. To Glue Baste, simply place small dots of Applique Glue on the wrong side of your Petal Template. Then center it diagonally on a 5" square. Print Fabric Petals are placed on Background 5" squares and Background Fabric Petals are placed on Print 5" squares. You should have 1/4" extra along the 2 corner edges.
If you are Pin Basting, take care to keep the pins in the center of your Petal Applique and away from the edges. That way when you are secure stitching your applique you don't have to remove the pins.
With your Petal Applique basted to your 5" square, you can now secure stitch around your applique. You can do machine, hand, or needle turn applique and choose any color thread. Stitch around the entire Applique using your desired secure stitch. I like to backstitch 1-2 stitches at the end of my stitching just to hold it. I used a fun variegatedthread with a machine Blanket stitch :)
If you are new to applique, you can see my Applique Basics video's that will help walk you through the previous steps in more detail :)
Continue stitching the Petal Appliques until you have secure stitched them all to a 5" square. You should now have:
60 Print Petal Units and 32 remaining Assorted Print 5" Squares &
32 Background Petal Units and 20 remaining Background 5" Squares
STEP 3 - SEWING THE PETAL BLOCKS
Layout 3 Print Petal Units and 1 Background 5" Square as shown, taking note of the fabric placement. Place the right hand squares in each row onto the left hand squares with right sides together and align the raw edges. Stitch a 1/4" seam along both edges. Press the seams Open.
Now, place the Top Row onto the Bottom Row with right sides together and align and pin the center seam and raw edges. Stitch a 1/4" seam along the pinned edge. Press the seam open. Repeat this process to make a total of 20 Petal Block Corner Units.
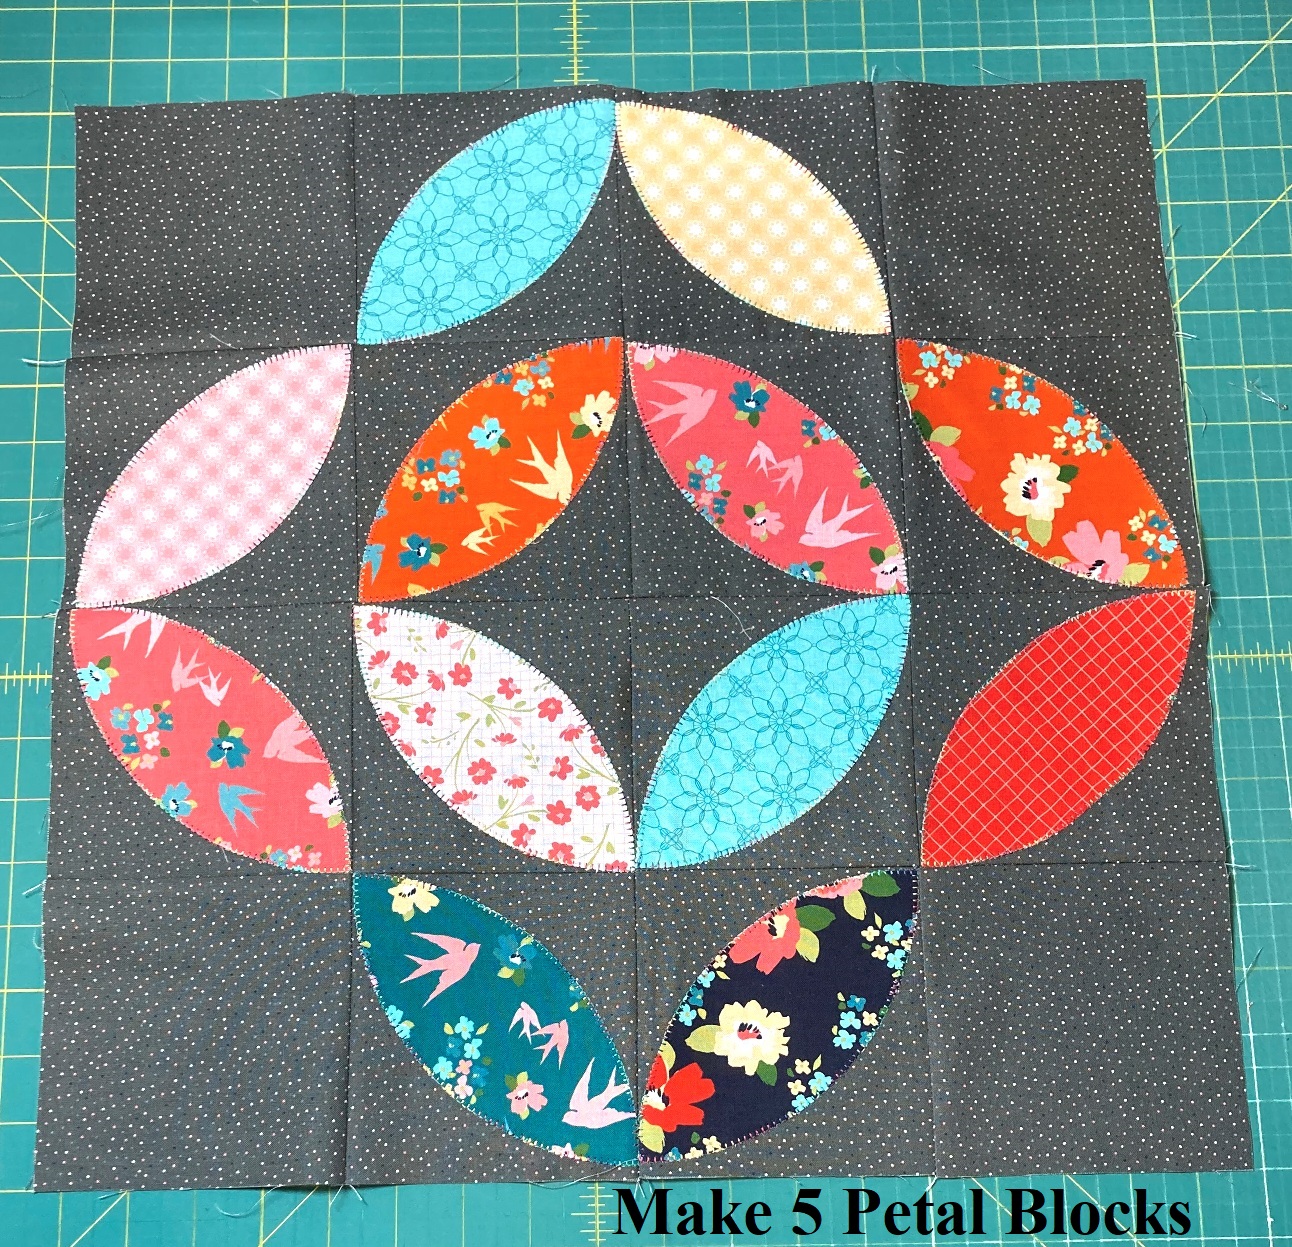
And now, with the units made, we can make the block! Layout 4 Petal Block Corner Units as shown, taking note of the fabric placement.
Place the right hand Units in each row onto the left hand Units with right sides together and pin and align the center seams and raw edges. Stitch a 1/4" seam along both edges.
Press the seams Open.
Now, place the Top Row onto the Bottom Row with right sides together and align and pin the seams and raw edges. Stitch a 1/4" seam along the pinned edge. Press the seam open.
And you have a beautiful 18" unfinished Petal Block. Repeat this process to make a total of 5 Petal Blocks.
STEP 4 - SEWING THE CRISS CROSS BLOCKS
Layout 2 Background Petal Units and 2 Assorted Print 5" Square as shown, taking note of the fabric placement. Place the right hand squares in each row onto the left hand squares with right sides together and align the raw edges. Stitch a 1/4" seam along both edges. Press the seams to opposite sides towards the 5" Print Square.
Now, place the Top Row onto the Bottom Row with right sides together and align and pin/nest the center seam and raw edges. Stitch a 1/4" seam along the pinned edge. Press the seam open. Repeat this process to make a total of 16 Criss Cross Block Corner Units.
And once again, with the units made, we can make the block! Layout 4 Criss Cross Block Corner Units as shown, taking note of the fabric placement.
Place the right hand Units in each row onto the left hand Units with right sides together and pin and align the center seams and raw edges. Stitch a 1/4" seam along both edges.
Press the seams Open.
Now, place the Top Row onto the Bottom Row with right sides together and align and pin the seams and raw edges. Stitch a 1/4" seam along the pinned edge. Press the seam open.
And you have a beautiful 18" unfinished Criss Cross Block. Repeat this process to make a total of 4 Criss Cross Blocks.
STEP 5 - MAKING THE QUILT TOP
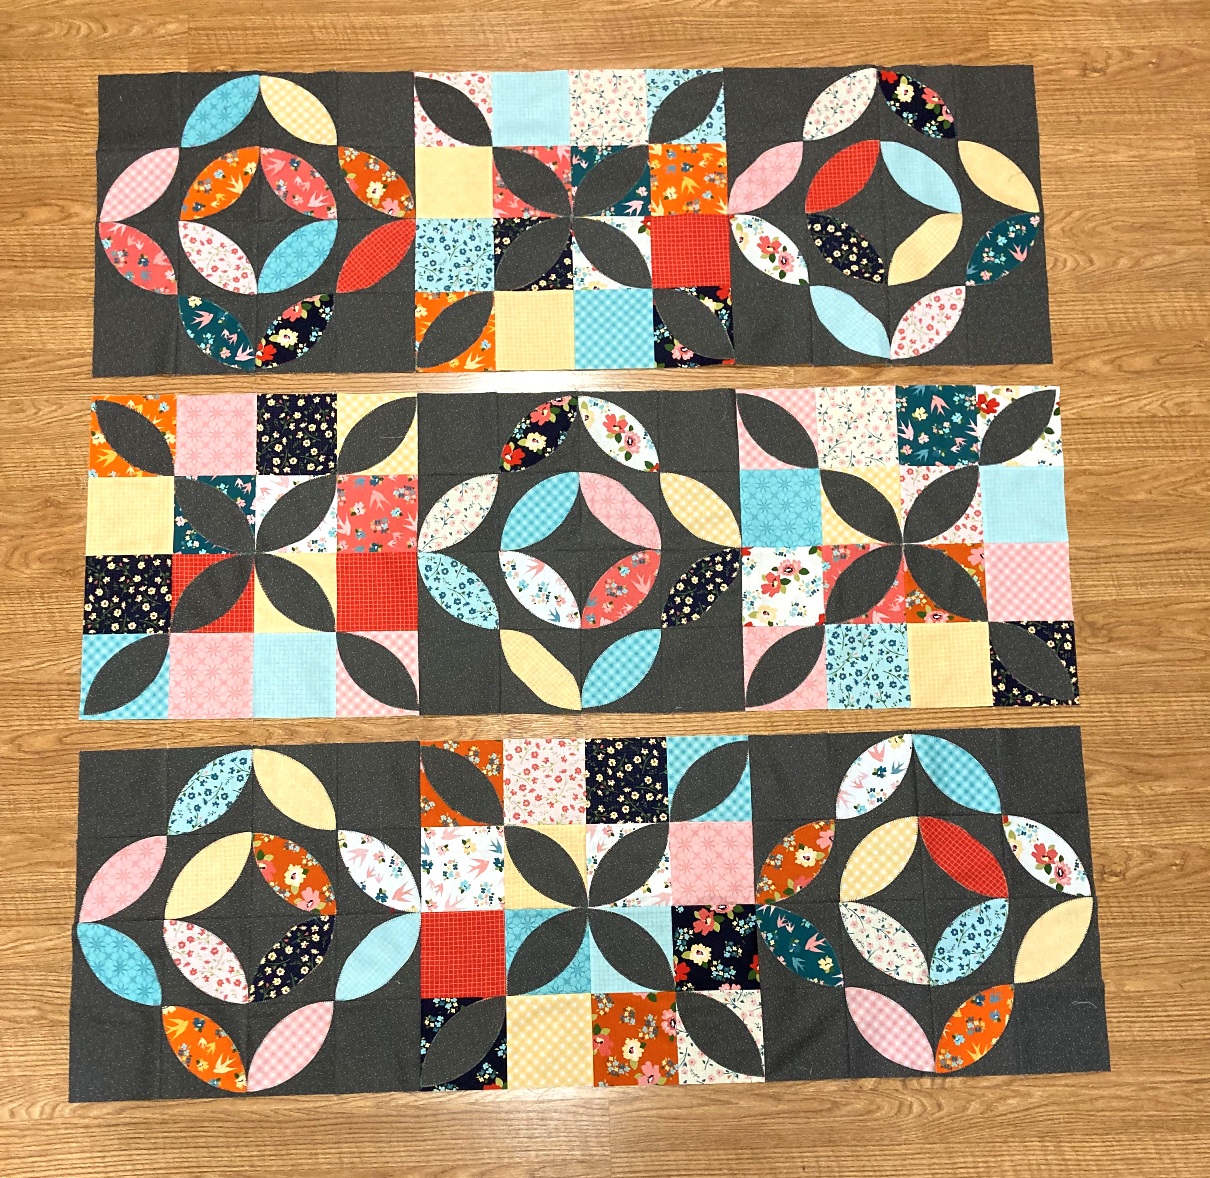
And with your Blocks complete, you are ready to sew your quilt top. Layout your 5 Petal Blocks and 4 Criss Cross blocks as shown below. You can rotate them as much as you like until you get a color layout that is pleasing to the eye.
Now, it's time to sew the blocks into rows. Place the second block onto the first block in each row with right sides together. Align and pin the seams and then stitch a 1/4" seam along the edge. (shown in the first row, chain stitch all 3 rows). Then, place the third block onto the now sewn together first and second blocks with right sides together. (shown in the second row). Align and pin the seams and then stitch a 1/4" seam along the edge, chain stitch all 3 rows.
Once all of the blocks are sewn into rows press the seams in each row open. Then layout your rows again.
Now, stitching the rows together is the same, just in a longer fashion. Place the second row onto the first row with right sides together. Align and Pin all of your seams. Sew a 1/4" seam along the edge.
Then, place the third row onto the now sewn together first and second row, with right sides together. Align and pin all of the seams. Sew a 1/4" seam along the edge. Press the seams open.
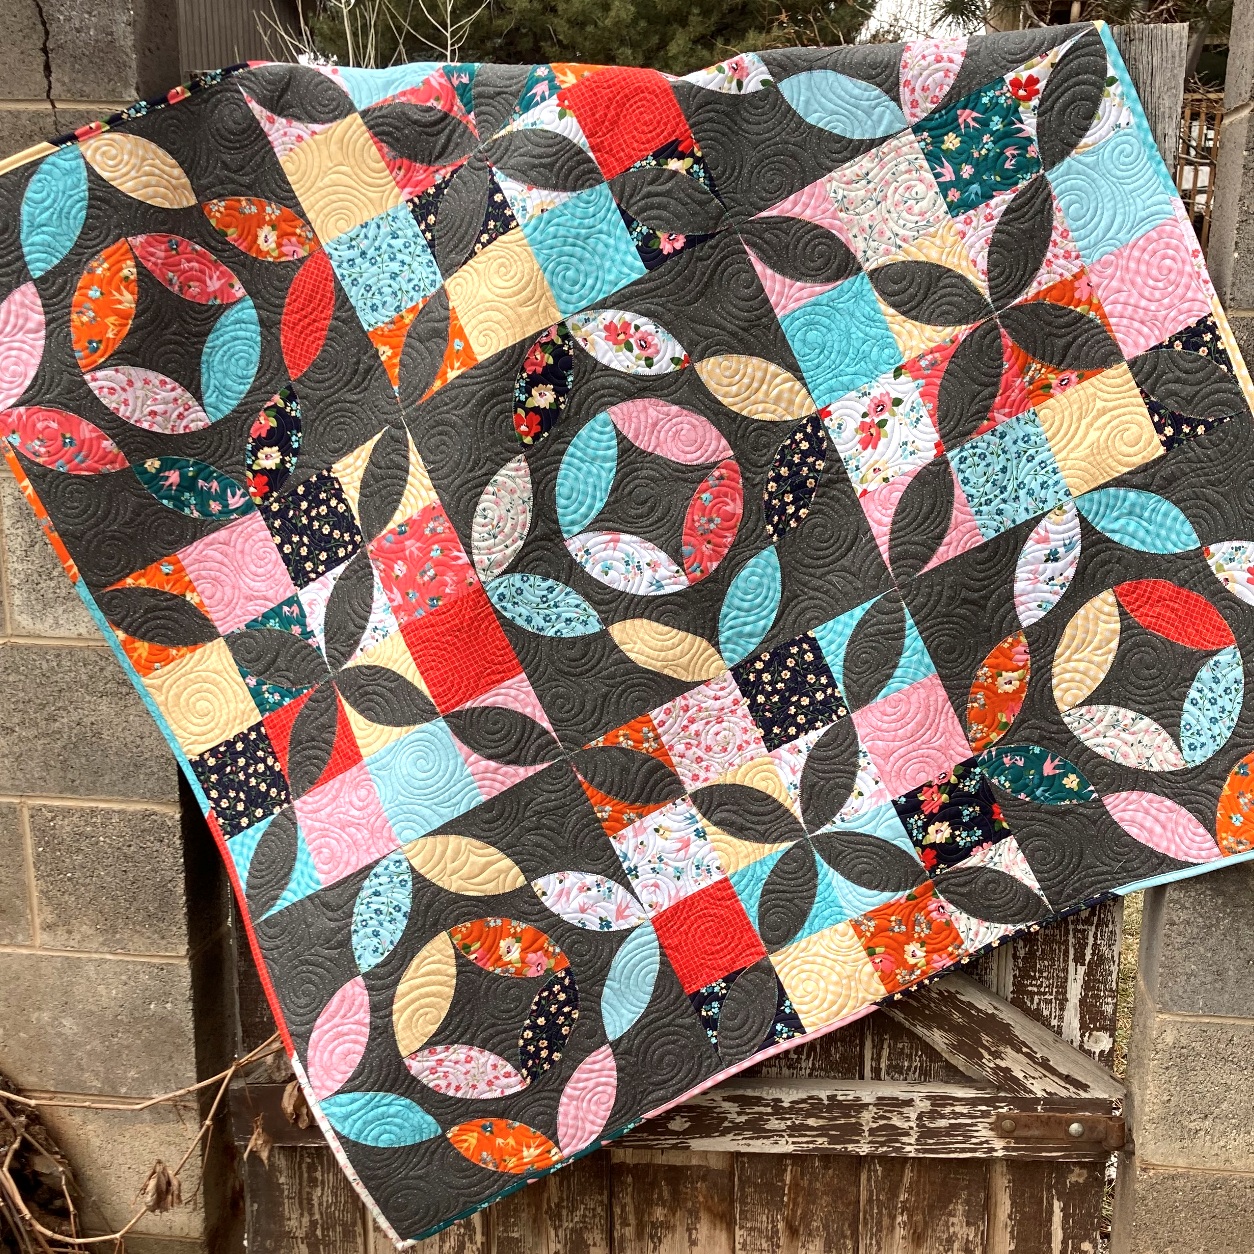
And just like that, you have a beautiful 54 1/2" x 54 1/2" finished Petal Patch Quilt Top!!!! So fun!!!!
STEP 6 - FINISHING THE QUILT
And now let's get this quilt top!! All that is left is to just Baste It, Quilt It, and Bind it!!!! Yup, three big things in one little sentence. If you are new to quilting and need some tips on how to Baste It, Quilt It, and Bind It, you can check out myFinishing Your Quilt Video Series. It will walk you through it all in step by step detail.
I quilted mine with an all over swirl design that I just love to stitch. It is so relaxing and fun, and also it adds lots and lots of texture to the quilt!!! It also will help keep all of that applique super secure stitched ;)
And that is my Petal Patch Quilt!!! I hope you have enjoyed this tutorial and if you make your own Petal Patch Quilt I would love to see it!! You can email me a picture at happyquiltingmelissa@gmail.com, or post it to social media with #happyquiltingwithmc :) I can't wait to see your Petal Patch Quilts!!!
Thanks so much for sharing this new quilt finish and tutorial with me.


AMAZING! what a beautiful quilt!!
ReplyDeleteThe quilt is absolutely beautiful and it looks like it would be fun to make. Thank you!
ReplyDeleteThis is really cute! Thank you for the tutorial.
ReplyDelete